Paxton Superchargers Ford Mustang GT User Manual
Page 21
6-3
P/N: 4809628
©2003 Paxton Automotive
All Rights Reserved, Intl. Copr. Secured
05JUN03 v2.1 MusGT(4809628 v2.1)
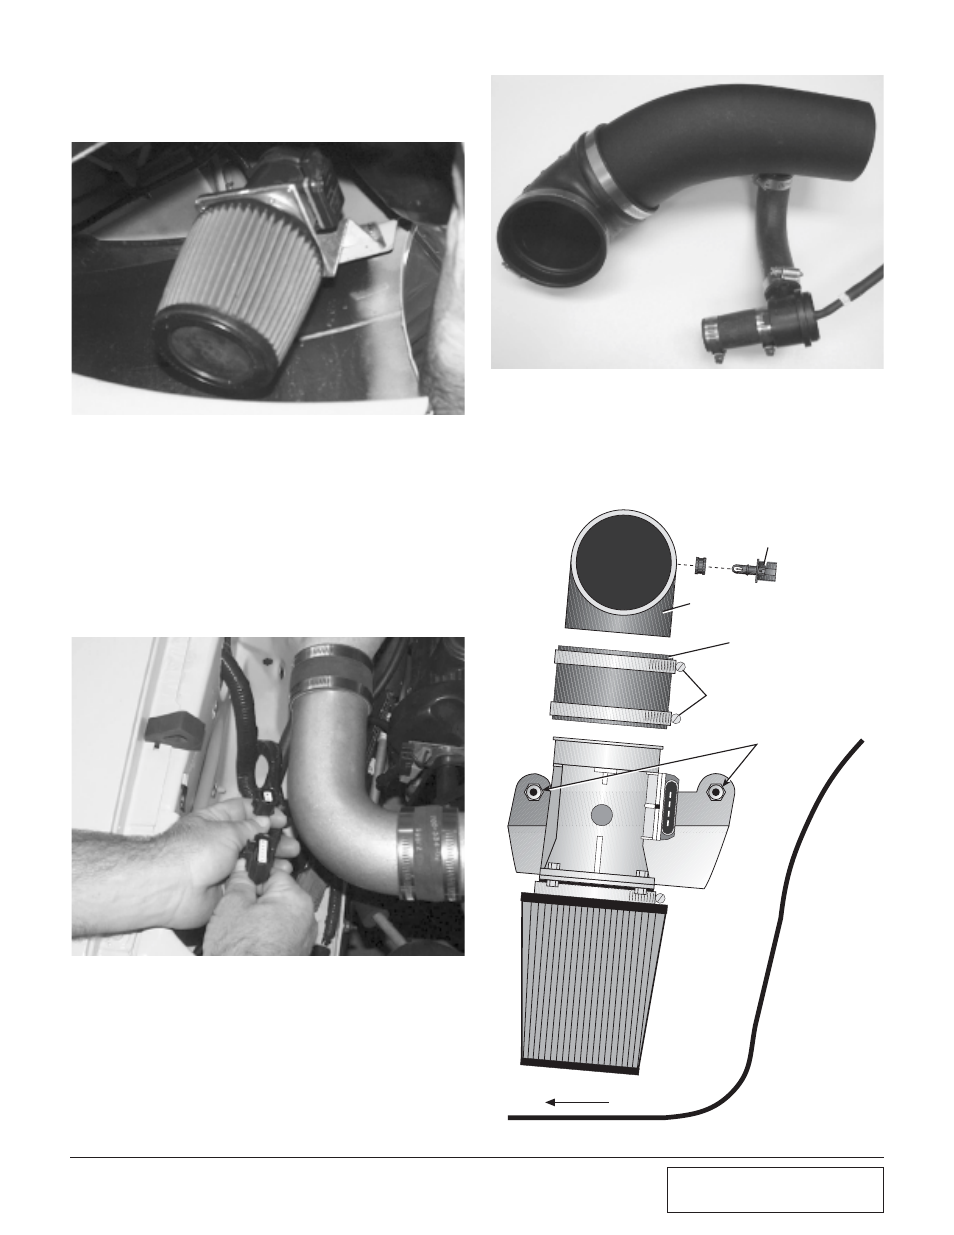
Fig. 6-h
L.
Place the MAF/air filter bracket over the
existing studs, then secure with the original
nuts. (See Fig. 6-h.)
M. Carefully open the main wiring harness
(runs from the passenger side inner fender
into the engine compartment) with a razor
blade, making an incision that is approxi-
mately 6-inches long. Pull the MAF wiring
upwards, until the wires are long enough to
be routed back through the opening in the
inner fender, and down to the MAF. (See
Fig. 6-i.)
Fig. 6-i
P.
Connect the plastic inlet duct (with bypass
valve and hoses attached) to the supercharg-
er inlet. This is to illustrates what the MAF
assembly should look like after assembly.
(See Fig. 6-k.)
FRONT
INSIDE
RIGHT FRONT
PASSENGER
FENDERWELL
#56 CLAMPS
FACTORY AIR
TEMPERATURE SENSOR
(NOT ON 2002+ MODELS)
3-1/2" ELBOW
SLEEVE
FACTORY
STUDS & NUTS
Fig. 6-k
N.
Insert the 1" x 10" rubber hose to the inlet of
the compressor bypass valve. Secure both
hoses with the supplied #16 hose clamps.
O.
Install the bypass valve assembly on the
underside of the secondary intake tube. (See
Fig. 6-j.) Tighten the hose clamp to secure
the valve assembly to the intake tube.
Fig. 6-j