Paxton Superchargers Dodge Durango User Manual
Page 11
2-5
P/N: 4809632
©2002 Paxton Automotive
All Rights Reserved, Intl. Copr. Secured
25SEP02 v1.0 Dodge Durango(4809632v1.0)
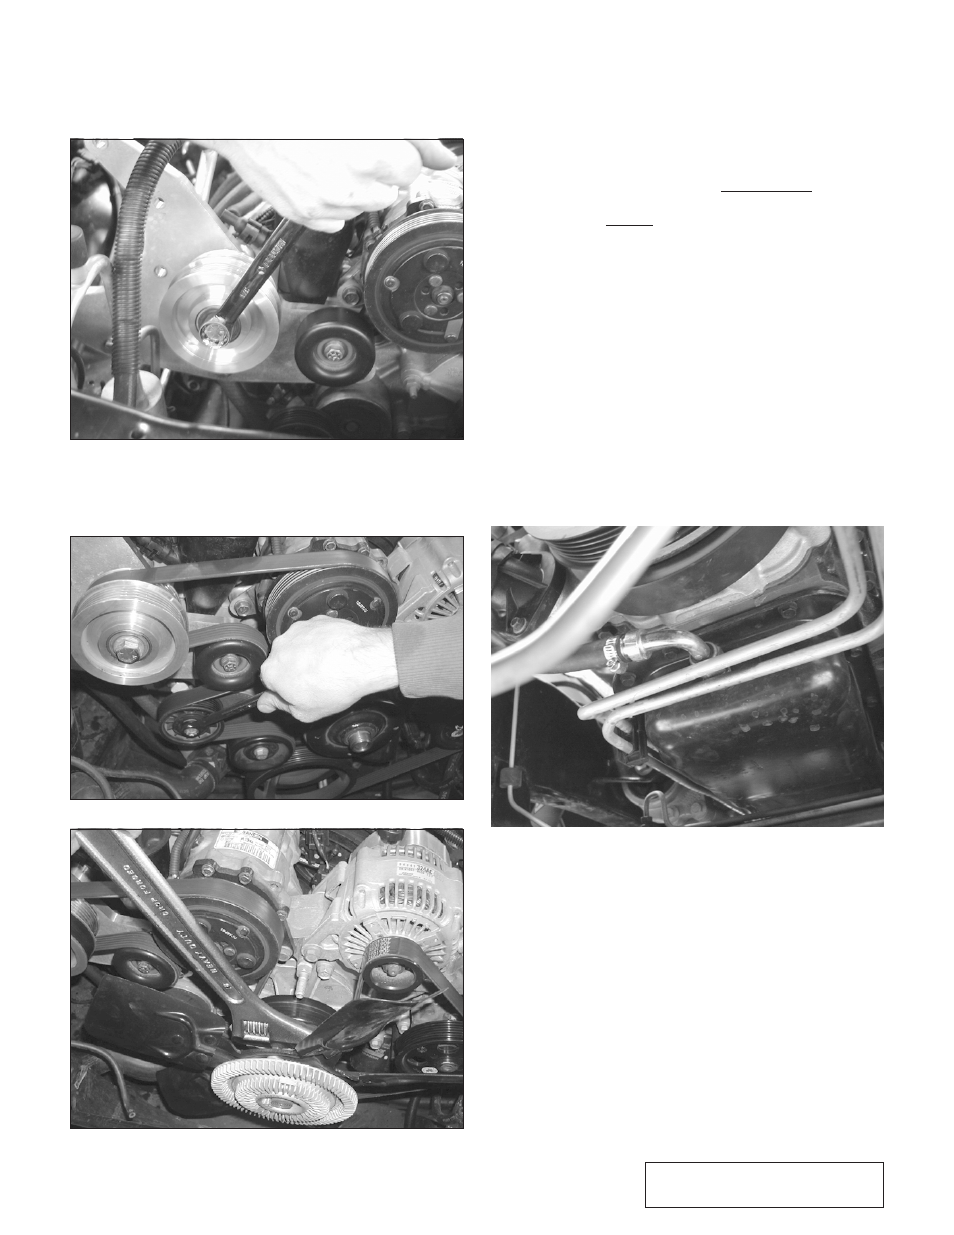
x.
Bolt the front plate to the rear plate using a
9/16”, 3/4” and a 17mm socket (See Fig.
2-20.) Check the tightness of the small idler
attached to the plate with a 9/16” socket.
Fig. 2-20
y.
Install the new Accessory drive belt. (See
Fig. 2-21.) Re-install the fan. (See Fig.
2-22.)
Fig. 2-21
Fig. 2-22
z.
From under the vehicle mark and drill the
oil pan in preparation for the oil drain. (See
Fig. 2-23.) On the front of the pan, measure
and mark the center. Now find the center-
point between the pan rail. Coat a 3/16” drill
bit with grease and drill the hole. Coat the
supplied punch with anti-seize or heavy
grease and drive it in only halfway using an
air chisel with a blunt tip. Do not use a ham-
mer. Do not go in all the way or you will
damage internal engine components. Now
you must cut off the front portion of the
hardened steel punch with either a grinder or
a cut off wheel. Continue driving the punch
in, and expand the hole until it measures
Ø9/16". Go slow with this. It will affect
your tapped hole if you go too far. Now tap
the hole using a greased 3/8 NPT tap. Go
slowly and make sure the tap goes in
straight. Stop periodically to clean and re-
grease the tap. Run the tap in only 2/3 of the
way and check to see that the fitting will
screw in leaving at least three threads
exposed. Clean threads thoroughly, coat fit-
ting with Teflon sealant and install.
Fig. 2-23