Paxton Superchargers Dodge Durango User Manual
Page 14
3-2
P/N: 4809632
©2002 Paxton Automotive
All Rights Reserved, Intl. Copr. Secured
25SEP02 v1.0 Dodge Durango(4809632v1.0)
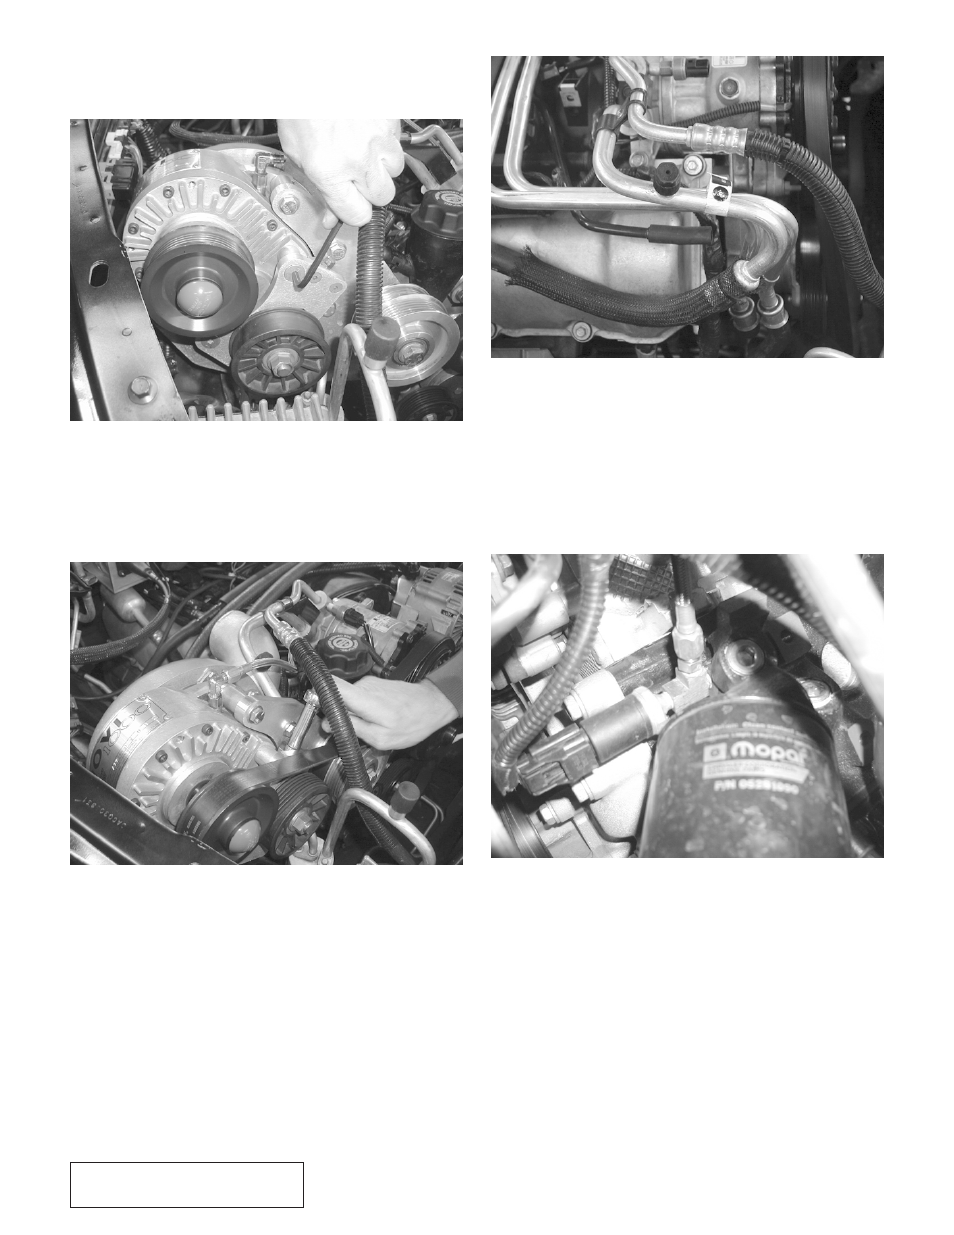
e.
Bolt the belt tensioner assembly to the front
of the supercharger using a 7/32” allen
wrench or socket (See Fig. 3-5.)
Fig. 3-5
f.
Install the supercharger drive belt and ten-
sion by turning the leadscrew clockwise
using a 10mm socket. The belt should be
very tight as it will stretch after being run
and loosen up. (See Fig. 3-6)
Fig. 3-6
g.
Tighten the nut on the tensioner pulley using a
3/4” wrench. You will have to bend the upper-
most a/c line up slightly to clear the belt.
(See
Fig. 3-7.)
Also, bend it up slightly at the radia-
tor end until it clears.
Fig. 3-7
h.
Under the vehicle, near the oil filter, you
will find the oil pressure sender. Unplug and
remove using an oil pressure sender socket
available at most auto parts stores. Install
the brass TEE fitting using Teflon sealant on
the threads. (See Fig. 3-8.) The sender is
now re-installed pointing toward the front of
the vehicle.
Fig. 3-8
i.
Using Teflon sealant, install the straight fit-
ting into the remaining port and attach one
end of the oil line using a 9/16” wrench.
Route the oil line up and across the top of
the engine toward the supercharger.
j.
Install the 90 deg. fitting in the supercharger
oil jet using Teflon sealant. Support the jet
with a 1/2” wrench as you tighten the fitting.
Next, route the oil line. (See Fig. 3-9.)