Accessories included, General features, Installation – Televes KIT DIGINOVA BOSS ANTENNA FM/BIII/UHF G-2/10/22dBi User Manual
Page 12: Installing the indoor domestic amplifier
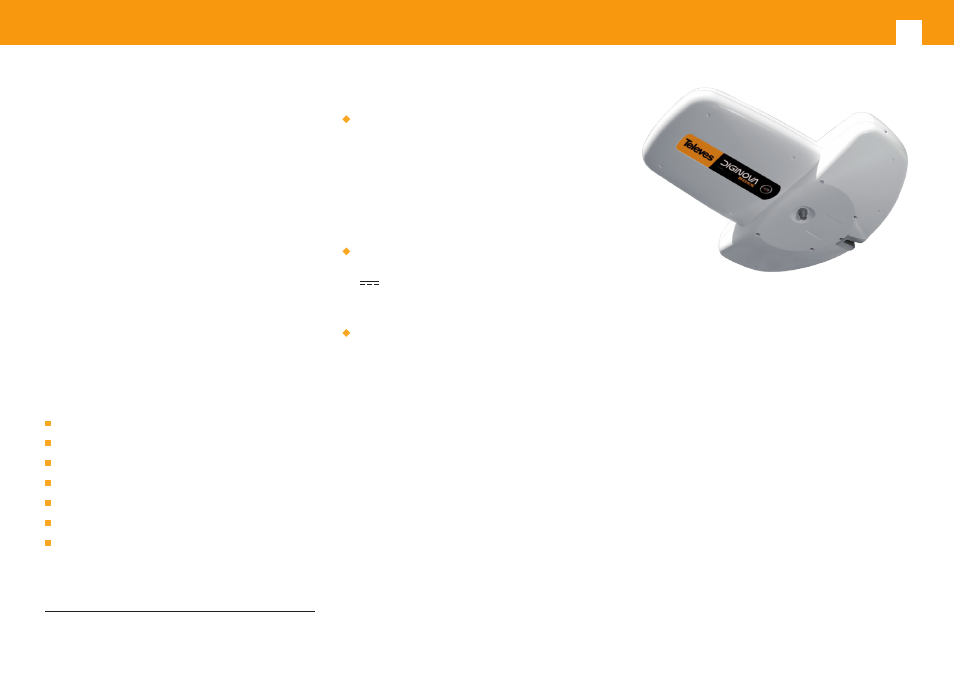
Antenna DIGINOVA BOSS
12
This antenna is specially designed for the DTT
reception (and ready to reject LTE/4G).
It is protected by an ABS plastic radome that is UV
resistent; it is ideal to work within bad climatic
conditions. Besides, it shows a low visual impact,
what is very recommendable for the installation
in fronts, balconys and single-family homes in
general.
Ideal as an antenna for occasional use (holidays,
trips, etc.).
Characterised by its easy installation, robustness
and high electrical performance.
Manufactured using materials with high
resistance to water, wind, etc
Accessories included:
(figs. 1a & 1b depending on the reference):
1 Indoor domestic amplifier
1 “Power injector” for battery connection.
1 Roll of T-100 cable (14 metres).
1 M/F extension cable 1.5 m.
1 Shielded IEC-type connector.
3 F type connectors.
1 F watertight cover.
*
European patent
General features
7 element Yagi-type antenna (directional), using
Microstrip* technology in UHF, and printed FM-
BIII dipole.
It incorporates our BOSS-Tech shielded amplifier
to manage both VHF and UHF bands, this
technology also allows to pass through these
signals even though the powering is switched-
off.
System comprising an FM-BIII-UHF antenna,
power injector for voltages between 12-24
V
(use with accumulators), and a 230V~
±10% indoor domestic amplifier (connection to
power supply).
The Indoor domestic amplifier:
- Provides the necessary voltage for the antenna
and additional amplification in FM-BIII and UHF.
- Allows the user to control the operating mode
of the antenna, activating or de-activating its
amplifier.
- Includes a cable for connection to the power
supply.
Installation
If possible, choose an installation point free from
obstacles, where the antenna can be pointed in the
direction of the transmitter (fig. 2).
If mounted on a mast, a diameter of between 35
and 45 mm is recommended.
The antenna can be installed in horizontal or
vertical polarity thanks to the design of its clamp
(figs. 3 & 4).
Connect the antenna to the mast with the clamp in
the position shown. Twist the clamp down on the
screw so that it grips the mast firmly, and push it
into the other screw (fig. 4b).
Slide the clamp onto the screws until it grips.
Tighten the connecting bolts slightly so that
the antenna can then be turned towards the
transmitter (fig. 4c).
Installing the Indoor domestic
amplifier
Choose an accessible point inside the room to
install the amplifier so that it is protected from
heat, damp, etc., making sure that the length of