Step 2: job-site set-up, Auto-logging – Auto-Zone Control Systems Prism 2 Graphical Interface Technical Guide (Version 01J) User Manual
Page 15
STEP 2: JOB-SITE SET-UP
Prism 2 Technical Guide
15
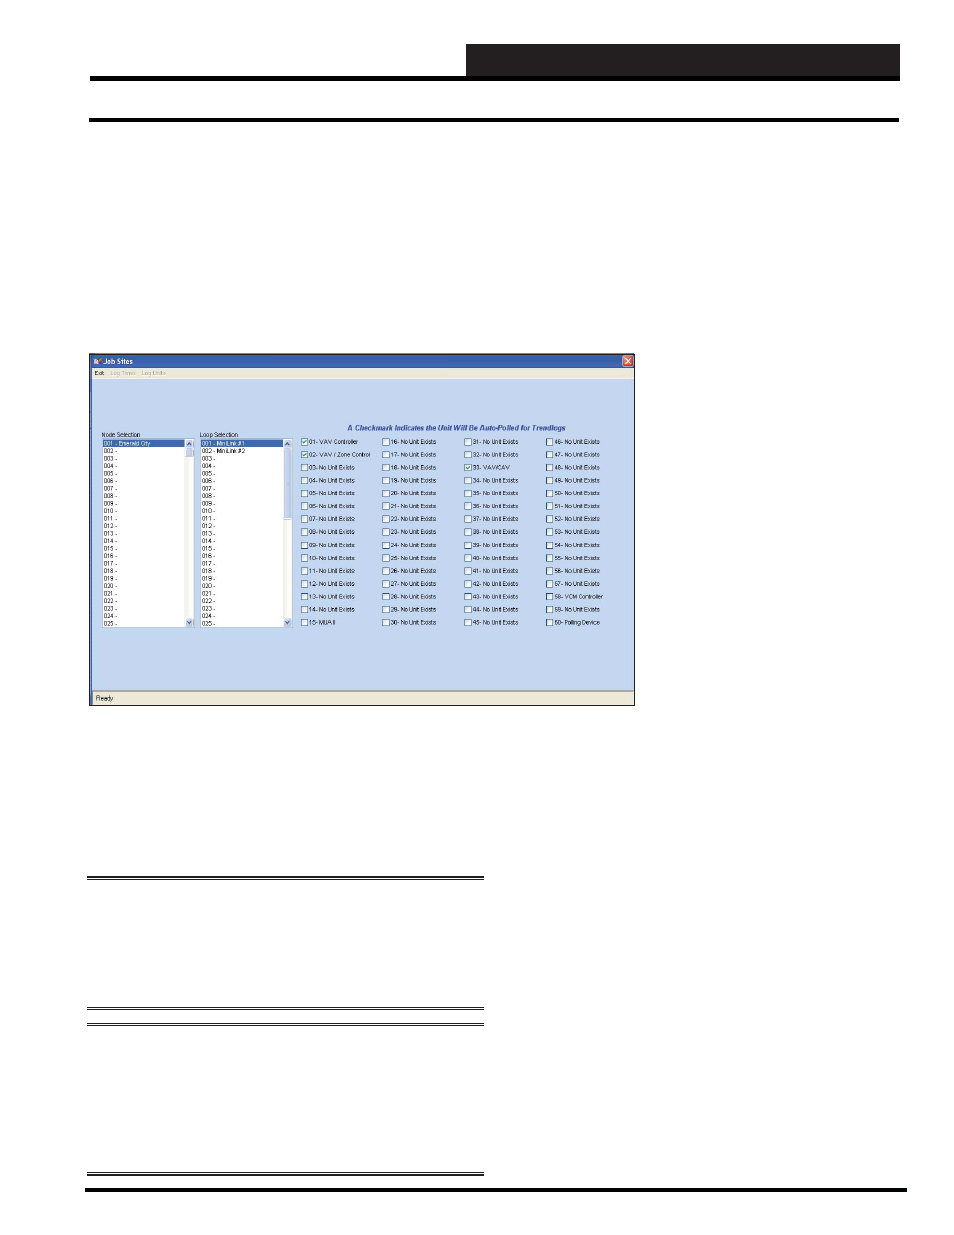
Log Units
Once you have selected the Log Times, you need to select which
units to retrieve log data from. If you have controllers such as
Lighting Panels which don’t have internal logs, you don’t need to
select them. Also, if you don’t need archival storage of log data, you
may only want to activate this feature to troubleshoot a job-site, and
then disable this feature once everything is running smoothly again.
Click
<Log Units>
from the Job Site Window’s Top Menu Bar and
select units to be logged.
As you can see on this sample screen, only three units have been
selected for auto-logging four times a day (See Log Times sample
screen). All other units will be ignored during this process.
Keep in mind that on systems with multiple communications loops,
you will need to select each loop one at a time from the Loop
Selection List Box and then check each desired unit on the selected
loop.
NOTE:
If you are using
multiple
CommLink IV w/IP or
CommLink 5 w/IP devices on a campus setting, you will need
to select each Node and then each Loop along with the Units on
those loops that you would like to auto-log. Prism 2 will open
communications with each CommLink IV w/IP or CommLink
5 w/IP in order and retrieve the logs from each building.
NOTE:
Auto-logging places a heavy demand on the
communications pipeline. If you are viewing Status or Setpoint
screens when it is time for an auto-log to occur, it would be best to
close out your viewing session until the logging is complete. This
helps to avoid missing packets of data or extending the logging
procedure because it would be competing for communications
time with a Status Screen polling for live data.
Auto-Logging