Auto-Zone Control Systems Prism 2 Graphical Interface Technical Guide (Version 01J) User Manual
Page 27
Prism 2 Technical Guide
27
STEP 8: CONFIGURING ALARMS
Configuring Alarms
Step 8: Configuring Unit Alarms
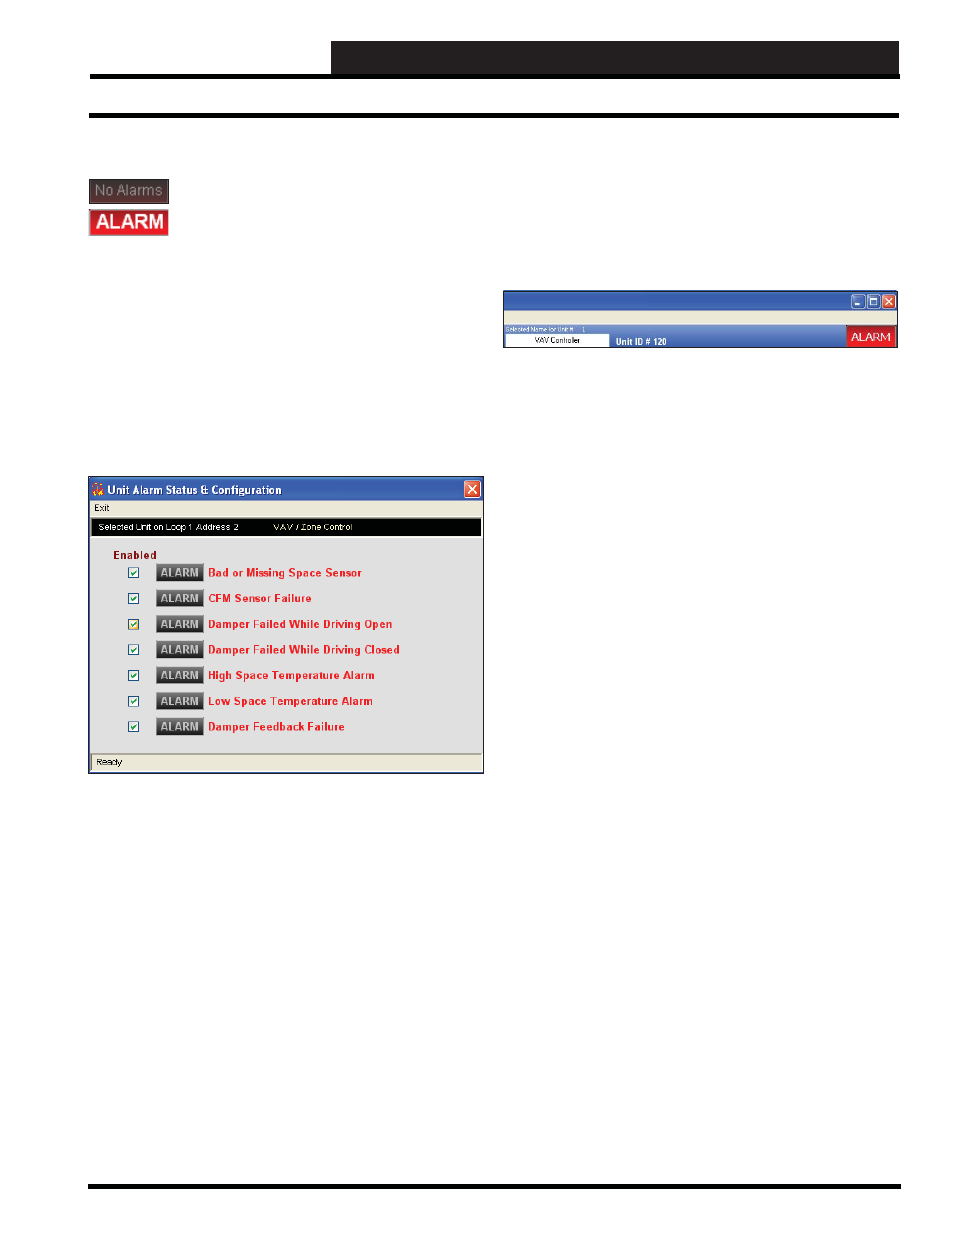
You can confi gure which alarms can generate call-
outs or e-mails by accessing the Unit Alarm Screen
for each controller on your system. The Unit Alarm
Screen is accessed from each controller’s status
screen by clicking the
< ALARM>
button. This button will be a dull
red and display
< No Alarms>
when there are no alarms present
or will be bright red and display
<ALARM>
if active alarms exist.
Click the
<ALARM>
button when bright red or the
<No Alarms>
button when dull red. The Unit Alarm Status & Confi guration
Screen will appear.
Below is a sample Unit Alarm Status & Confi guration Screen. This
screen also displays the Alarm Status for each enabled alarm. Each
individual
<ALARM>
button will be bright red if an alarm exists
and will be gray if no alarm exists or if the alarm is not enabled.
You must check the box associated with each alarm in order for
the system to alert you of each alarm. You must also select
Alarm
Polling Enabled
in the Job Sites Window in order for Prism 2 to
actively poll for alarms.
If there is an active alarm condition, it will be indicated by the
<ALARM>
button located in the upper right corner of the Prism 2
Main Screen.
You can always view all active alarm conditions for a specifi c
controller from its individual status screen, but only alarms
designated for notifi cation will appear on the Prism 2 Main Screen
alarm display. The Alarm display is described in detail in the
section “Alarm Polling” on page 28.