Roster, Schedule, Web-sync – Daktronics DakStats Baseball Software User Manual
Page 12: Common tasks, 2 creating a season, Creating a season, N 3.2 )
6
Initial Setup
Roster
After selecting the appropriate season and team, the roster will appear in this area if one has
already been created (Section 3.4).
Double-click a player in the roster, or click Configure to edit the roster settings.
Click Download Roster to get a team’s latest roster for those using DakStats Web-
Sync. Refer to the DakStats Web-Sync Guide
for instructions on setting
up the Web-Sync service.
Schedule
This area lists all scheduled games for a selected season.
Select a game on the list and click Open, or double-click the game to begin entering
scores and stats for that game.
Select a game and click Configure to edit the game settings.
Click Add New to create a new game for the season (Section 3.5).
Web-Sync
Select a user Profile, type in the Password, and click Sync to begin the Web-Sync. Refer to the
DakStats Web-Sync Guide
for instructions on setting up the Web-Sync service.
Common Tasks
This area includes additional frequently used commands.
Print Season Reports: Click to generate a wide variety of printouts (Section 6.3).
Import Game: Click to import a game file (Section 7.1).
Export Game: Click to export a game file (Section 7.2).
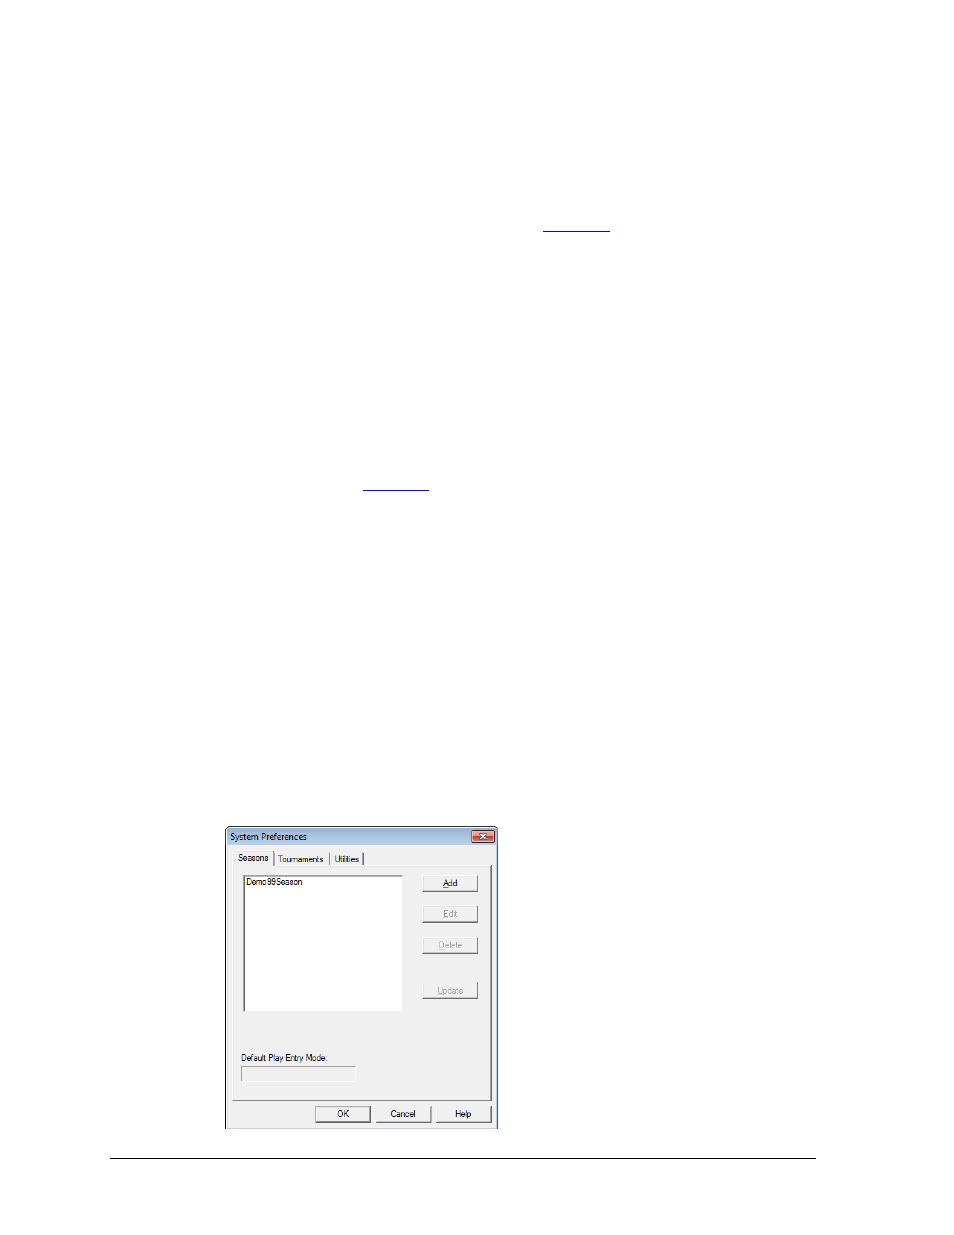
3.2 Creating a Season
The first step to set up the DakStats Baseball program is creating the season in which the
games will be played. By default a “Demo” season exists in the “Seasons” file, but users
should create their own seasons for all future games.
To create a season:
1. Go to Configure > Season and System Preferences (Figure 3).
Figure 3: System Preferences