Diamondback Fitness 910Ic User Manual
Page 14
14
FINAL INSTALLATION & SETUP
• Moving and Positioning the Unit. Move the 910Ic into the
desired final position by carefully raising the rear end of the
unit until the wheels located in the front stabilizer contact the
floor. Leave room around the unit for safe operation and
sufficient air flow.
• Leveling the Unit. Level the unit by rotating the four leveling
feet located in the stabilizer bars. Lock the feet into position
by tightening the jamb nut upward, against the frame.
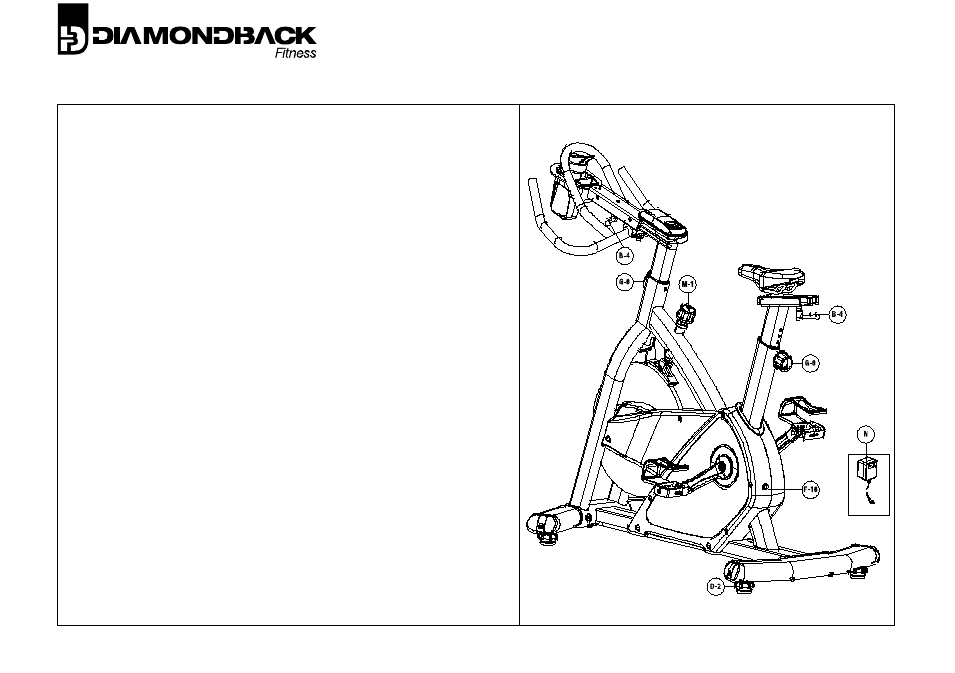
• Final Adjustments – Up/Down. Raise and lower the stem and
handlebar assemblies by loosening the adjuster knobs (G-6)
with a couple of counter-clockwise rotations. While
supporting the assembly, pull the knob outward, away from
the frame, to disengage the pop-pin. Raise or lower the
assembly as desired, releasing the knob to reengage the pop
pin. Tighten the knob to lock the assembly in place.
•
Final Adjustments – Fore/Aft. Fore-aft adjustment for the
seat and handlebar are made by loosening the levers (B-4)
located under the assemblies. Rotate the lever to the left to
loosen. If the lever movement in inhibited by the frame or
other components, pull the lever downward to reposition the
lever and release. Continue to loosen. Only ¼ turn should be
required to loosen or tighten the levers. Position the seat and
handlebar slides and secure the levers.
•
Charge the Unit. Plug one end of the power adaptor/charger
(N) into a 120V power source. Plug the opposite end into the
power input jack (F-16) found on the rear end of the plastic
housing.