Removing and replacing the belts – DR Power Scout 8.25 (January 2007 and Later) User Manual
Page 28
24 DR
®
SCOUT
™
FIELD and BRUSH MOWER
Removing and Replacing the Belts
BEFORE PERFORMING ANY MAINTENANCE PROCEDURE, STOP THE ENGINE AND
DISCONNECT THE
SPARK PLUG WIRE.
USE ONLY DR BELTS ON YOUR MACHINE. THEY HAVE BEEN THOROUGHLY TESTED AND PROVEN FOR
MANY HOURS OF USE.
To Replace the Blade Belt
Tools and Supplies Needed:
•
9/16" Wrench or Socket (Spring Nut)
•
1/2" Wrench or Socket (Bracket Mounting Bolt)
•
Gloves
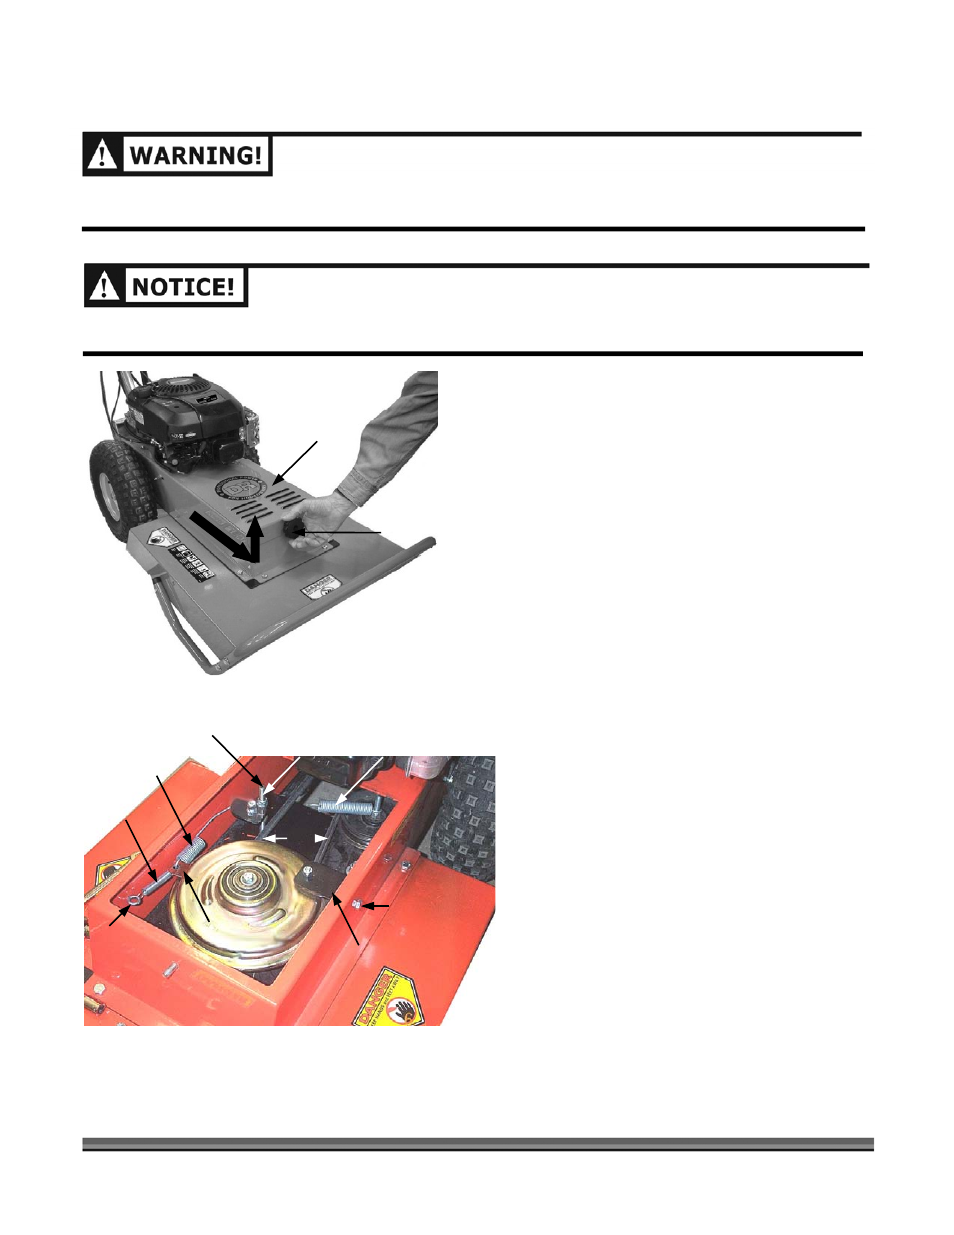
1. Remove the Belt Guard by unscrewing the black
Knob and pull the Guard forward, lifting to
remove it (Figure 12).
2. Remove the top nut from the Blade Engagement
Cam Pivot Bolt (Figure 13). Remove the Belt
Tension Spring from the Shaft by gripping the
Spring with your gloved hand, pulling the Spring
toward the Shaft, and lifting it over the Shaft
(Figure 13).
3. Remove the Anti-Rotation Bracket by removing
the Mounting Bolt from the side of the machine
(Figure 13). Place one hand beneath the Bracket
inside the machine to catch any inside washers.
Lift the Bracket from the Clutch.
4. Remove the Clutch Return Spring by unhooking
it from the Eyebolt (Figure 13) and the Clutch
Spring Hook under the Clutch Tab.
5. Remove the Clutch Spring from the Clutch Tab
by rotating the tab toward the rear of the
machine (clockwise) to relieve tension and
unhook the Spring from the Tab (Figure 13).
6. Remove the Belt from the Engine Pulley below
the machine and then remove it from around
the Clutch (Figure 13).
7. To mount the Belt, follow the above procedure
in the reverse order. See page 30 for details on
reinstalling the Springs.
Knob
Figure 12
Tension Spring Unhooked
Clutch Spring
Eyebolt
Return
Spring
Clutch Tab
Mounting Bolt
Blade
Belt
Nut Removed
Figure 13
Engagement Cam
Pivot Bolt
Anti-Rotation Bracket
Belt Guard