DR Power Scout 8.25 (January 2007 and Later) User Manual
Page 36
32 DR
®
SCOUT
™
FIELD and BRUSH MOWER
8. Lightly lubricate the Clutch Shaft then slip the new Clutch on the Shaft with the Clutch Tab facing the
Clutch Springs area.
9. Position the Blade Belt around the Clutch Pulley and Engine Pulley.
10. Seat the new Clutch on the Shaft and replace the Bolt, Lock Washer, and Flat Washer (Figure 27 on
page 31).
11. Tip the machine as in step 2 and place the wood block on the opposite side shown in Figure 26 on page
31.
12. Tighten the Clutch Bolt securely and remove the wooden block.
13. Place the Lock Washer on the Anti-Rotation Mounting Bolt and set it near the Bracket Mounting Hole.
14. Place the Bracket on the Clutch Stud on top of the Clutch and move the Bracket into position near the
Mounting Bolt Hole in the frame.
15. Hold two (2) of the Flat Washers supplied in your kit between the Bracket and the Mounting Hole (save
the third washer for possible adjustments later).
16. Insert the Mounting Bolt with Lock Washer through the Mounting Hole, the two (2) Flat Washers and
thread it into the Anti-Rotation Bracket. Tighten the assembly securely.
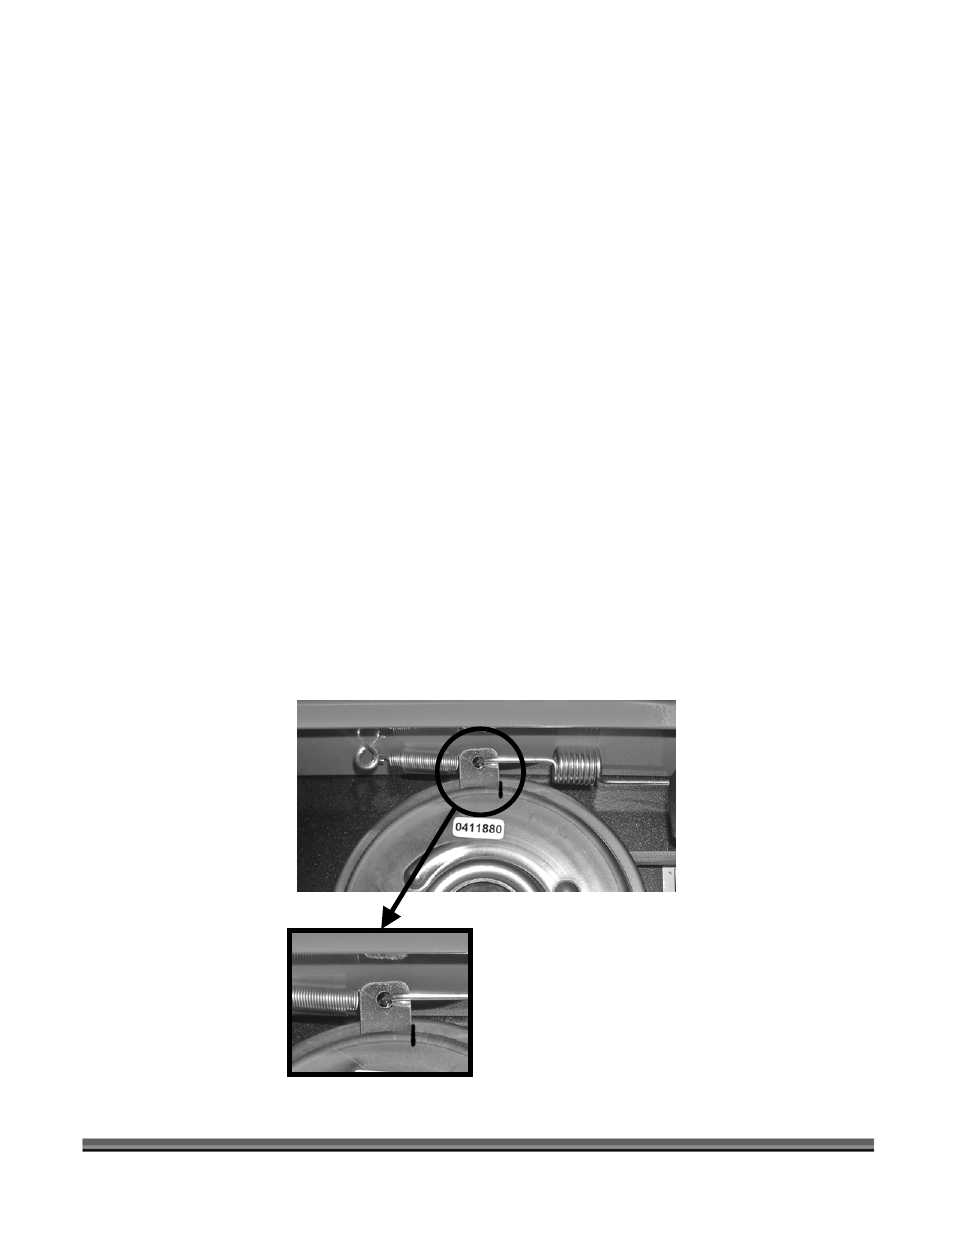
17. Rotate the Clutch Tab toward the rear of the machine (clockwise) and hook the Clutch Spring into the
Clutch Tab hole.
18. Re-hook the Return Spring to the Clutch Spring hook under the Clutch Tab and to the Eyebolt on the
frame.
19. Re-connect the Tension Spring to the Pivot Bolt, replace the Pivot Bolt Nut, and tighten.
NOTE: With no tension on the Clutch Spring, the hook should rest in the center of the hole in the Clutch Tab
(Figure 29) when the Tab edge is at the mark previously made on the Clutch housing.
Figure 29