DR Power Scout 8.25 (January 2007 and Later) User Manual
Page 37
CALL
TOLL-FREE
1-800-DR-OWNER 33
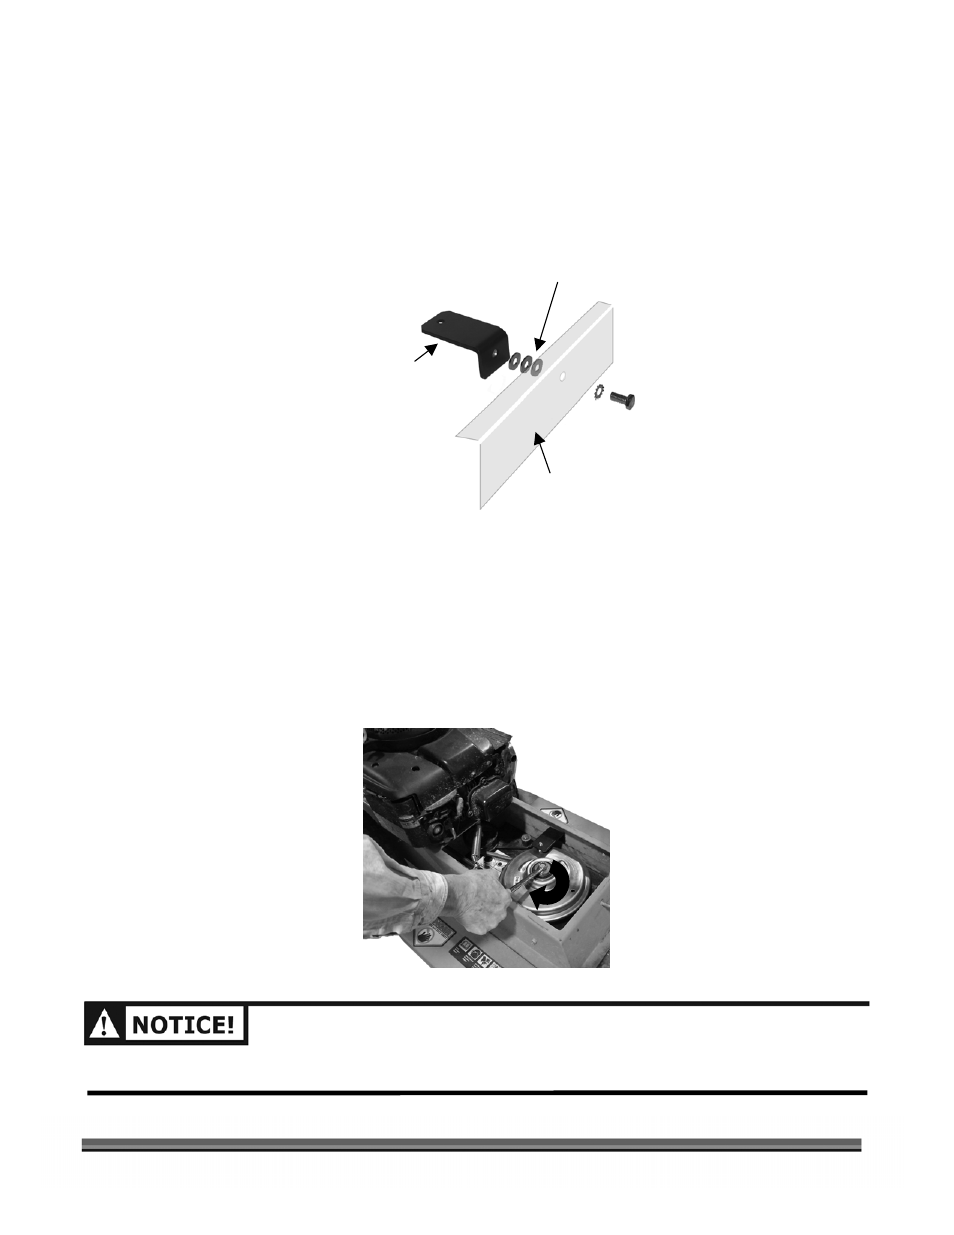
Add washer here to
adjust the spring.
Anti Rotation
Bracket
Deck
Sidewall
20. Adjust the Blade Engagement Cable, as required, (reference Figure 22 on page 29) so that the Clutch
Spring Hook is in the center of the Clutch Tab Hole as shown in Figure 29 on the previous page.
NOTE: If you are unable to achieve a correct adjustment of the Clutch Spring Hook in the Clutch Tab, it will be
necessary to add the third Flat Washer (Figure 30) to the Anti-Rotation Bracket Assembly and repeat steps
16 through 20 using three (3) Flat Washers.
NOTE: It is VERY IMPORTANT that you perform the following test.
21. With the Blade Engagement Lever in the down position, place a 1/2" Wrench on the Clutch Bolt and
attempt to turn the Bolt (Blade Shaft) clockwise (Figure 31).
NOTE: There should be significant resistance and the Shaft should not turn without great effort. This insures that
the Blade will stop immediately when not engaged.
22. If the adjustment is correct and working, replace the Belt Guard. The installation is now complete.
YOU SHOULD PERFORM THIS CLUTCH ADJUSTMENT ONCE DURING THE INSTALLATION OF NEW
CLUTCH. IF ADJUSTMENT IS REQUIRED IN THE FUTURE, THIS INDICATES A WORN CLUTCH, REPLACE IT.
Figure 30
Figure 31