Step 5: install the handlebars – DR Power Walk-Behind Pro (1985 - 2000) User Manual
Page 13
DR
®
TRIMMER/MOWER
™
Assembly & Operating Instructions
11
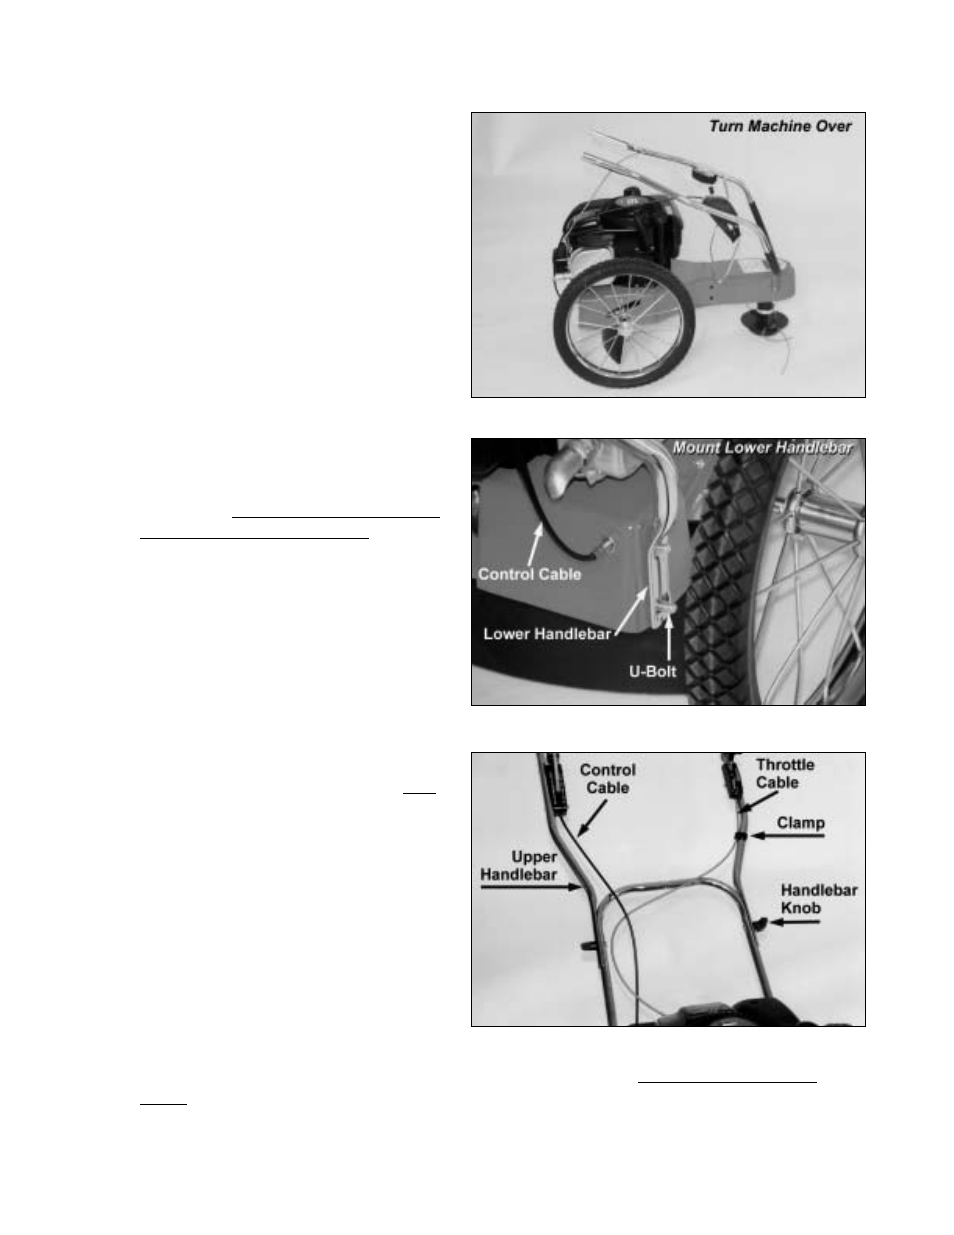
3. Bring the upper handlebar section up and
over the front end of the machine. Let it
rest there (Figure 8).
Caution: DO NOT add gas or oil to the
engine at this time.
Step 5: Install the Handlebars
A) Lower Handlebar
Note: There are 2 U-bolts, 4 washers, and 4
lock nuts in your parts bag that will be
needed for the lower handlebar assembly.
1. With the control cables on the inside of
the handlebars, position the lower
handlebar over the bolt holes in the
trimmer frame (Figure 9).
2. Place the U-bolts through the bolt holes
in the trimmer frame from the inside out
(Figure 9). Make sure the black control
cable is not beneath the U-bolt.
3. Mount the washers and nuts and secure
them snugly on both sides—don't tighten
them yet. Position the lower handlebar in
the middle of the slotted notch on each
side. This is the average height needed
by most users. Tighten the nuts securely.
After you install the upper handlebar
you'll be able to judge whether you need
to adjust the height.
B) Upper Handlebar
1. Making sure the control cables are over
the lower handlebar, position the upper
handlebar outside the lower handlebar
(Figure 10). The ends of the upper
handlebar are cupped half-circles and fit
on the outside of the lower handlebar.
With the holes aligned, insert one of the
two round-headed 1-1/2" handlebar bolts
from the inside facing out.
2. Secure the bolt with one of the large black
handlebar knobs on the outside of the
handlebar. Repeat on the opposite side.
3. Be sure the throttle control cable on the
left handlebar is secured with the black plastic clamp (Figure 10). Do not kink the control
cables.
Figure 8
Figure 9
Figure 10