DR Power Walk-Behind Pro (1985 - 2000) User Manual
Page 24
22
DR
®
TRIMMER/MOWER
™
Assembly & Operating Instructions
WARNING: Before performing any maintenance procedures, the engine should be stopped
and the spark plug wire disconnected.
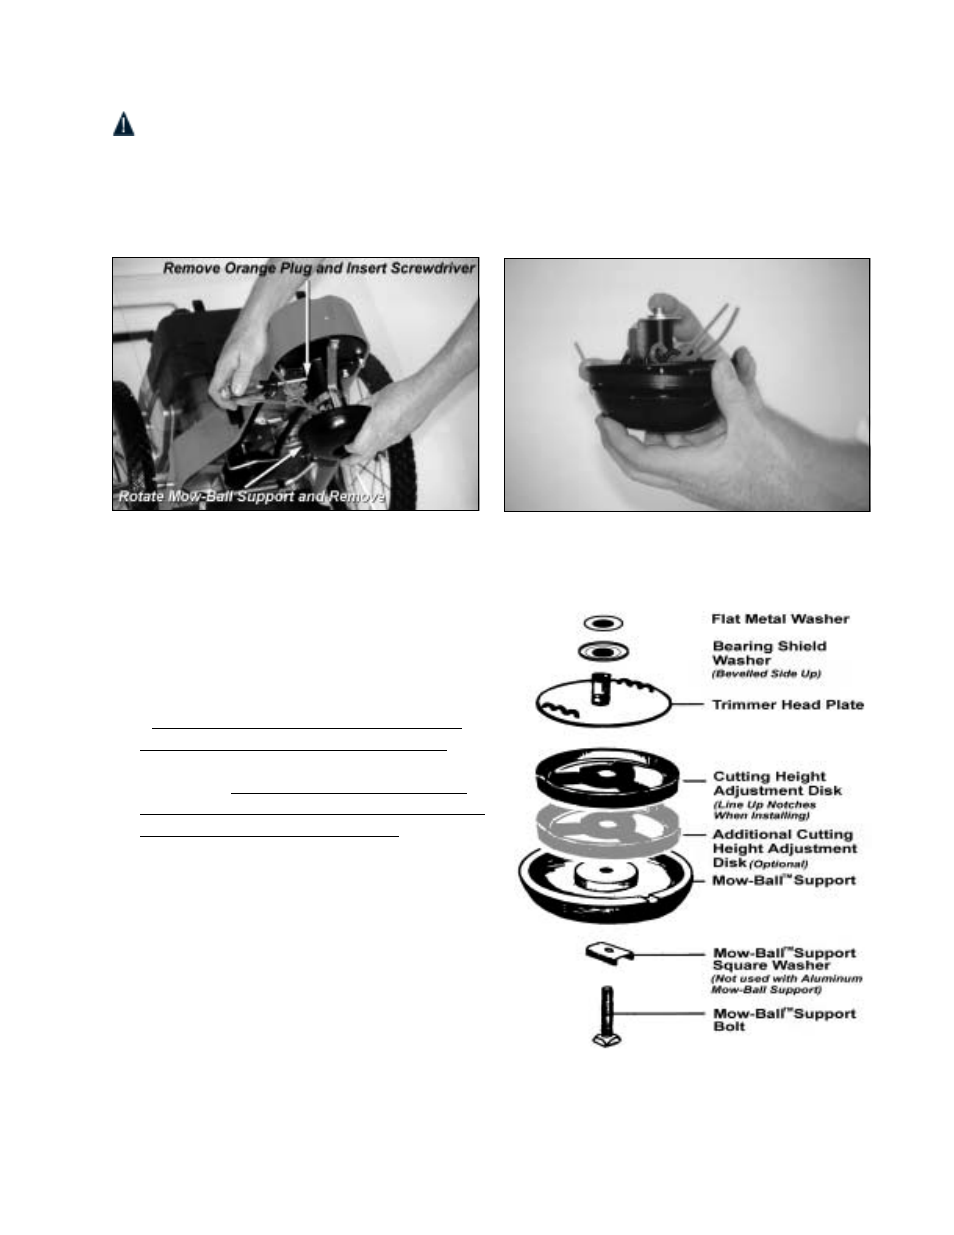
1. Remove the orange, vinyl plug from the bearing housing's outer shaft (Figure 26).
2. Insert a screwdriver into the hole (Figure 26) and rotate the Mow-Ball
™
Support until the
screwdriver fits in the second hole in the inner shaft, locking it in place.
3. With your hands, turn the Mow-Ball
™
Support
assembly with your hands until it completely
unscrews from the bearing housing (Figure 27).
4. Reassemble the components in the order shown
in Figure 28, adding the additional cutting
height disk above or below the one already
installed.
• Be sure to align the notches in the cutting
height disks and the Mow-Ball
™
Support
before completing assembly.
• Check the head of the Mow-Ball
™
bolt. It
should sit in the groove (square washer) at the
bottom of the Mow-Ball
™
Support.
5. Keeping the bearing housing locked with the
screwdriver, mount the Mow-Ball
™
Support
assembly. Hold the bolt in place with one
finger and turn the assembly onto the bearing
housing until it's finger tight.
6. Spin the Mow-Ball
™
Support to be sure the
anti-wrap device does not hit the trimmer head
plate. There should be about 1/16" to 1/8" of
clearance between the top of the flat plate and
the end of the anti-wrap bracket. There will be
some resistance as you turn the trimmer head
because of the belt and pulley.
Figure 26
Figure 27
Figure 28