Using the parallel trimming action \(pta™\) fea, Using the parallel trimming action (pta, Feature – DR Power Walk-Behind Pro (1985 - 2000) User Manual
Page 19
DR
®
TRIMMER/MOWER
™
Assembly & Operating Instructions
17
Using the Parallel Trimming Action (PTA
™
) Feature
By tilting the cutting head beyond the wheels, Parallel Trimming Action allows you to trim under
fences and along shrub borders and buildings—those hard-to reach places that usually require
pushing and pulling the machine. The wheels remain parallel to whatever is being trimmed, so you
can also easily edge along curbs and sidewalks.
To Engage Parallel Trimming Action
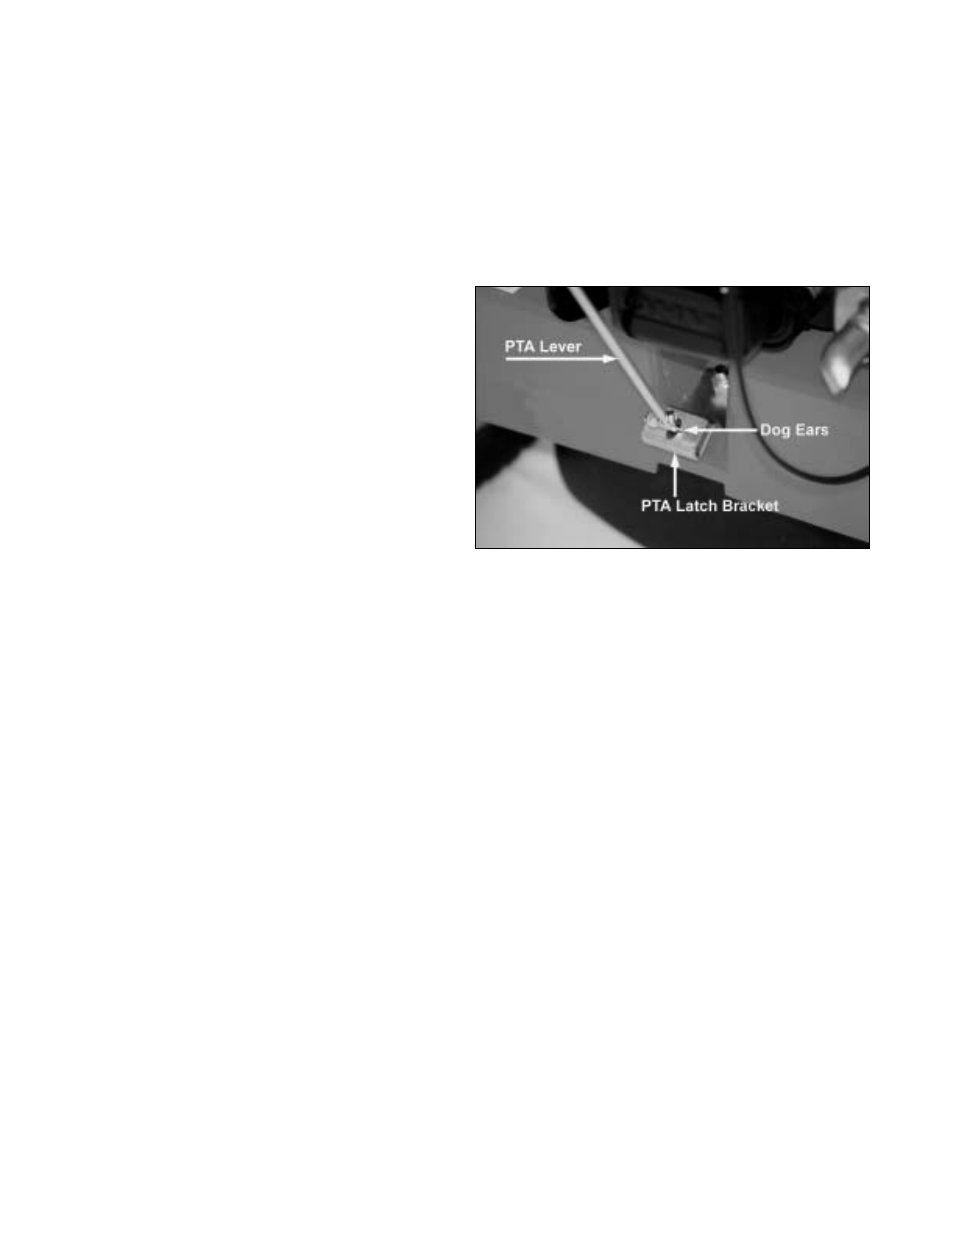
1. Pull up on the PTA
™
lever (Figure 16)
until you see the two dog ears at the
bottom of the lever (Figure 19). You may
need to turn the lever to see them. This
unlocks the axle.
2. Turn the lever one quarter turn so the dog
ears rest on the PTA
™
latch bracket at the
base of the frame after the lever is
released (Figure 19).
3. Push down on the handlebar to tip the
nose of the machine off the ground about
six inches. By balancing the weight of the
machine on the wheels, it is easier to pivot
the front of the trimmer to the left or right.
4. Grip the handlebar, pulling up with one hand and pushing down with the other, swinging the
front of the trimmer to the left or right. If this action is difficult please see page 33.
5. Now, to lock in the left or right position, pull the PTA lever back and turn it a quarter of a turn
and release. It will spring into place and lock into the axle plate.
To Return to Flat and Forward Mode
1. Pull the PTA
™
lever and turn a quarter of a turn so the lever is resting on the dog ears.
2. Release the lever, push down on the handlebars, and pivot the trimmer head straight ahead.
3. Pull and turn the PTA
™
lever a quarter turn, and it will automatically lock the machine into the
forward position.
See the PTA
™
Feature usage tips on page 19 for more information.
Figure 19