To reassemble the mow-ball™ support assembly, To reassemble the mow-ball, Support assembly – DR Power Walk-Behind Pro (1985 - 2000) User Manual
Page 30
28
DR
®
TRIMMER/MOWER
™
Assembly & Operating Instructions
To Reassemble the Mow-Ball
™
Support Assembly
WARNING: Before performing any maintenance
procedures, the engine should be stopped and the
spark plug wire disconnected.
Caution: An improper installation may cause damage
to the bearings. Please follow these directions
carefully.
Tool Needed:
• Phillips head screwdriver
Note: If you removed and are reinstalling the Wagner
Anti-Wrap Device, be sure the bracket is flush with or
slightly above the bottom edge of the bearing housing
shaft—not below it.
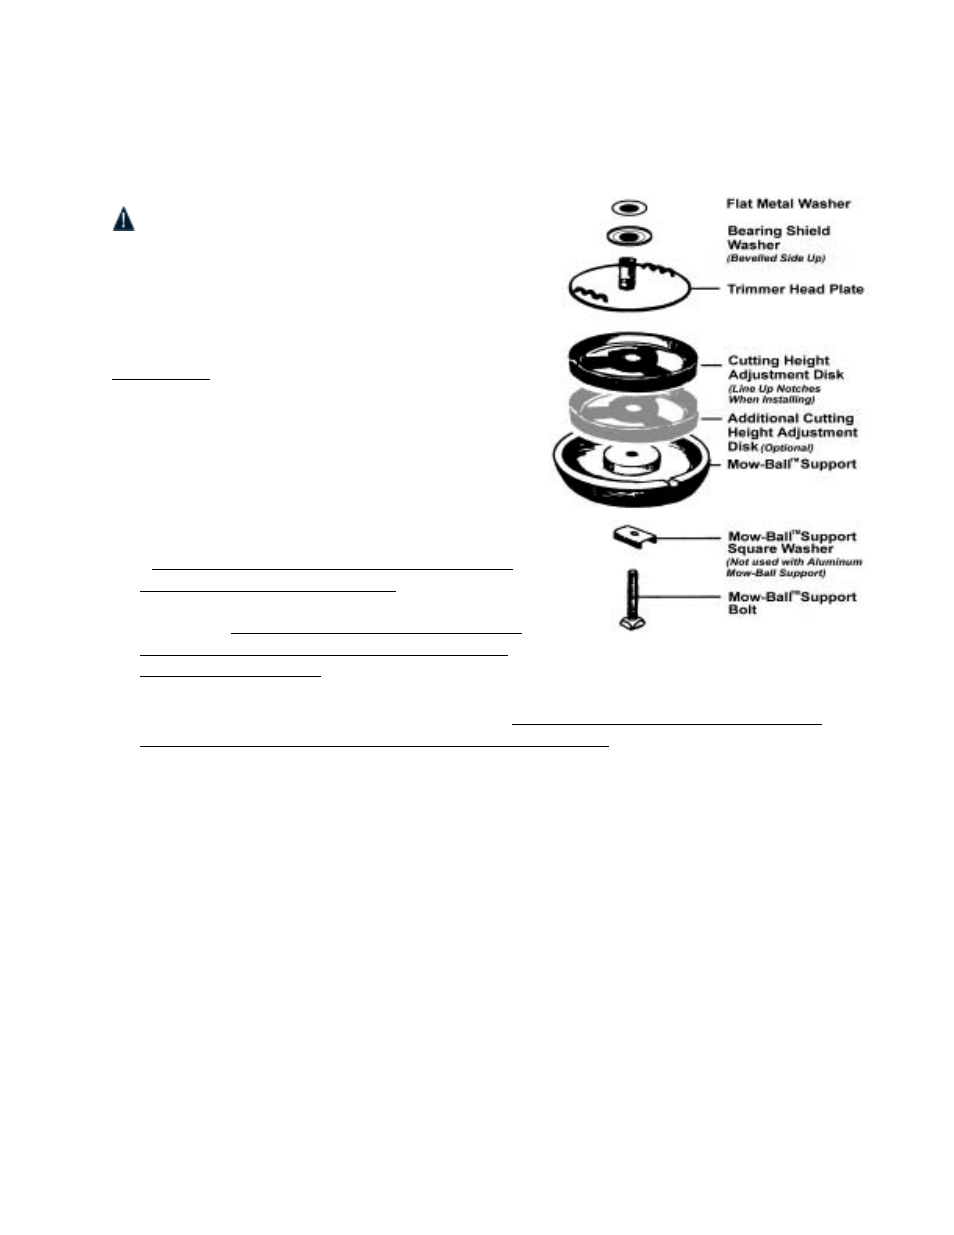
1. Reassemble the components in the order shown in
Figure 35.
• Be sure to align the notches in the cutting height
disks and the Mow-Ball
™
Support before
completing assembly.
• Check the head of the Mow-Ball
™
bolt. It should
sit in the groove (square washer) at the bottom of
the Mow-Ball
™
Support.
2. Hold the Mow-Ball
™
bolt head in place with one finger and turn the Mow-Ball
™
Support
assembly counterclockwise until it's finger tight. Holding the bolt in place prevents it from
turning in the groove and digging into the Mow-Ball
™
Support.
3. Spin the Mow-Ball
™
Support to be sure the anti-wrap device does not hit the trimmer head plate.
There should be about 1/16" to 1/8" of clearance. There will be some resistance as you turn the
trimmer head because of the belt and pulley.
4. Return the orange vinyl plug. This will keep out dirt and debris and ensure the long life of the
bearings.
Please Note: Do not put oil or grease in the hole.
Figure 35