Step 4: install the handlebars – DR Power Sprint (1985 - 2000) User Manual
Page 13
DR
®
TRIMMER/MOWER
™
Assembly & Operating Instructions
7
Step 4: Install the Handlebars
A) Lower Handlebar
Note: There are 2 U-bolts, 4 washers, and 4
lock nuts in your parts bag that will be needed
for the lower handlebar assembly.
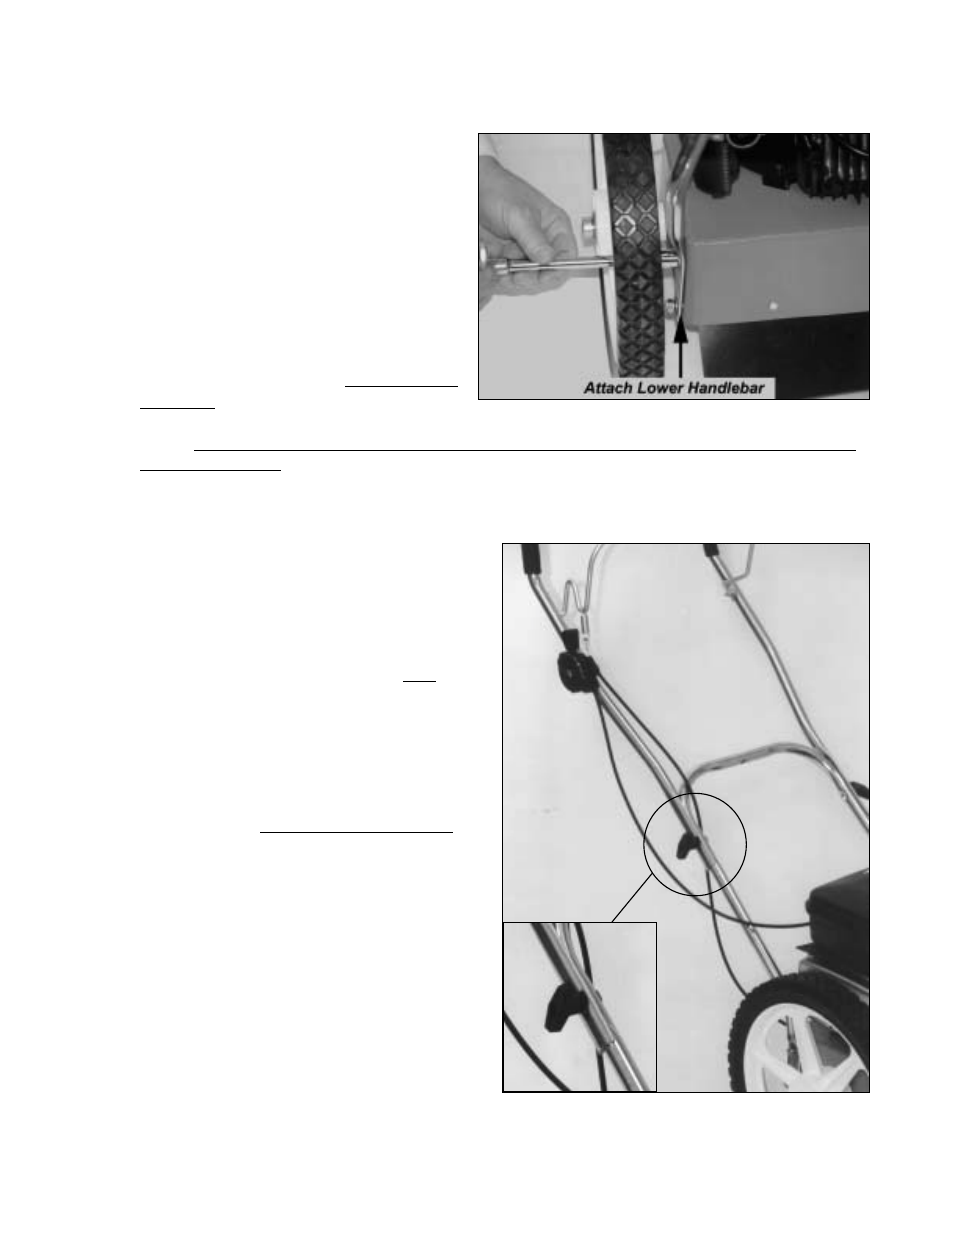
1. With the control cables on the inside of the
handlebars, position the lower handlebar
over the bolt holes in the trimmer frame
(Figure 8).
2. Mount one of the U-bolts through the hole
in the frame and handlebar from the inside
facing out (Figure 8). Repeat on the other
side.
Note: Make sure the black control cable that runs along the right underside of the frame is not
beneath the U-bolt.
3. Mount the washers and nuts and snug them on both sides—don't tighten them yet. Position the
lower handlebar so the bolts are in the middle of the slotted notch on each side. This is the
average height needed by most users. Tighten
the nuts securely. After you install the upper
handlebar you'll be able to judge whether you
need to adjust the height.
B) Upper Handlebar
1. Making sure the control cables are over the
lower handlebar, position the upper handlebar
outside the lower handlebar (Figure 9). The
ends of the upper handlebar are cupped half-
circles and fit on the outside of the lower
handlebar (inset). With the holes aligned,
insert one of the two round-headed 1-1/2"
handlebar bolts from the inside facing out.
2. Secure the bolt with one of the large black
handlebar knobs on the outside of the
handlebar. Repeat on the opposite side.
The height of the handlebar depends on many
factors for each individual. However, it is crucial
to find a height that allows the Mow-Ball
™
Support to glide along the ground and remain
balanced without the operator having to push
down or pull up on the handlebars. At the proper
height, your hands should rest at a comfortable
level and the front end should roll easily on the
Mow-Ball
™
Support.
Figure 8
Figure 9