DR Power Sprint (1985 - 2000) User Manual
Page 21
DR
®
TRIMMER/MOWER
™
Assembly & Operating Instructions
15
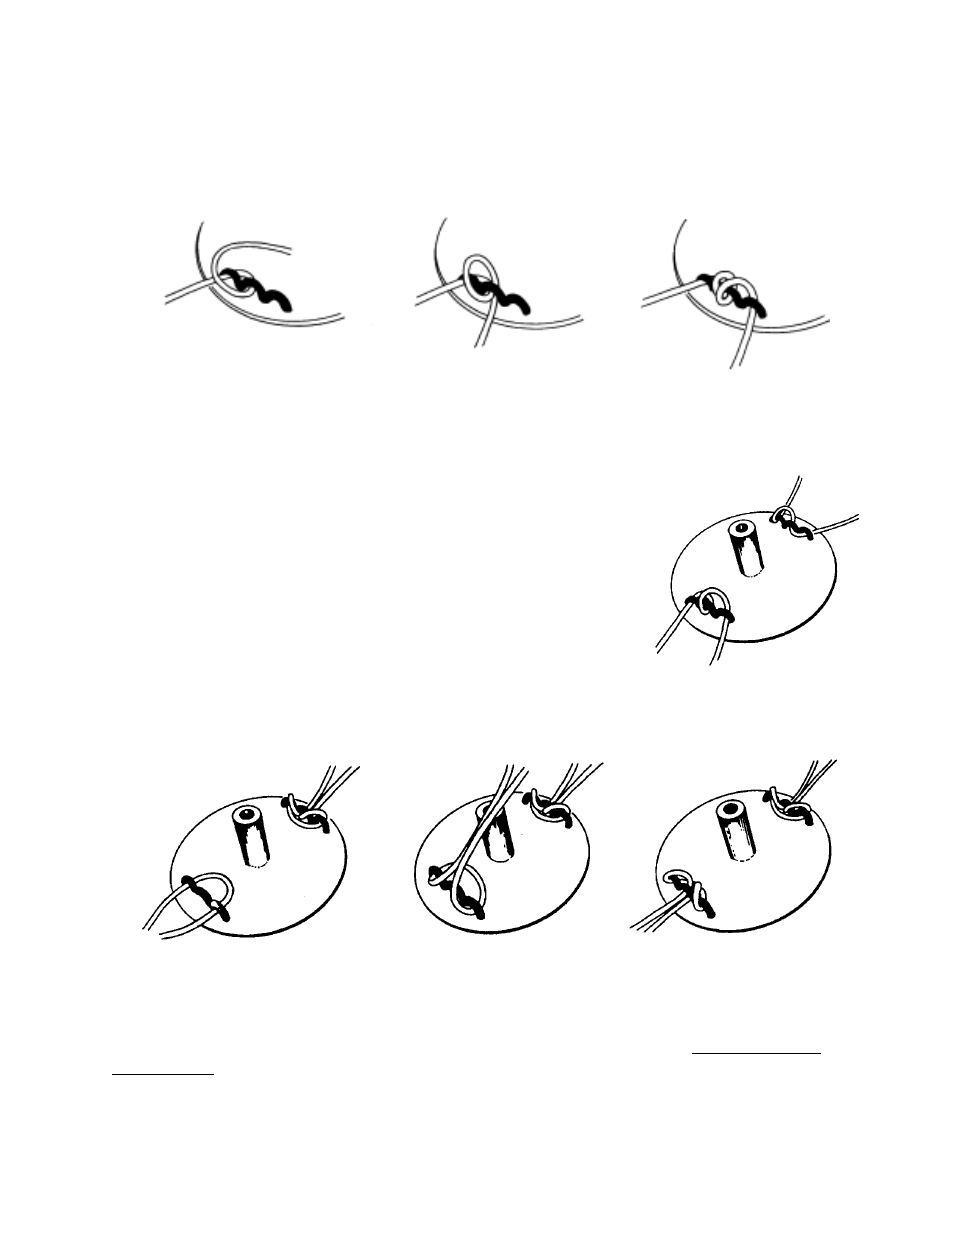
If Cords Slip
There are several options for installing the cutting cords. Experimenting in different conditions with
different cutting cords is a good way to find the best method. Below are some suggestions:
·
When using the standard installation method, wrap the cutting cord through the middle loop
twice (the thicker, green cord is stiff, but it can be done) as shown in Figure 17 . This will help
prevent the cords from slipping.
·
You can also try the method illustrated in Figure 18, especially
for the green, 155 mil cord. This not only holds the cord tight,
but also helps the cords cut better in larger diameter, tough and
woody growth.
·
Another method is shown in Figure 19.
·
You can also try a method opposite of that illustrated in Figure
19. Push the cord ends IN through the two end holes in the
trimmer head plate. The bottom of the U formed by the cord
should be toward the outside. Next, pull the two ends back
through the middle hole, then UNDER the bottom of the U and pull them tight.
Be careful not to move too fast through thick growth. If there are woody weeds in the material being
cut, the cutting cords may wrap around the stalks they cannot cut and pull away from the trimmer
head. If the cutting cords can't cut quickly, they may tear from the machine. Ease the tips into
heavy growth.
F
Reminder: The tips of the cutting cords do the cutting.
Figure 17
Figure 18
Figure 19