Adjusting the cutting height – DR Power Sprint (1985 - 2000) User Manual
Page 22
16
DR
®
TRIMMER/MOWER
™
Assembly & Operating Instructions
Adjusting the Cutting Height
One cutting height adjustment disk is already installed on your machine, just above the Mow-Ball
™
Support. An additional disk is included in your product package, but you can order more. We
recommend you try trimming with one disk before experimenting with additional disks.
The cords will cut approximately 1-1/2" to 2" off the ground with one disk installed. If the cut is
too low or if you're cutting very tall or heavy grass, you may want to try using an additional disk.
Tool Needed:
• Phillips head screwdriver
Caution: An improper installation may cause damage to the bearings. Please follow these
directions carefully.
Caution: Do not tip the machine all the way back on its handlebars unless you first drain the gas
and oil.
WARNING: Before performing any maintenance procedures, the engine should be stopped
and the spark plug wire disconnected.
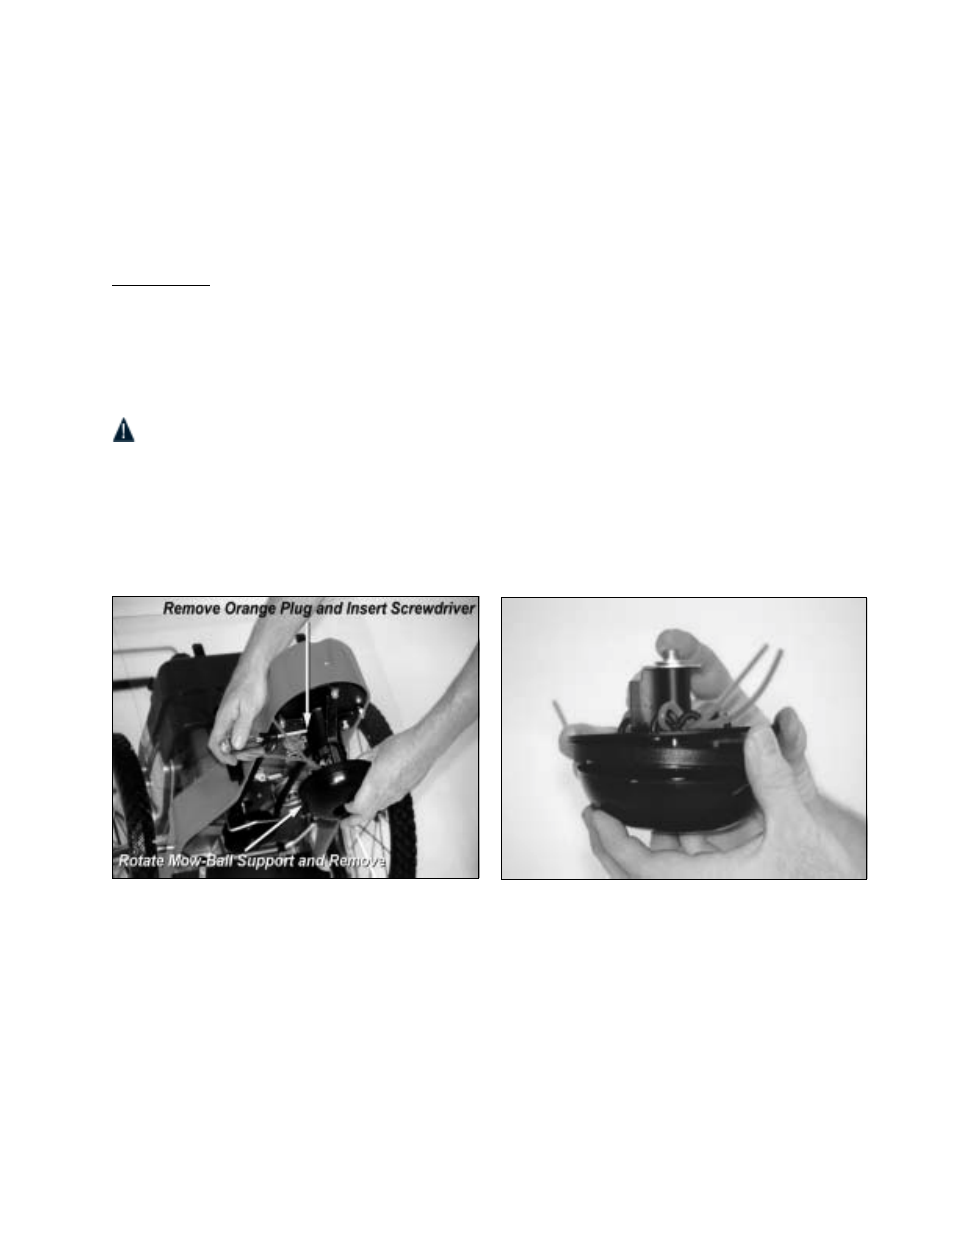
1. Remove the orange vinyl plug from the bearing housing's outer shaft (Figure 20).
2. Insert a screwdriver into the hole (Figure 20) and rotate the Mow-Ball
™
Support until the
screwdriver fits in the second hole in the inner shaft, locking it in place.
3. With your hands, turn the Mow-Ball
™
Support assembly counterclockwise with your hands until
it completely unscrews from the bearing housing (Figure 21).
Figure 20
Figure 21