Removing and replacing the hoses – DR Power Tow-Behind 13.74 Pro-XL (August 2010 - August 2014) User Manual
Page 24
24
DR
®
LEAF and LAWN VACUUM
LUBRICATE IMPELLER BEARING
1. Remove the right Coupling Cover by using a 1/2" Socket to remove the Bolts
and Washers that retain the Cover (Figure 39).
2. Lubricate the Bearing (Figure 40) with Multipurpose Automotive Grease
using a grease gun on the fitting.
3. Reinstall the Coupling Cover.
REMOVING AND REPLACING THE ENGINE OIL
Refer to the Engine Operator Manual for Engine Procedures for removing and
replacing the oil.
NOTE: Be sure to use environmentally safe
disposal procedures in the disposing of the used oil.
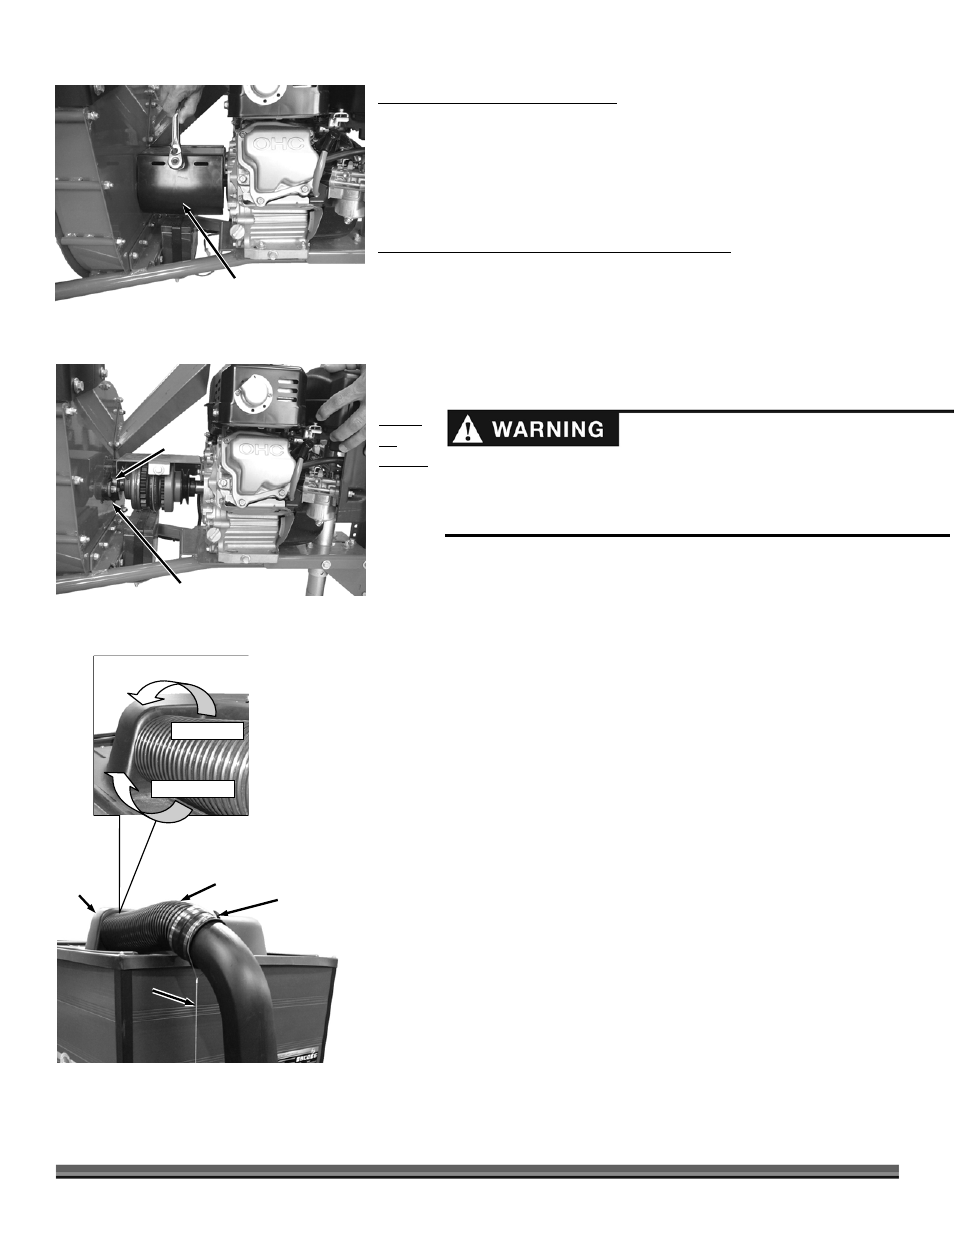
Removing and Replacing the Hoses
OUTL
ET
HOSE:
1. Slid
e
the
Lan
yard off the Hose Cuff and onto the Outlet Duct (Figure 41
2. Disconnect the Outlet Hose from the Outlet Duct by loosening the
Thumbscrew Clamp and pulling the Hose from the Outlet Duct.
3. Remove the Hose from the Top Cover by grasping the Hose and unscrewing
it clockwise.
4. Install the new Hose by screwing the Hose counterclockwise into the
opening of the Top Cover. Turn the Hose in until about 4 or 5 of the hose
ribs have entered the opening. That will leave it loose enough so it is easy to
attach it to the Outlet Duct without resting on the corner of the Collector.
5. Clamps are provided on the new Hose. Slide the new Hose Cuff onto the
Outlet Duct and turn the Thumb Screw Clamp until tight.
6. Slide the Lanyard up onto the Cuff to hold it in place.
Before performing any maintenance, repairs or inspection, you must first shut
off the mower and leaf and lawn vacuum engines, wait five minutes for all
parts to stop and cool, and disconnect the spark plug wire of the leaf and lawn
vacuum.
Right Side
Coupling Cover
Figure 39
Grease
Fitting
Figure 40
Bearing
Install Hose
Remove Hose
Outlet
Duct
Figure 41
Outlet Hose
with Cuff
Thumb Screw
Clamp
Lanyard
Top Cover