Replacing the coupling – DR Power Tow-Behind 13.74 Pro-XL (August 2010 - August 2014) User Manual
Page 27
CONTACT US AT www.DRpower.com 27
Replacing the Coupling
Tools Needed:
Two 1/2" Wrenches
Wire Cutters
Large Flat Head Screwdriver
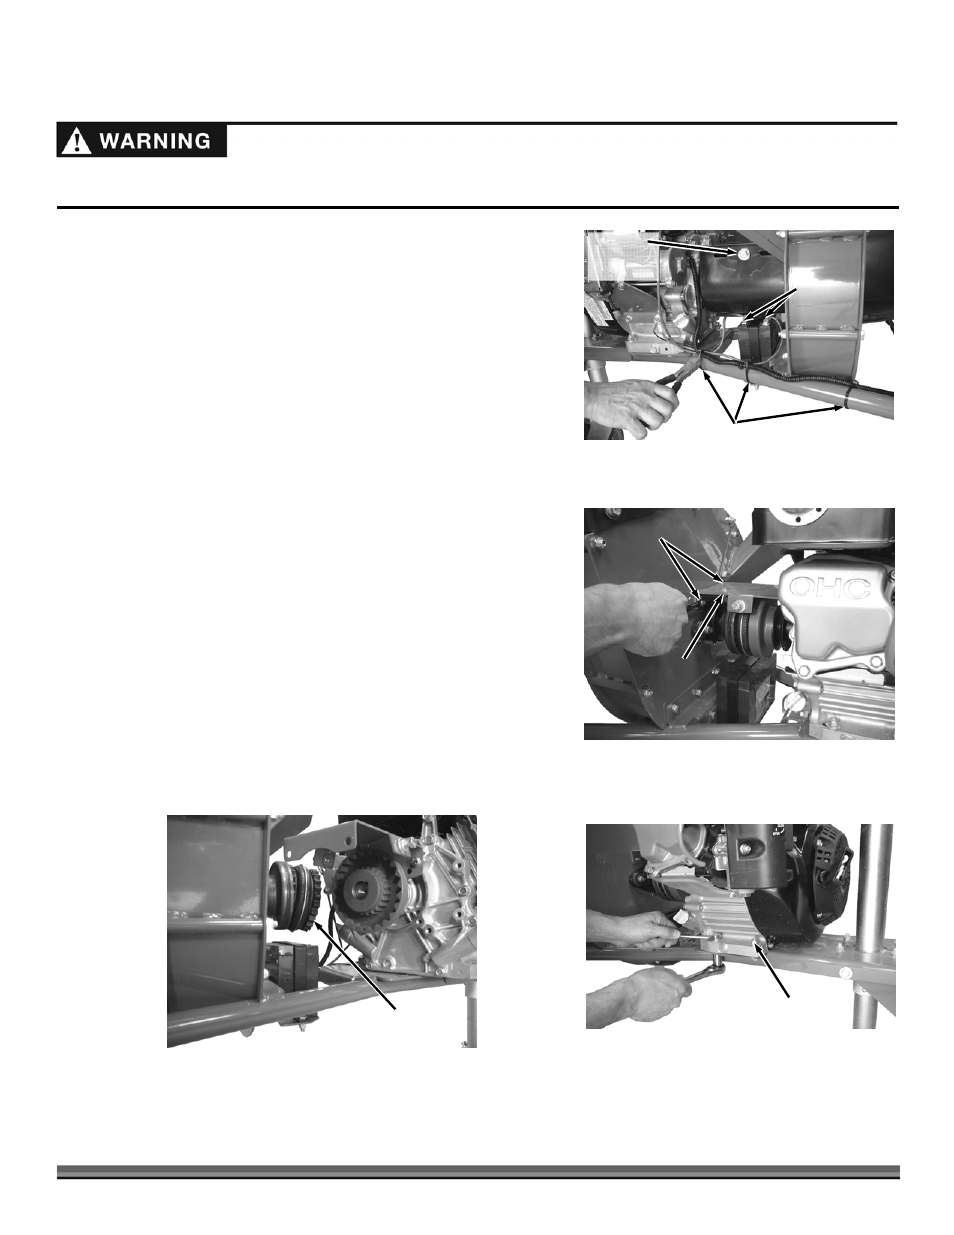
1. Disconnect the Battery Positive and Negative Cables by pulling them from
the Terminals (Figure 48).
2. Cut the Cable Ties that secure the Engine Harness to the Frame with Wire
Cutters.
3. Remove the two Bolts, Lock Washers and Flat Washers that secure the
Coupling Guards on both sides of the Engine Brace with a 1/2" Wrench.
4. Remove the two Locknuts that secure the front side of the Engine Brace to
the Impeller Housing with a 1/2" Wrench (Figure 49).
5. Remove four Engine Bolts, Flat Washers and Locknuts with two 1/2"
Wrenches (Figure 50).
6. Carefully slide the Engine away from the Coupling until the Rubber Coupling
can be removed from the machine (Figure 51).
NOTE: If you have the Pro-XL model, you may need to lift and twist on the Engine
to get the required separation to remove the Rubber Coupling.
Before performing any maintenance, repairs or inspection, you must first shut off the mower and leaf and lawn vacuum engines,
wait five minutes for all parts to stop and cool, and disconnect the spark plug wire of the leaf and lawn vacuum.
Cable Ties
Figure 48
Battery
Terminals
Coupling
Guard
Bolt, Lock
Washer and
Flat Washer
Locknuts
Figure 49
Engine
Brace
Engine
Hardware
Figure 50
Rubber
Coupling
Figure 51