Carriage wear plate replacement – DR Power RapidFire 6 HP Subaru (July 2012 - Aug 2013) User Manual
Page 13
CONTACT US AT www.DRpower.com 13
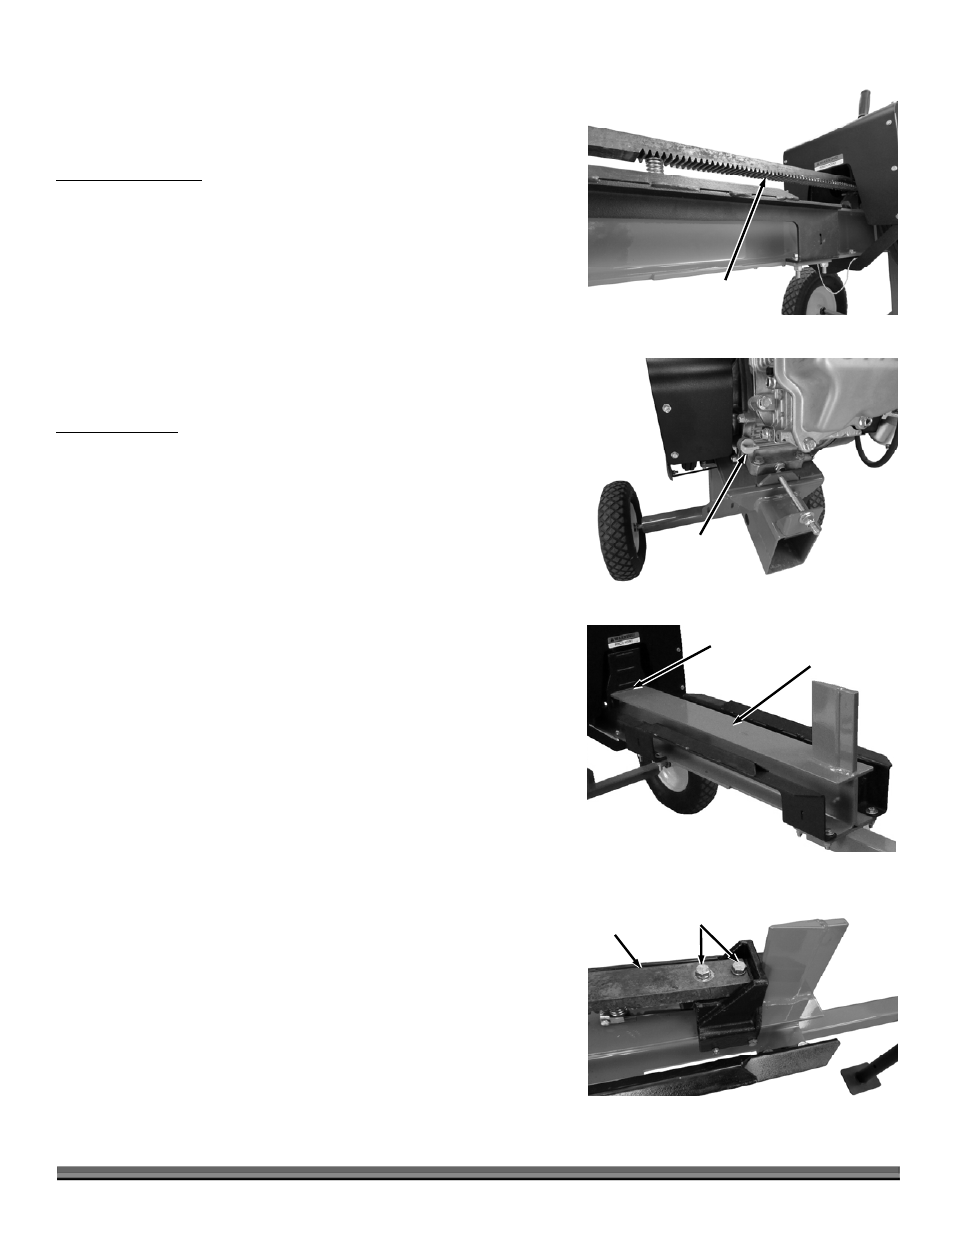
3. Grease the Rack Teeth with All Purpose Grease (Figure 16).
4. Push the Carriage assembly back into starting position, reconnect both
Return Springs and cut the strings off.
Changing Engine Oil
One of the easiest methods to remove oil from this Engine is to use a siphon
style Oil Extractor. If you do not have one you can purchase it from us at
www.DRpower.com.
Tools and Supplies needed:
Oil Extractor
Clean Container for used Oil
1. Remove the Oil Fill/Dipstick (Figure 17).
2. Siphon the Oil as described in the Oil Extractor instructions.
3. Add oil as described in “Adding Oil and Gasoline” in Chapter 2.
Rail Maintenance
Between each use of the LOG SPLITTER, we recommend applying a rust
preventative (Fluid Film or equivalent) to any bare metal areas on the top of the
rail (Figure 18). This will assure the longest possible service life of the Wear
Plate.
Carriage Wear Plate Replacement
Tools and Supplies needed:
Two 7/16" Wrench
Two 9/16" Wrenches
3/4" Wrench
Philips Head Screwdriver
Dead Blow Hammer
String
Thread-Locking Fluid
1. Remove the Return Springs as described in step 1 of “Greasing The Rack
and Pinion” on page 12 (Figure 15).
2. Pull the Carriage out all the way so it rests against the Wedge for support
(Figure 19).
Note: In the next step position the Wrench on the right hand side of the Splitter so
that the force from loosening the Bolts pulls the Ram into the Wedge for
support. The Dead Blow Hammer should be used because the Bolts are very
tight and the extra shock of hitting the Hammer against the Wrench
loosening the Bolts easier. The Dead Blow Hammer should also be used to
tighten the Bolts when reassembled.
3. Remove the two Bolts that secure the Rack to the Wedge using a 3/4"
Wrench and Dead Blow Hammer (Figure 19).
Top Surface
of Rail
Figure 18
Wear
Plate
Oil
Check/Fill
Figure 17
Grease
on Teeth
Figure 16
Rack
Figure 19
Rack Bolts