Attaching the valve control handle to the valve – DR Power Hydraulic 8-Ton User Manual
Page 13
Contact us at www.DRpower.com 13
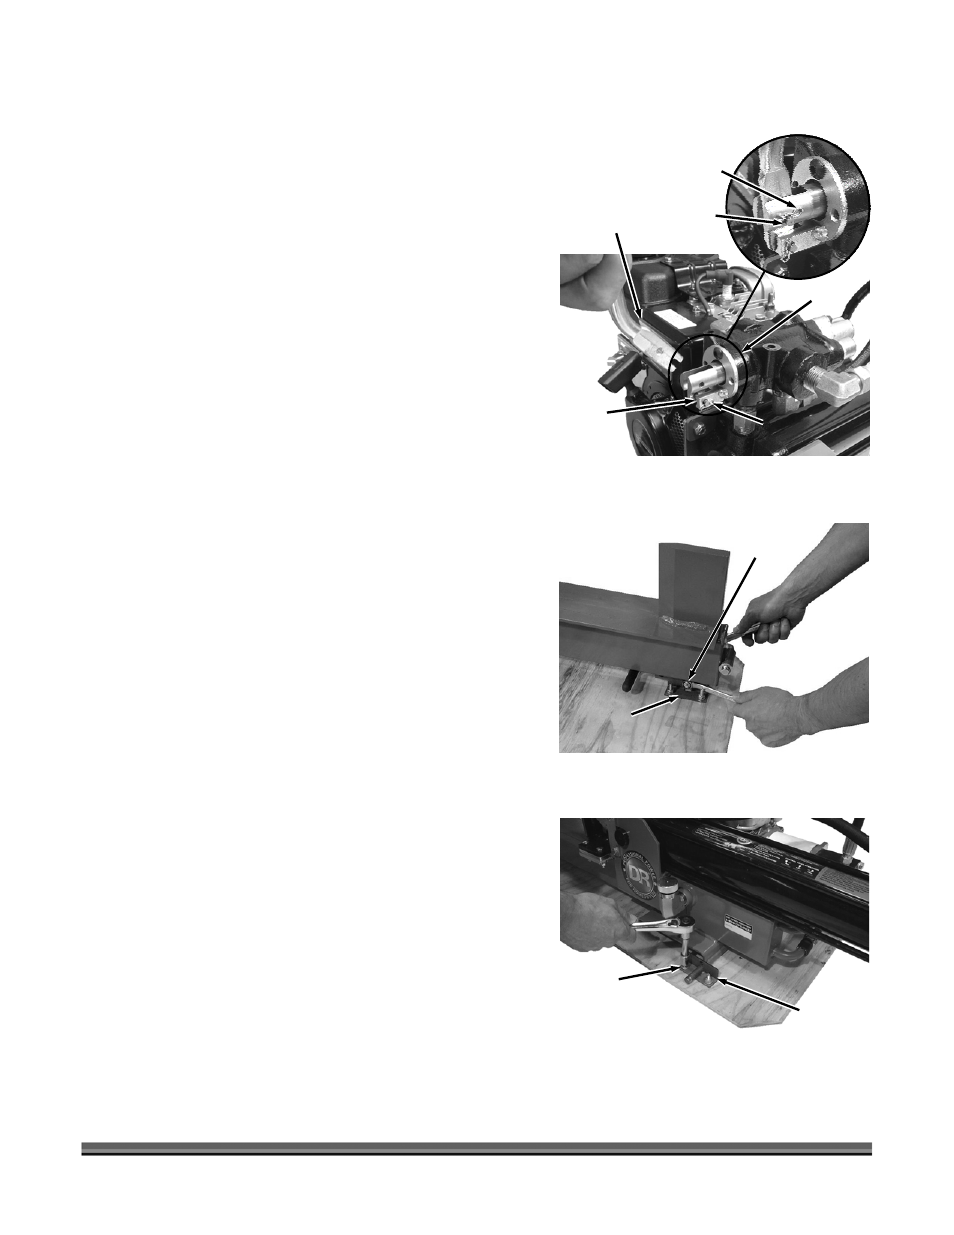
Attaching the Valve Control Handle to the Valve
1. Install the Clevis Pin and Hairpin Clip through the
bottom hole on the Valve (Figure 8).
2. Insert the forked end of the Valve Control Handle over
the Clevis Pin.
3. Align the hole in the Handle with the top hole in the
Valve and insert the top Clevis Pin and Hairpin Clip.
4. Remove the Bolt and Locknut that is securing the
wedge end of the Splitter to the shipping Bracket
(1/2" wrenches) (Figure 9).
NOTE: Set the Bolt and Locknut that was removed in the last
step aside to be used when you install the Front Leg.
5.
Remove the Two Carriage Bolts and Locknuts that secure
the Shipping Bracket to the Plywood Base (1/2" wrenches)
and remove the Shipping Bracket (Figure 10).
6.
Slide the Splitter out of the Shipping Bracket that is on the
opposite side and set the Splitter on a flat, clean surface.
Shipping
Bracket
Figure 9
Bolt and
Locknut
Figure 8
Valve
Control
Handle
Clevis
Pin
Clevis
Pin
Hairpin
Clip
Valve
Hairpin
Clip
Figure 10
Carriage
Bolts and
Locknuts
Shipping
Bracket