DR Power Hydraulic 8-Ton User Manual
Page 31
Contact us at www.DRpower.com 31
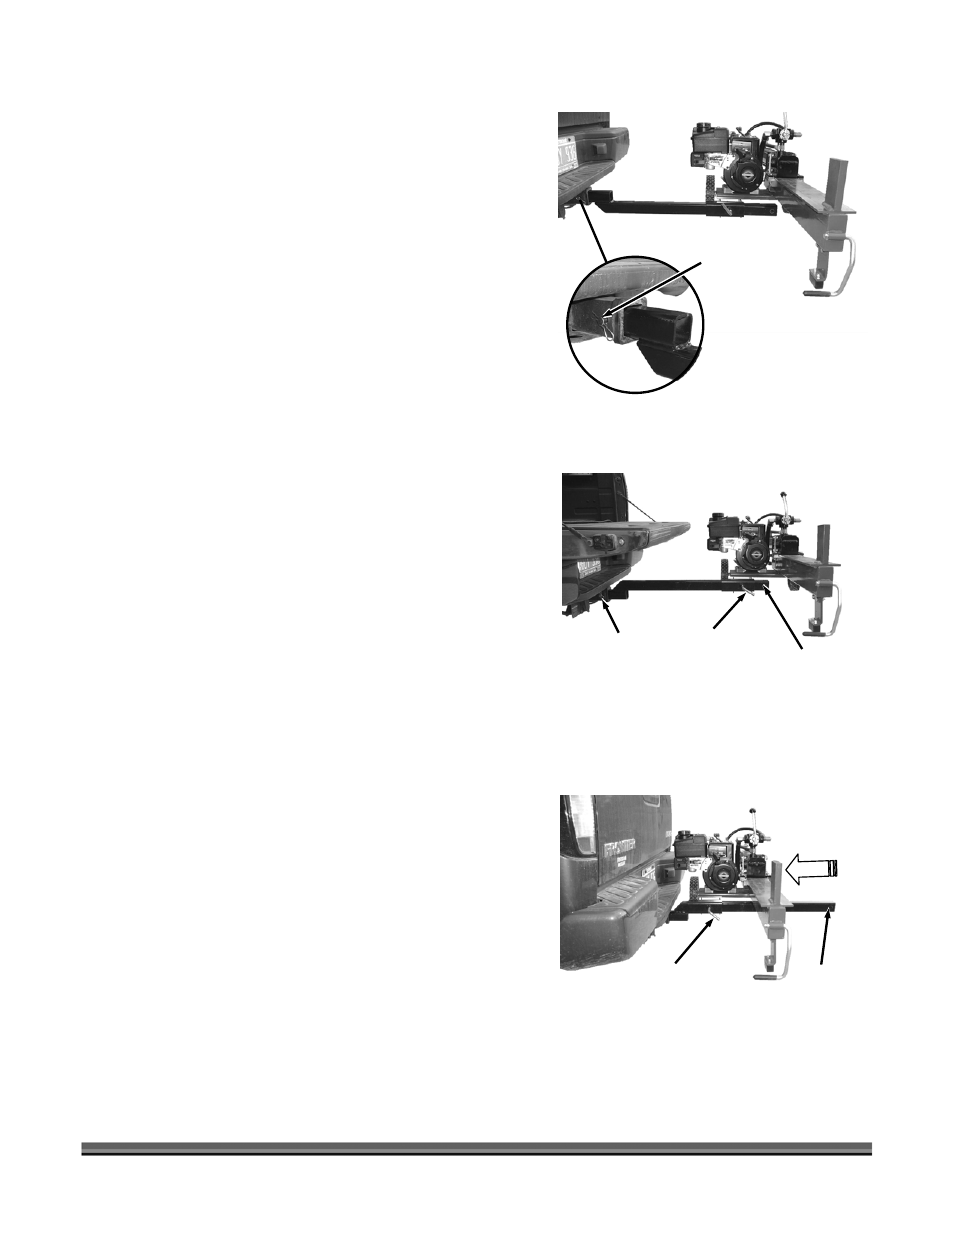
10. Pick up your Wood Splitter up and slide the unit
forward into the Vehicle Hitch until the Lock Pin holes
line up (Figure 43). (Due to the weight, we
recommend two people for this operation). Lock the
Receiver Bar into position with your Vehicle Hitch
Lock Pin.
NOTE: When you have the Wood Splitter adjusted to the end
of the Receiver Bar (with the Clevis Pin and Clip
installed at the end of the Receiver Bar and the L-
Shaped Tensioning Bolt is hand tight) you will have
room to drop down the tailgate of the vehicle for easy
loading (Figure 44). This is the operating position.
The Wood Splitter should be secured in a stable and
level position for best splitting performance. When
positioning a heavy log on the Wood Splitter, it may
be necessary to support the Front Leg to maintain a
level position.
NOTE: When transporting your Wood Splitter, be sure to
carry it in the HIGH position (Figure 41) and slide it
as close to your vehicle as possible without hitting any
part of the vehicle. Secure it in position by hand
tightening the L-Shaped Tensioning Bolt (Figure 45).
Always be sure to have the Clevis Pin and Clip
inserted into the end of the Receiver Bar.
Observe the posted speed limits when transporting the
Wood Splitter with the receiver mount properly
installed and the Wood Slitter properly attached.
When traveling over rough terrain, drive slowly to
prevent undue stress to the Receiver Bar.
Figure 43
Vehicle Hitch
Lock Pin
L-Shaped
Tensioning
Bolt
Figure 44
Clevis Pin
and Clip
Operating
Position
Vehicle Hitch
Lock Pin
L-Shaped
Tensioning
Bolt
Figure 45
Clevis Pin
and Clip
Transport
Position