Rotisserie instructions – Fire Magic Regal I 34 series Drop In User Manual
Page 22
22
USING YOUR BACKBURNER AND
ROTISSERIE
Rotisserie cooking with the backburner is accomplished
without use of the main burners. Follow the steps in the
appropriate sections below to set up and use these
accessories (see PARTS LIST for image).
SET UP
1. Remove the backburner cover (if present) by sliding
it upward off the backburner.
2. Remove the cooking grids from your barbecue
(if necessary) to obtain maximum clearance for
larger cuts. The fl avor grids may also be removed if
required.
Tip:
Aluminum foil or a baking pan may be placed
over the main burners to catch excess
drippings from cooking.
3. Attach the rotisserie motor to the rotisserie mounting
on the right side of your barbecue by inserting the
four mounting tabs through the four holes in the
motor mounting on the right side of the barbecue
and allowing the unit to slide downward and lock into
place.
Note: Make sure the motor is oriented so that no
rain can fall into the air vents.
4. Follow the LIGHTING INSTRUCTIONS to light the
backburner.
5. Allow the backburner to preheat for approximately
10 minutes on HI LIGHT setting.
PUTTING THE MEAT ON THE SPIT ROD
1. Slide the meat and spit prongs onto the spit rod so the
meat is centered and balanced as well as possible.
2. Tighten the spit prongs into place so that the meat
remains in a fi xed position on the rod and the meat
rotates with the rod.
Important: The counterbalance, which is included
with your rotisserie kit, should be used
to balance the load on your rotisserie
and prolong the life of your motor. Heavy
unbalanced meats can stress the rotisserie
motor and may cause motor failure.
USING THE COUNTERBALANCE SUPPLIED
WITH YOUR ROTISSERIE
1. Hold the spit rod at each end and lift. Do not grip
the rod. Let the rod rotate so the heavy side of the
meat hangs down naturally.
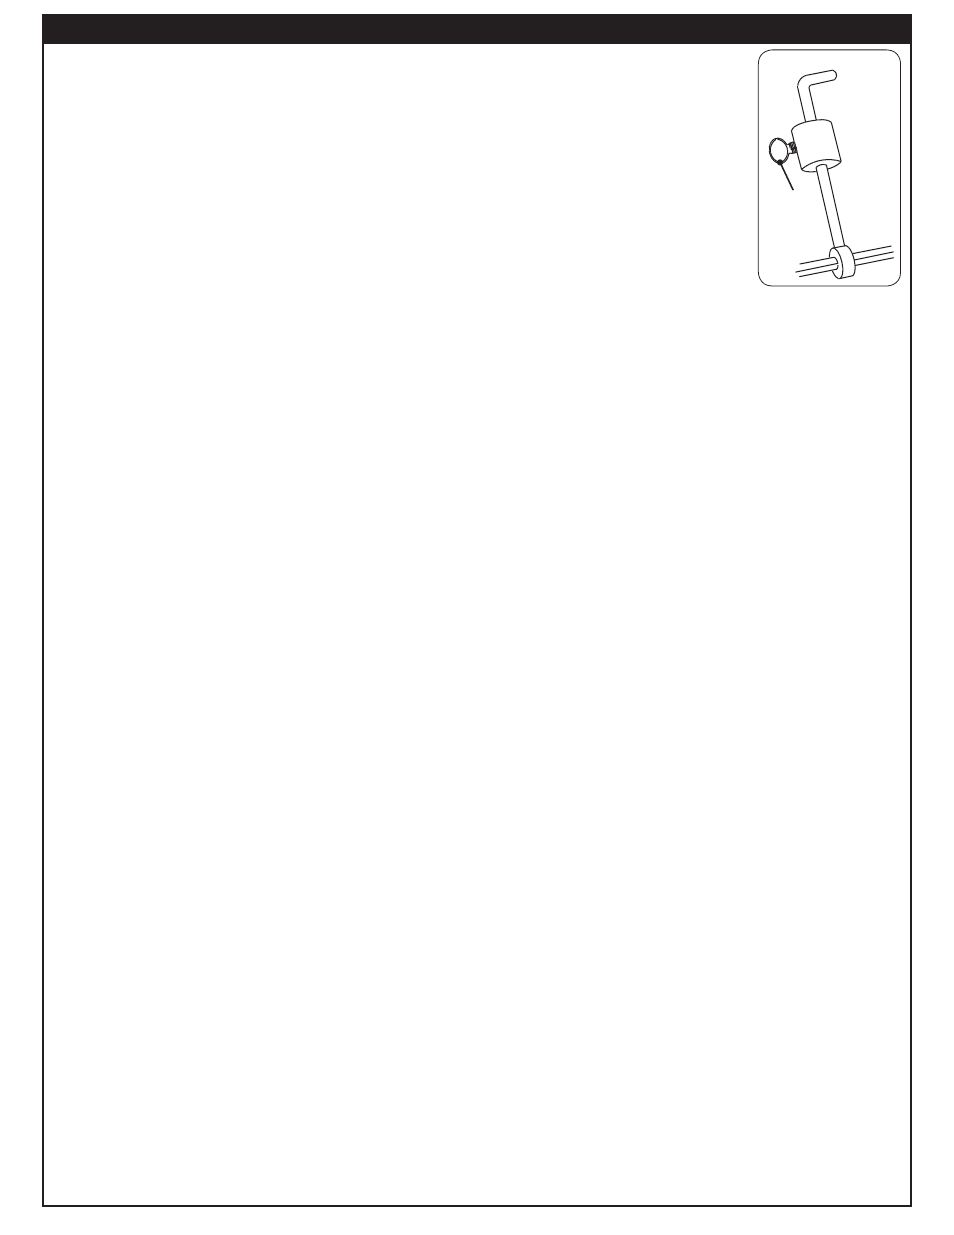
2. Turn the counterbalance on
the spit so the counterbalance
rod and weight point upward,
or opposite from the heavy
side of the meat. Tighten the
counterbalance rod in the hub
against a fl at surface of the spit
rod to secure (Fig. 22-1).
3. Loosen the thumb screw and
slide the weight along the
counterbalance rod to balance
the meat. Since meats are not
a uniform shape, it may not
be possible to achieve a perfect balance. Properly
balanced meat should not rotate when you hold the
spit rod loosely by the ends.
4. Make sure the counterbalance will not strike the
barbecue frame when the rotisserie is started.
RUNNING THE ROTISSERIE
1. Place the pointed end of the spit rod into the motor
drive socket and rest the handle end of the spit rod in
the spit bracket on the right side of the barbecue.
2. Plug in (if necessary) and turn on the rotisserie
motor.
3. Use a standard roasting guide to estimate the length
of time for your meat. A meat thermometer may also
be used to tell when your favorite cuts are cooked
to your liking. When testing temperatures with a
thermometer, turn off the rotisserie motor and turn
the backburner on LOW. This will keep the meat
from overcooking on one side.
Note: When burning properly, the backburner fl ames
will be blue with yellow tipping, and the grating
will glow red. The fi rst time it is used, the
backburner may smoke a little.
Important: Operate your backburner with the oven
closed. This simulates an oven effect and
helps your meat cook faster. Constant
rotation of the spit ensures even cooking
and maximum retention of juices.
Note: On large cuts of meat or whole turkeys, it
may be necessary to reduce the heat from
your backburner. Cooking your food at a lower
temperature for a longer period of time will
keep the outer surface from burning while
cooking the interior of your meat. In any case,
it is normal for the back burner grating to glow
red when operating properly.
Fig. 22-1
Thumb
screw
Tip:
Aluminum foil or a baking pan may be placed
over the main burners, a little forward of
center, to catch excess drippings from the
meat.
3. Attach the rotisserie motor to the barbecue frame by
inserting the tab of the bracket attached to the motor
into the slot on the right of the barbecue so that the
spit rod will fi t into the motor drive socket from the left.
If left-side spit support is not already in place, insert
it into the tab on the left side of the barbecue at this
time.
ROTISSERIE INSTRUCTIONS