Fire Magic 53825-T Built-in Trash Container User Manual
Built-in trash container
1
NO. L-C2-32209
REV 1 - 0907071542
®
24”
12 ¾”
20”
ROBERT H. PETERSON CO. • 14724 East Proctor Avenue • City of Industry, CA 91746
BUILT-IN
TRASH CONTAINER
Model #53825-T
INSTALLER:
Leave these instructions with consumer.
CONSUMER:
Retain for future reference.
To install your trash container, follow the steps below:
1. Make sure the opening for your trash container matches the cutout dimensions shown.
Note: It is recommended that silicon caulking (not supplied) is applied around the back of the unit's trim before
installing it into the opening.
2. Slide the unit into the opening.
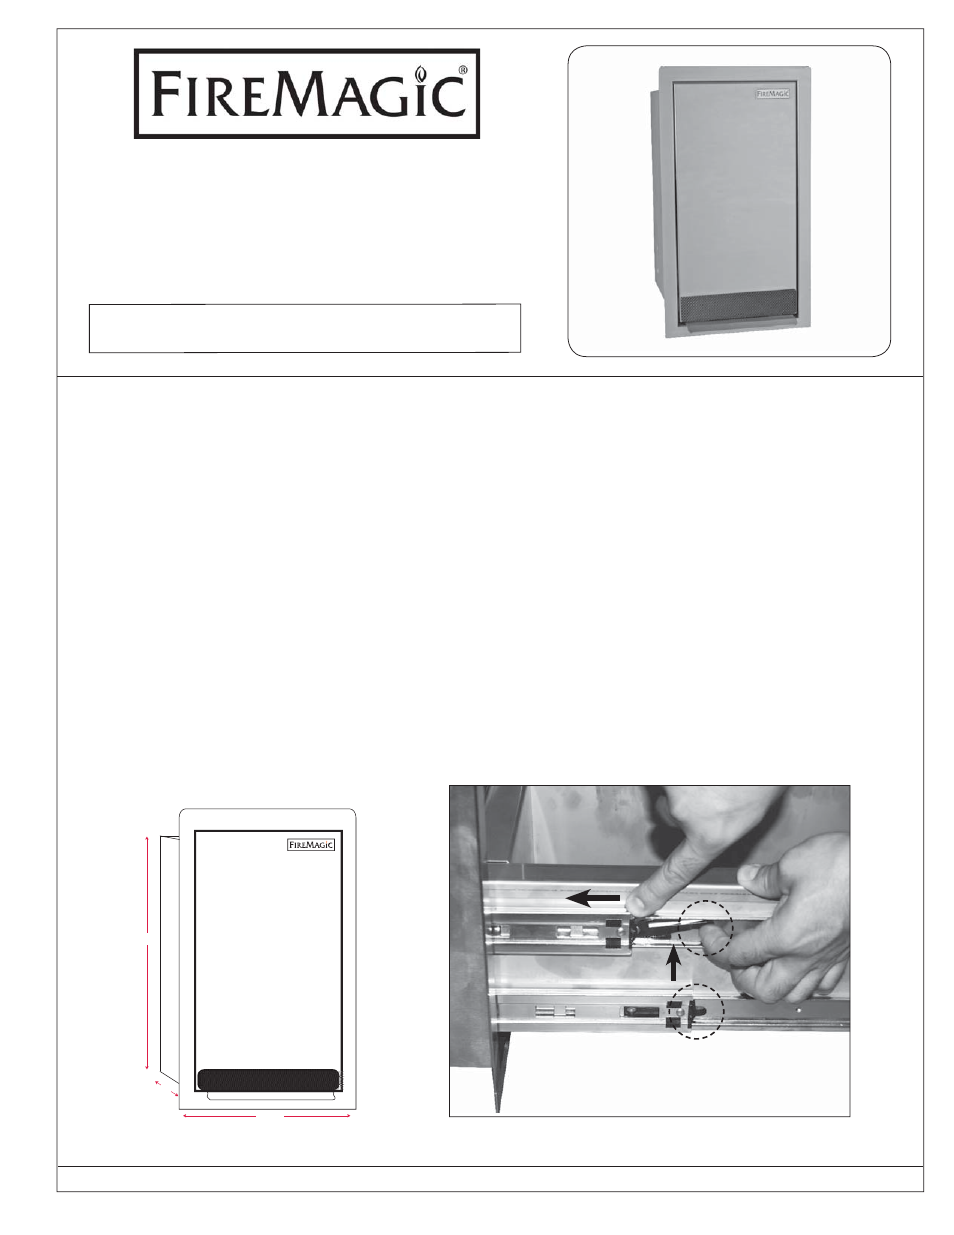
3. Open the trash container door by stepping on the pedal. Remove the bin. To remove the door, pull it
completely out. Release the door from the door slides by pressing the 2 black levers up on the left side,
and down on the right side. (With the lever pressed, the slide will need to be pushed back to unlock.) After
all 4 slides are unlocked, pull the door completely off. Locate the 3 screw holes found on the left and right
sides of the unit. Secure the unit using
1
/
8
" by
3
/
4
" fastening screws (not supplied) that are appropriate for
the enclosure framework.
4. Re-attach the door by extending the door slides completely and aligning the door into the slides, pushing
the door closed. Open the door to verify it has locked in place. Replace the bin.
5. If desired; attach the kick guard (included in the package) by peeling off its backing and applying it to the
bottom of the door. Reference Fig. 1-1 for location. Be sure to clean the area accordingly prior to application.
Please note that the kick guard is designed for permanent installation.
Fig. 1-1 Cutout dimensions
Fig. 1-2 Door removal
Left side shown
(Push levers down on right side)