Setup & operation – Formax FD 4040 User Manual
Page 11
1.
Place completed conveyor assembly behind delivery device (i.e. printer) with fans centered on exit end of delivery
device. Attach conveyor mounting bracket to table that the device is sitting on for stability using lag bolts provided,
see mounting details supplied with bracket.
2.
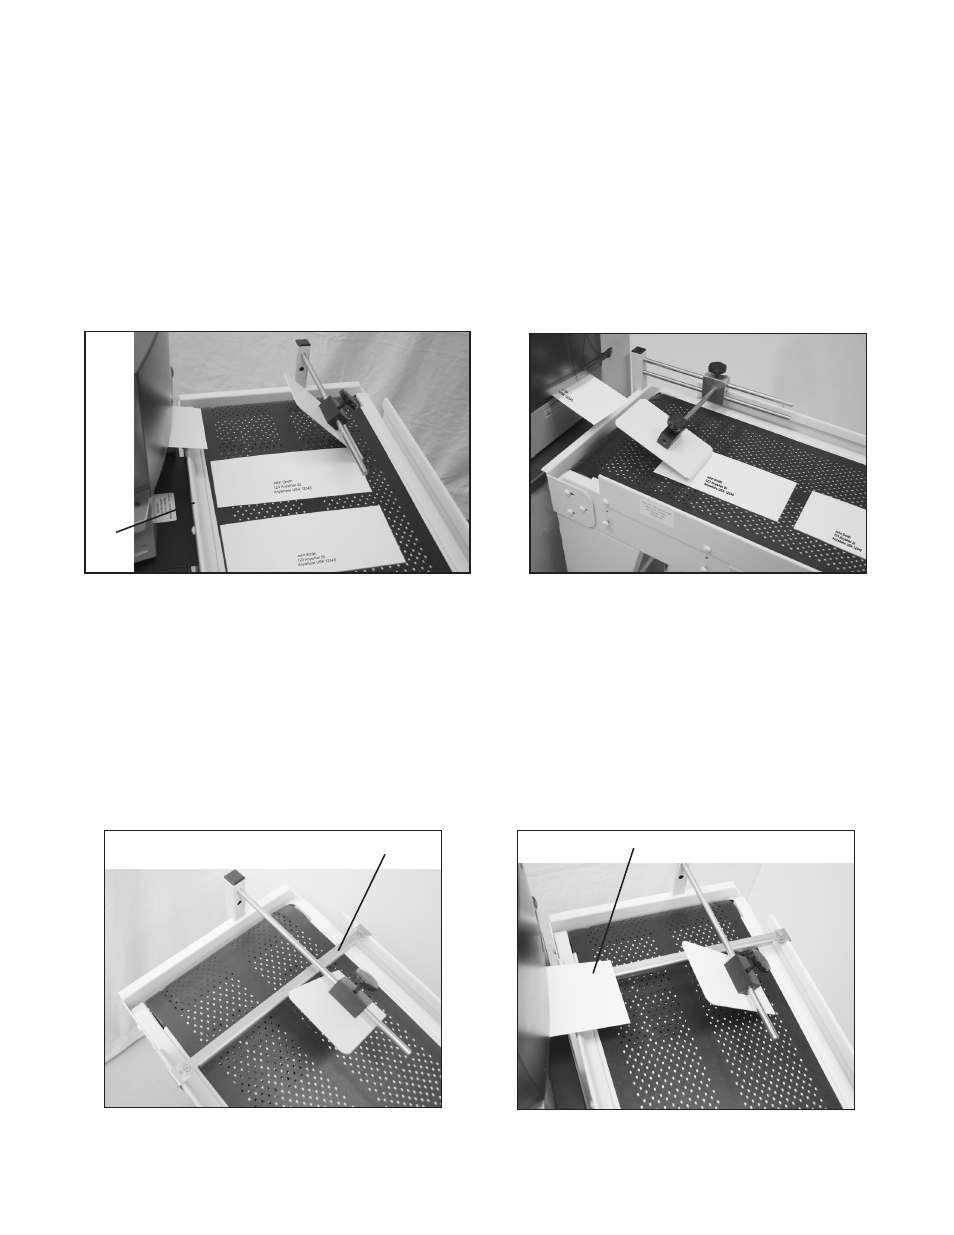
The top of the front guide rail (Fig 16a item A), should be positioned about 1 inch below the exit surface of the
delivery device (i.e. printer). If height adjustment is necessary, have another person support the weight of the
conveyor while you carefully loosen the black hand wheels (Fig 1 item B) and adjust the height of the conveyor leg
assemblies. Retighten to secure in place.
CAUTION! Be careful when performing this procedure. The conveyor is heavy and can cause injury if not properly
supported.
SETUP & OPERATION
A
Fig 16a - Right angle printer setup
Fig 16b - Optional straight-on printer setup
Optional Slide Bar for slow printing speed
If the printer is set at a slow speed, the slide bar (Fig 17a item A) may be needed to feed the envelope onto the
conveyor. Set the slide bar so that the top 1/4 of the envelope rides on the bar (Fig 17b item B). The envelope should
slide across the bar, hit the deflector and land on the conveyor in the correct position. To fine tune, move the slide bar
backwards or forwards and adjust the conveyor speed.
Fig 17a
A
B
Fig 17b
9