GAI-Tronics XAAB002A Audio Accessory Box User Manual
Page 19
Model XAAB002A Audio Accessory Box
Installation
15 11/06
Power Connections
Plug in the supplied wall transformer and connect the power into J8 on the XAAB002A. For direct mobile
radio use, connect 12 V dc from the radio to the audio accessory box via the dc connector provided (which
plugs into J8).
Programming Settings
The various microphone gains and logic polarities are set up with programming switches located on the
PCBA. The cover must be removed to gain access to these switches. Refer to the following tables. The
internal programming switch parameters are as follows:
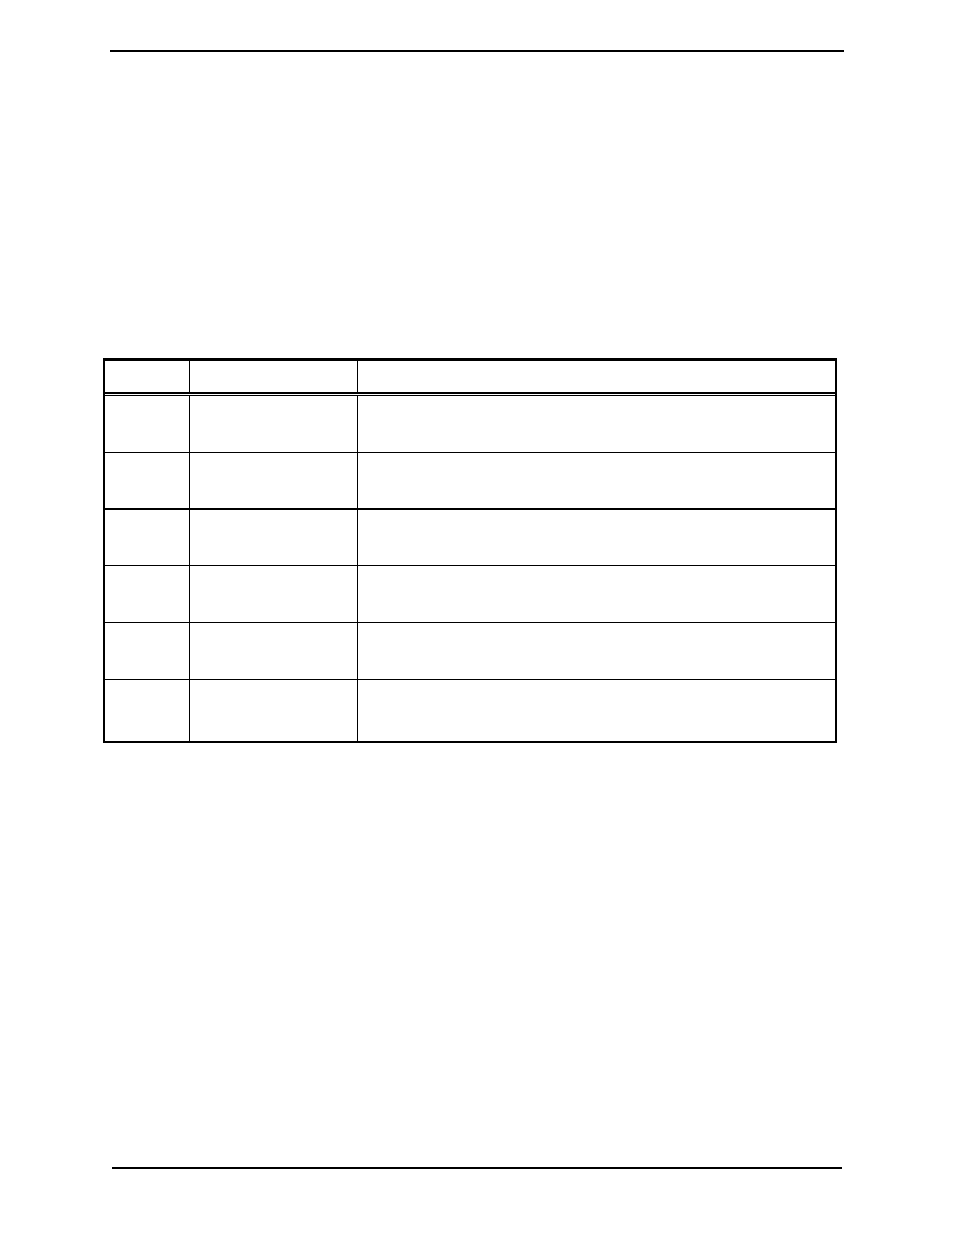
Table 12. Jumper Settings
Jumper Position Function
JU1 IN
(shorted)
OUT (Not shorted)
Handset not connected to J4 - does not generate off-hook
Handset is connected to J4.
JU2 IN
(shorted)
OUT (Not shorted)
Handset mic is always on.
Handset mic is PTT-controlled.
JU3 IN
(shorted)
OUT (Not shorted)
Desk mic is always on.
Desk mic is PTT-controlled.
JU4 IN
(shorted)
OUT (Not shorted)
Boom mic is always on.
Boom mic is PTT-controlled.
JU5 IN
(shorted)
OUT (Not shorted)
Headset mic is always on.
Headset mic is PTT-controlled.
JU6
IN (shorted)
OUT (Not shorted)
Headset RX level is normal.
Headset RX level - Add 10 dB.