GAI-Tronics 12514-007, 12514-008, 12514-009 6', 15', 25' Coil Cord, 6C and Bushing Kit User Manual
Page 2
Pub. 42003-035B
M
ODELS
12514-007,
12514-008,
AND
12514-009
PVC
C
OIL
C
ORD
R
EPLACEMENT
K
IT
Page:
2 of 6
\\s_eng\gtcproddocs\standard ioms - current release\42003 kit manuals\42003-035b.doc
4. When replacing a thermoplastic elastomer cord, remove the C-clip securing the bushing and the cord
to the rear of the front panel assembly.
5. Pull the old cord through the front panel assembly.
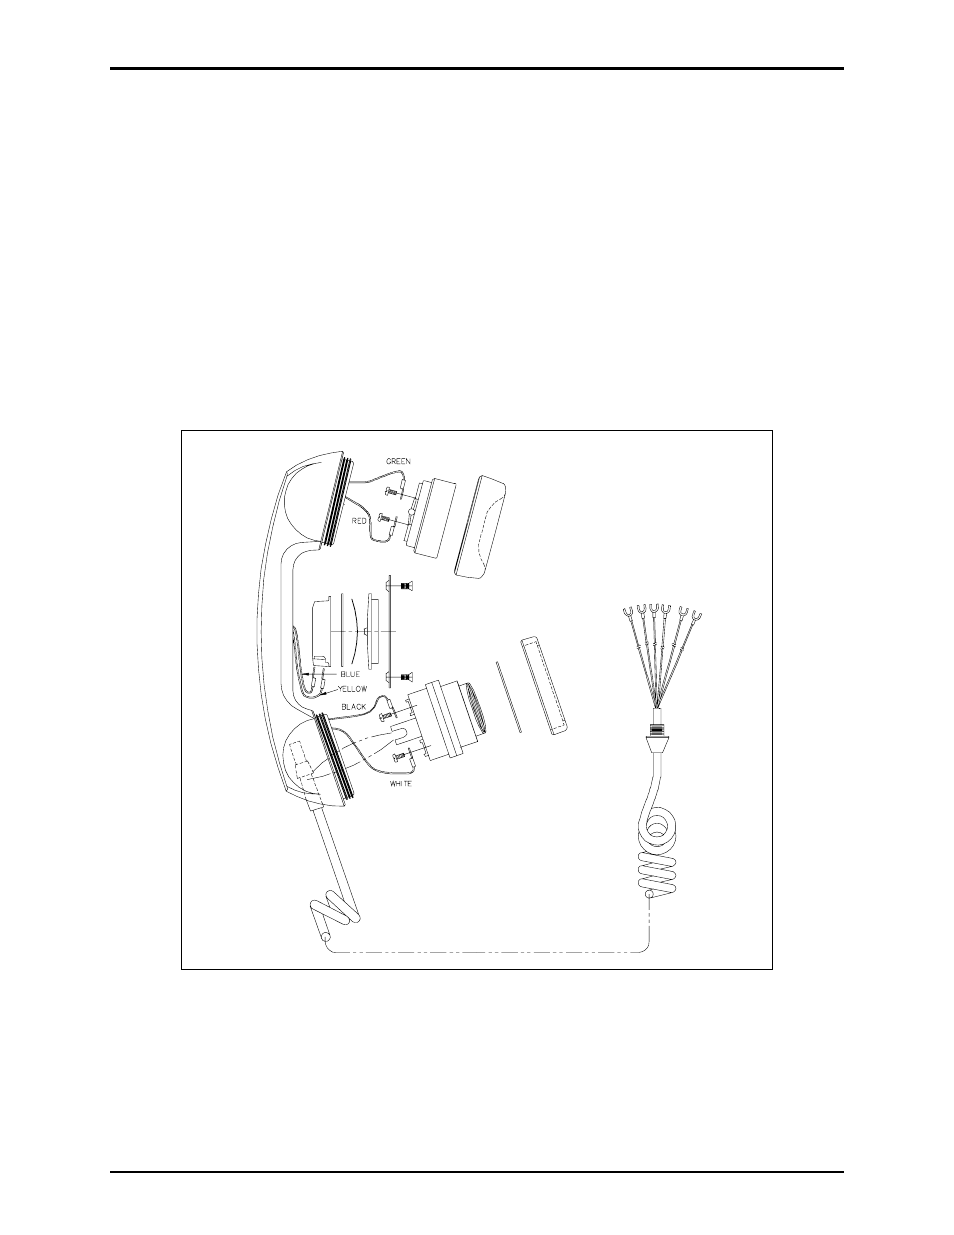
6. Remove the lower cap from the handset. Lift out the transmitter and disconnect both wires.
7. Remove the receiver cap, lift out the receiver and disconnect both wires.
8. Pull the wire harness out of the handset and discard the cord.
Installation of the new cord
1. Insert the wire harness from the new cord into the handset.
2. Snip off the blue and yellow wires as close to their origin as possible. Connect the red and green
wires to the receiver. Replace the receiver and the receiver cap.
3. Connect the black and white wires to the transmitter. Replace the transmitter, transmitter cup, and
cap. Refer to Figure 1. Note the notch on the transmitter. When placing the transmitter in the
handset, align the notch to catch the bushing on the coil cord to secure the cord firmly in the handset.
4. Insert the end of the new cord through the front panel assembly until the bushing is flush against the
panel.
Figure 1. Handset Assembly with Pressbar