Reassembly – GAI-Tronics 12613-001 Keypad Seal Kit for 246C, 256C, 246-001 and 256-001 User Manual
Page 2
Pub. 42003-230A
M
ODEL
12613-001
K
EYPAD
S
EAL
K
IT
Page:
2 of 3
f:\standard ioms - current release\42003 kit manuals\42003-230a.doc
04/10
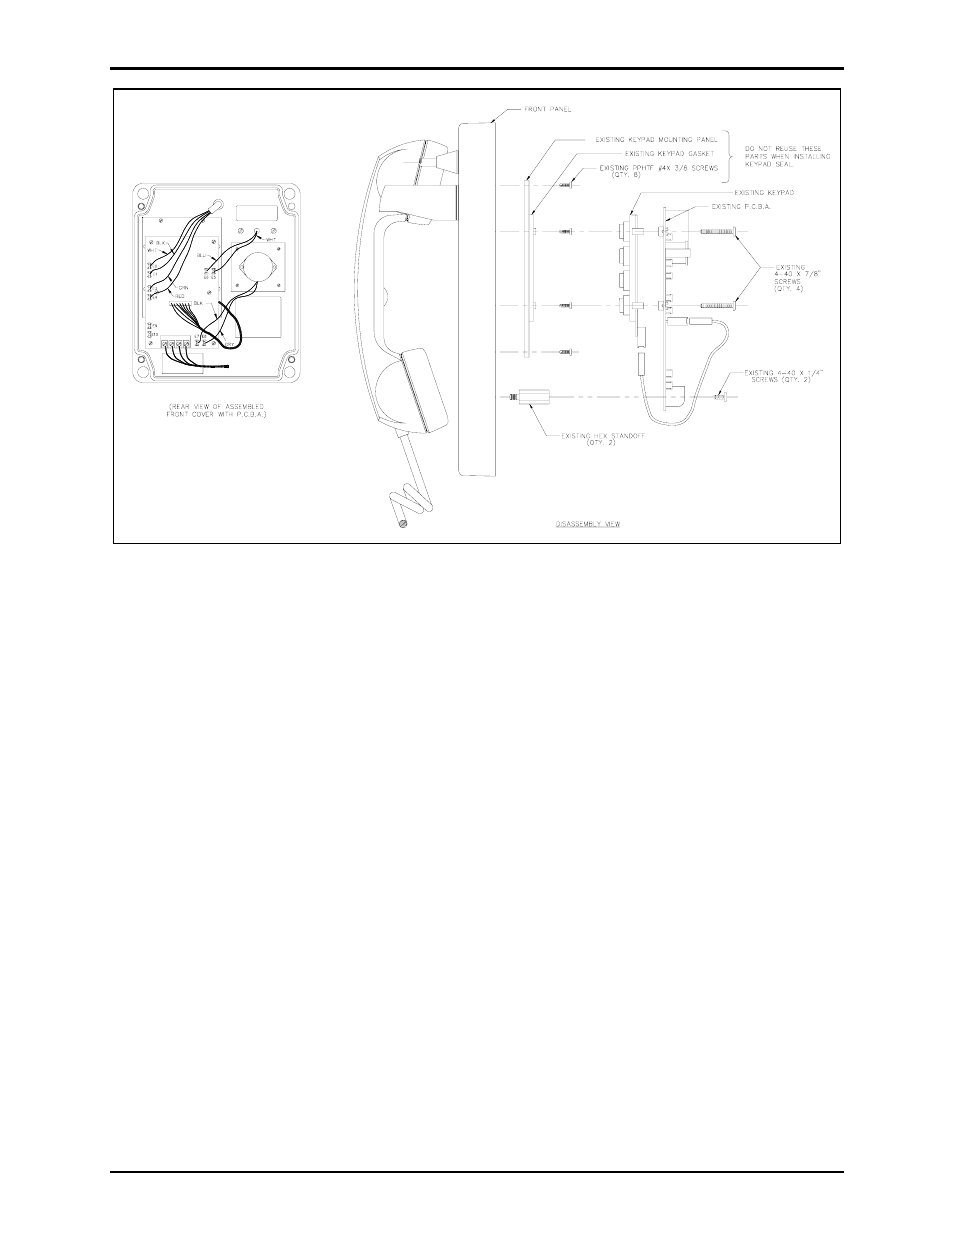
Figure 1. Disassembly View
3. Carefully flip PCBA up and away from obstructing access to the keypad and keypad mounting panel.
4. Lift keypad off the keypad mounting panel. There may be some resistance due to the keypad sticking
to the gasket on the keypad mounting panel.
5. Remove the eight screws holding the keypad mounting panel to the phone front panel. These screws
will NOT be reused in reassembling the keypad assembly.
6. The keypad mounting panel may be stuck to another gasket on the phone front panel and may require
some force to lift it up and off. Once dislodged from the phone, the front panel it will NOT be
reused.
Reassembly
1. See Figure 2. Install supplied keypad mounting panel (A) with eight supplied PPHTF #4
× ¼-inch
screws (B) as shown in Figure 2. Make sure that screws are uniformly tightened in a crisscross
pattern to ensure even pressure with the phone front panel gasket.
2. Press keypad seal (C) into the keypad mounting panel grid (A). Make sure that keypad seal numbers
are in the correct orientation with the phone front panel. Verify that each key position of the seal is
seated completely in each grid square and around the standoffs on the keypad mounting plate.
3. Place keypad spacer plate (D) over the keypad seal and standoffs on the keypad mounting panel.
4. Unscrew the two ¼-inch hex standoffs mounted to the phone front panel. Place one nylon washer (E)
under each standoff and screw the standoffs back into position on the phone front panel.