GAI-Tronics 12613-001 Keypad Seal Kit for 246C, 256C, 246-001 and 256-001 User Manual
Page 3
Pub. 42003-230A
M
ODEL
12613-001
K
EYPAD
S
EAL
K
IT
Page:
3 of 3
f:\standard ioms - current release\42003 kit manuals\42003-230a.doc
04/10
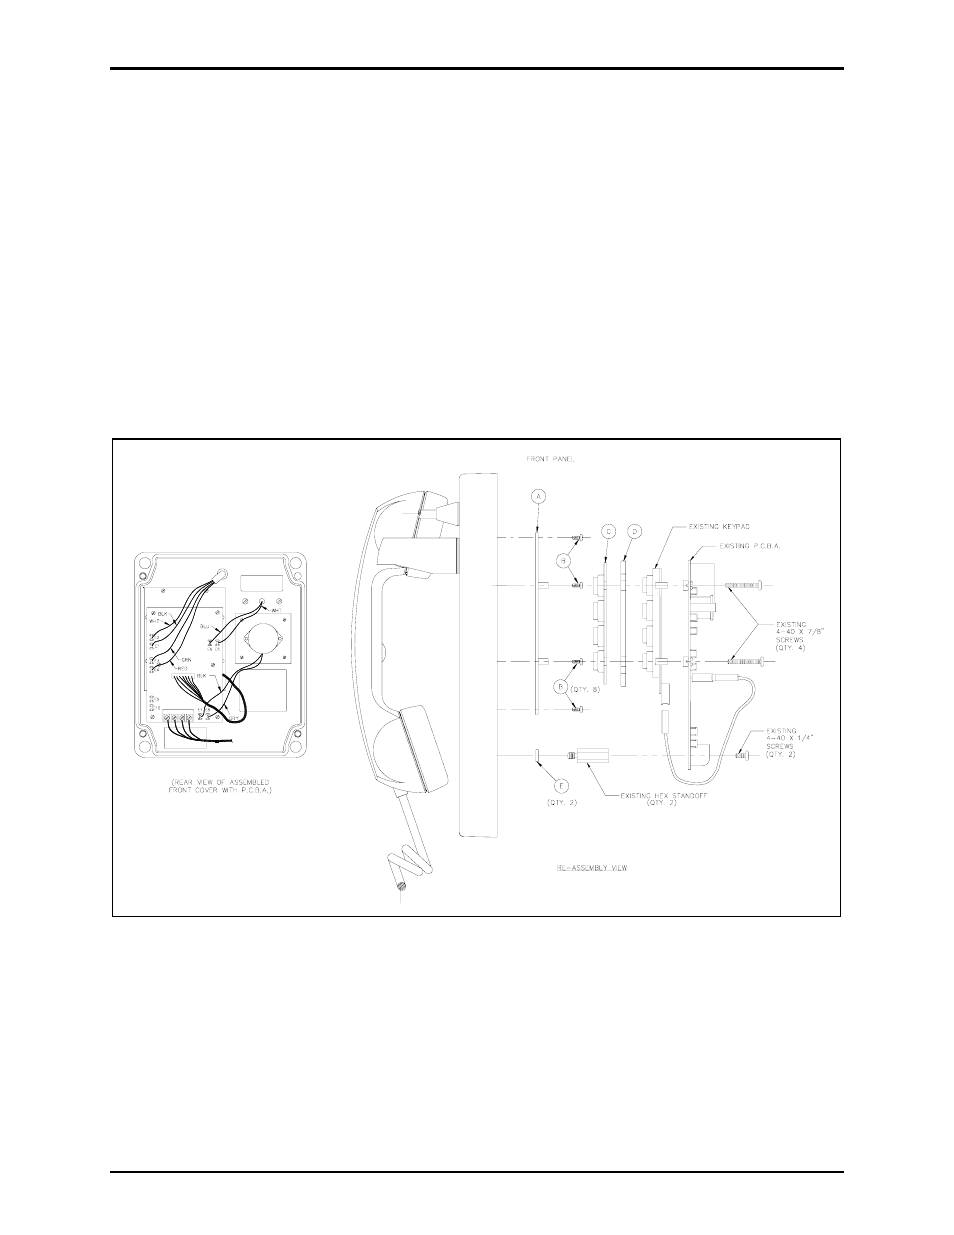
5. Place keypad onto keypad spacer plate.
6. Carefully flip PCBA back over and into place lining up the four long mounting screws through the
mounting holes in the keypad and into the keypad mounting bracket (A). Make sure all four screws
are engaged before tightening. Once they are all engaged tighten in a crisscross pattern to ensure
even pressure with the keypad spacer plate (D) and keypad seal (C).
7. Install the two 4-40
× ¼-inch screws from step 2 of the disassembly procedure.
8. Hold phone panel in upright position and press each key on keypad to verify that each button has
movement.
9. Check for any loose wire connections on the PCBA.
10. Connect field wiring from step 1 of disassembly procedure and screw the front panel to
enclosure/back box.
Figure 2. Reassembly View