Initial setup – Geist RAC User Manual
Page 7
7
Revision Date: 09/03/2014
The Configuration page allows you to assign the network properties or use DHCP to connect to
your network. Access to the unit requires the IP address to be known, so use of a Static IP or
reserved DHCP is recommended. The default address is shown on the front of the unit:
IP Address:
192.168.123.123
Subnet Mask:
255.255.255.0
Gateway:
192.168.123.1
Initial Setup
Connect the RAC unit to your computer using a crossover cable or hub/switch.
Windows XP
On your computer, go to “Start > Settings > Control Panel > Network and Dial Up
Connections”
Right click on “Local Area Connection” and select “Properties”
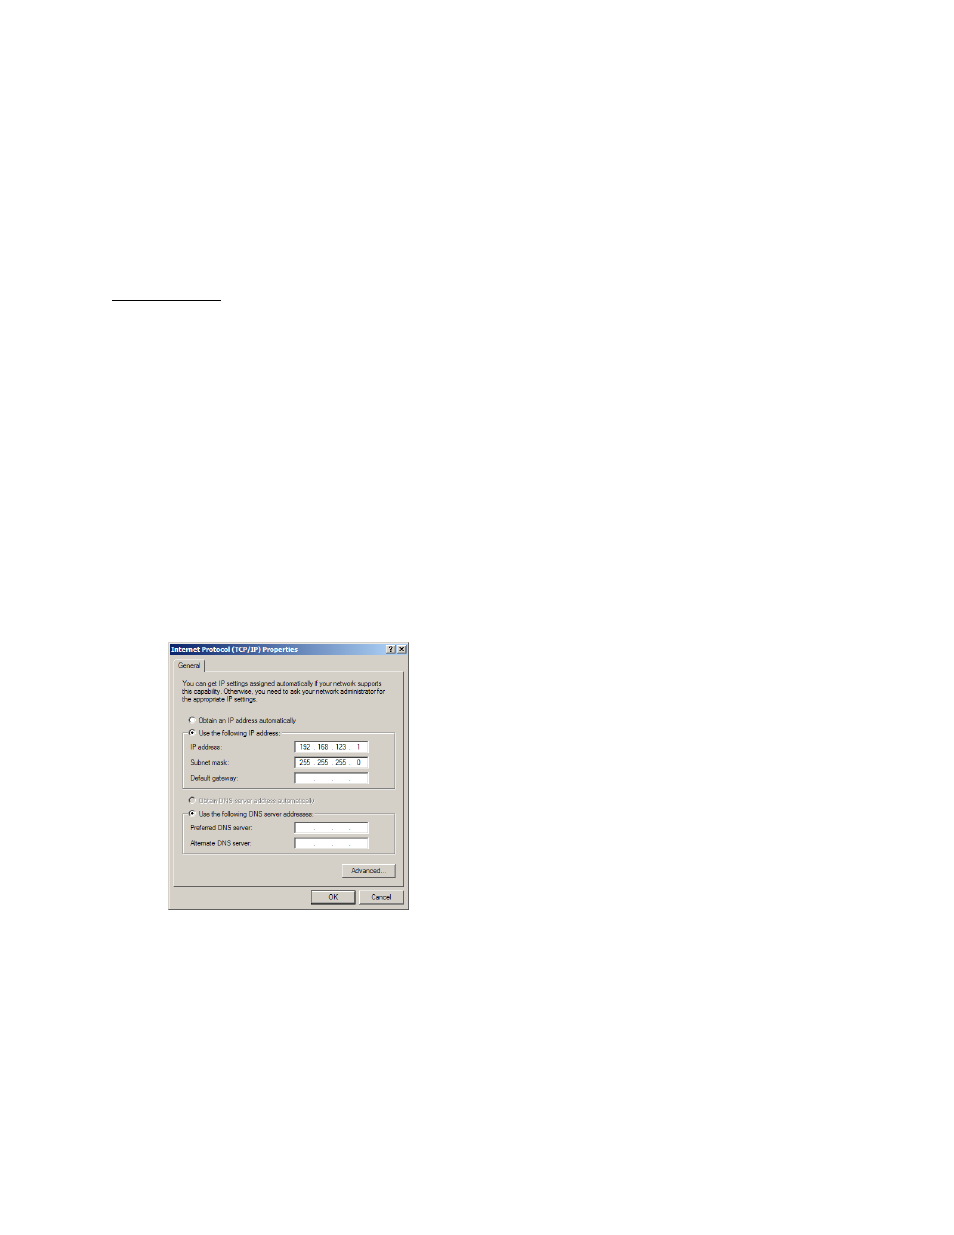
Select “Use the following IP address”. Use these settings:
IP Address:
192.168.123.1
Subnet Mask: 255.255.255.0
Gateway:
Leave blank
Click “OK” twice.
The unit should now be accessible in a web browser via the unit’s permanent IP address:
http://192.168.123.123/. See Unit Configuration (page 22) for details.
Figure 3: Windows XP network settings for initial setup
MacOS X Leopard
Open System Preferences via the Dock or the Apple menu.
Select “Network” under “Internet & Network.”
Select “Ethernet” from the list on the left side of the window and enter these settings on the
right side of the window: