Greenheck Clean-Out Port Kit (472428) User Manual
Assembly and installation instructions, Description, Installation
Phone: (715) 359-6171 • Fax: (715) 355-2399 • E-mail: [email protected] • Web Site: www.greenheck.com
Part #472428 • Clean-Out Port Kit • May 2009
Copyright © 2009 Greenheck Fan Corporation
Assembly and Installation Instructions
Please read these instructions carefully before attempting to assemble and install the product described.
Protect yourself and others by observing all safety information. Failure to comply with instructions could result
in personal injury and/or property damage!
®
Part #472428
Clean-Out Port Kit
Description
Designed to provide easy access to the ventilator wheel
through the windband for cleaning. Removable plug
and hardware included. Meets NFPA 96 Standards.
Installation
1. Shut off ventilator and lock out power source to
prevent accidental startup or operation.
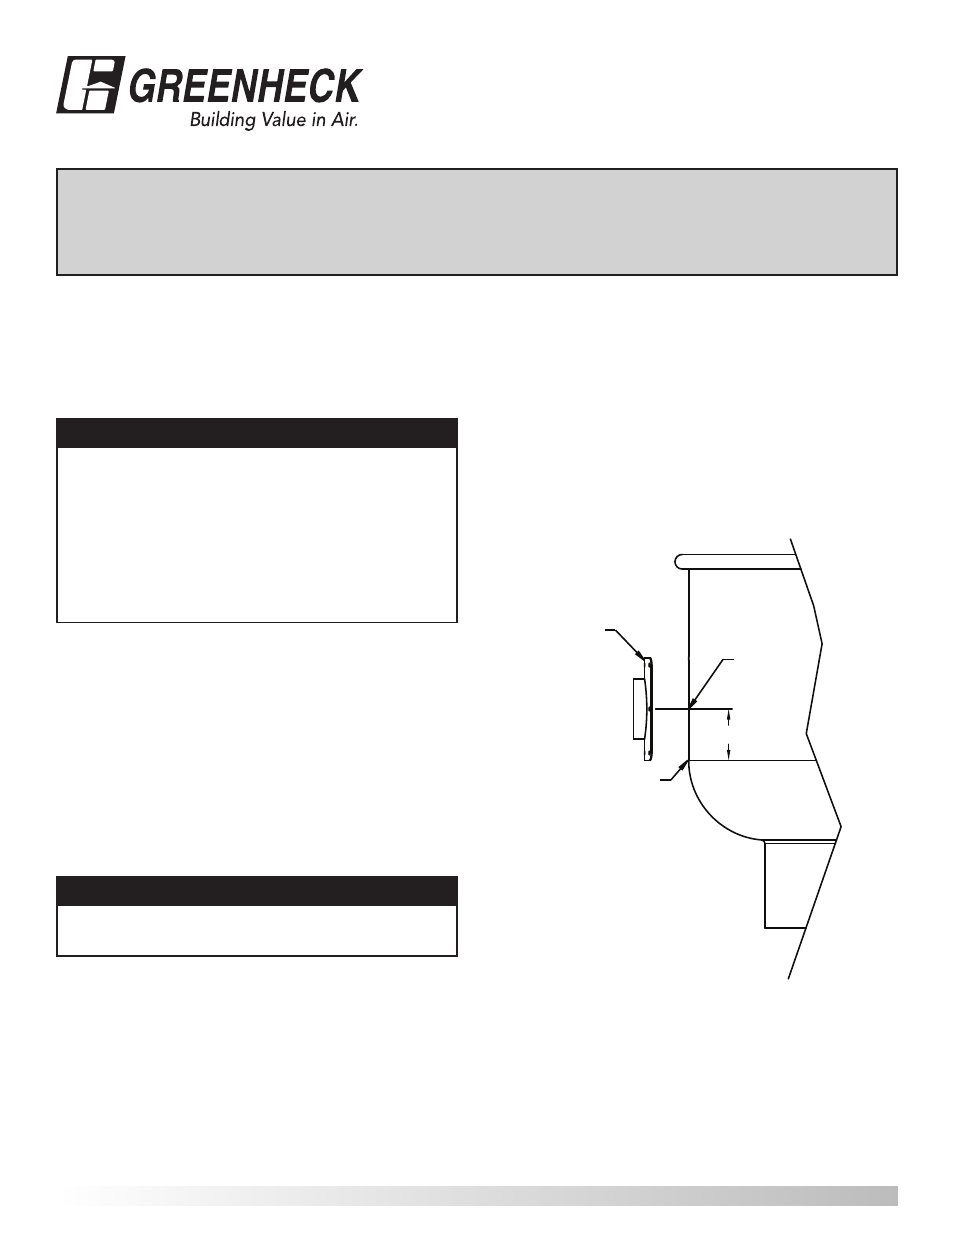
2. Locate and mark mounting position. Clean-out port
should be mounted 90 degrees left or right of drain
connection. Refer to Figure 1 for drilling location.
3. Drill a hole in the windband using a 4-inch hole
cutter or by conventional methods.
4. Remove the plug from the clean-out port plate.
5. Using the adhesive silicone supplied, generously
apply to the mating face of the clean-out port plate
being attached to the windband.
6. Place a clean-out port plate on the ventilator so that
the hole aligns with the hole in windband. Fasten
using (8) sheet metal screws provided. Using a
disposable cloth, clean up excess adhesive around
exterior and interior edges filling in all voids between
windband and clean-out port plate.
7. Let cure for a minimum of 15 minutes before
cleaning.
8. Reinsert plug into the clean-out port plate prior to
restarting ventilator.
Note: No repair parts available.
CAUTION
Automatically Operated Device: To reduce the
risk of injury, disconnect from power supply before
servicing. Do not depend on any switch as the sole
means of disconnecting power when installing or
servicing the fan. Always disconnect, lock and tag
power source before installing or servicing. Failure
to disconnect power source can result in serious
injury. Motor may start without warning after thermal
protector trips.
CAUTION
When applying silicone, refer to installation
recommended by manufacturer.
START OF RADIUS
DRILL 4 INCH
HOLE HERE
3.5 INCH
CLEANOUT
PORT PLATE
P.O.BOX 410 SCHOFIELD, WISCONSIN 54476-0410
TITLE
DRAWN BY
ECO
B
ENG. REF.
DATE
SUPERSEDES
SCALE
CAD DRAWING NO.
YAKLOVICH
11/14/2003
1/4
CUBE-141/HP
CUBE-161/HP
----
Figure 1 - Clean-out port