Honestech Video Editor 7.0 User Manual
Page 17
17. Video Editor 7.0
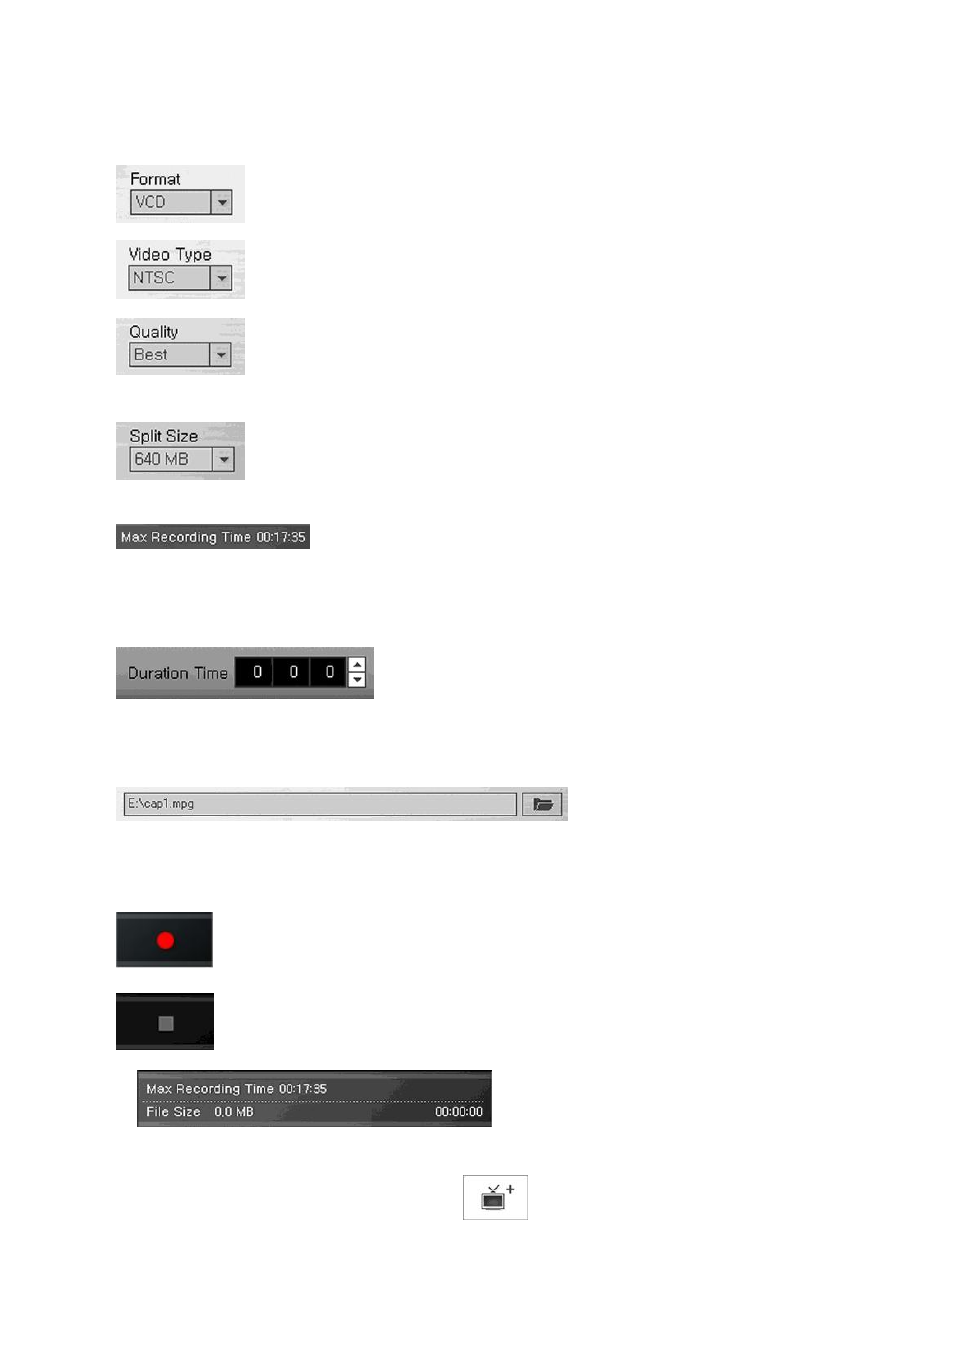
1. Select video format. (VCD / SVCD / DVD)
2. Select video type. (NTSC / PAL)
3. Select video quality. (Best/Good/Normal/Average
– higher video quality will
result in bigger file size)
4. Split Size takes the guess work out by automatically splitting the file size of
the captured video according to the format and capacity of the disc capacity
you are planning to burn the movie to. The output files are partitioned
according to the capacity of the disk to be burned (CD/DVD).
5. The maximum recording time is determined depending on the output
format and the available space on your hard drive. Files cannot be created which exceed this time.
(This is ideal for monitoring and recording activities at home while you are away for a short period
of time. Not recommended for an extended period of time)
6. Set the recording duration time. If you know the length of
the source video, y
ou don’t have monitor the entire capture
process from beginning to the end. By setting the duration
time, and Video Editor 7.0 will record for the amount of the time set and then stop automatically.
If you do not set a recording duration time, the recording will continue until you manually stop it.
7.
Specify the location where the capture video will be saved. You can also change the file name to
help identify your video clip better.
8. Click this button to start recording/capturing
9. Click this button to stop the recording/capturing.
10.
Displays the status of the recording depending on your recording duration time, and/or the maximum
recording time.
To capture from devices such as TV, click the button. This will open the capture option
screen in the left panel as shown below.