Replace the power cord (csa), Powermax30 – Hypertherm Powermax30 Service Manual User Manual
Page 66
MAINTENANCE
powermax30
Service Manual
3-27
5. Route the connector end of the new work lead through the hole in the endcap and then through the retaining
nut.
6. Tighten the nut onto the strain relief to hold it in place.
7. Attach the work lead to the power board at J22 using the screw and washer that you removed in step 3. The
torque setting for this connection is 20 inch-pounds (23.04 kg cm).
8. Replace or realign the end cap.
9. Being careful not to pinch any of the wires, replace the Nomex barrier and slide the cover back onto the power
supply. Make sure that the bottom edges are in the tracks.
10. Position the handle over the holes in the top of the cover, then use the 2 screws to secure the cover.
11. Reconnect the electrical power and the gas supply.
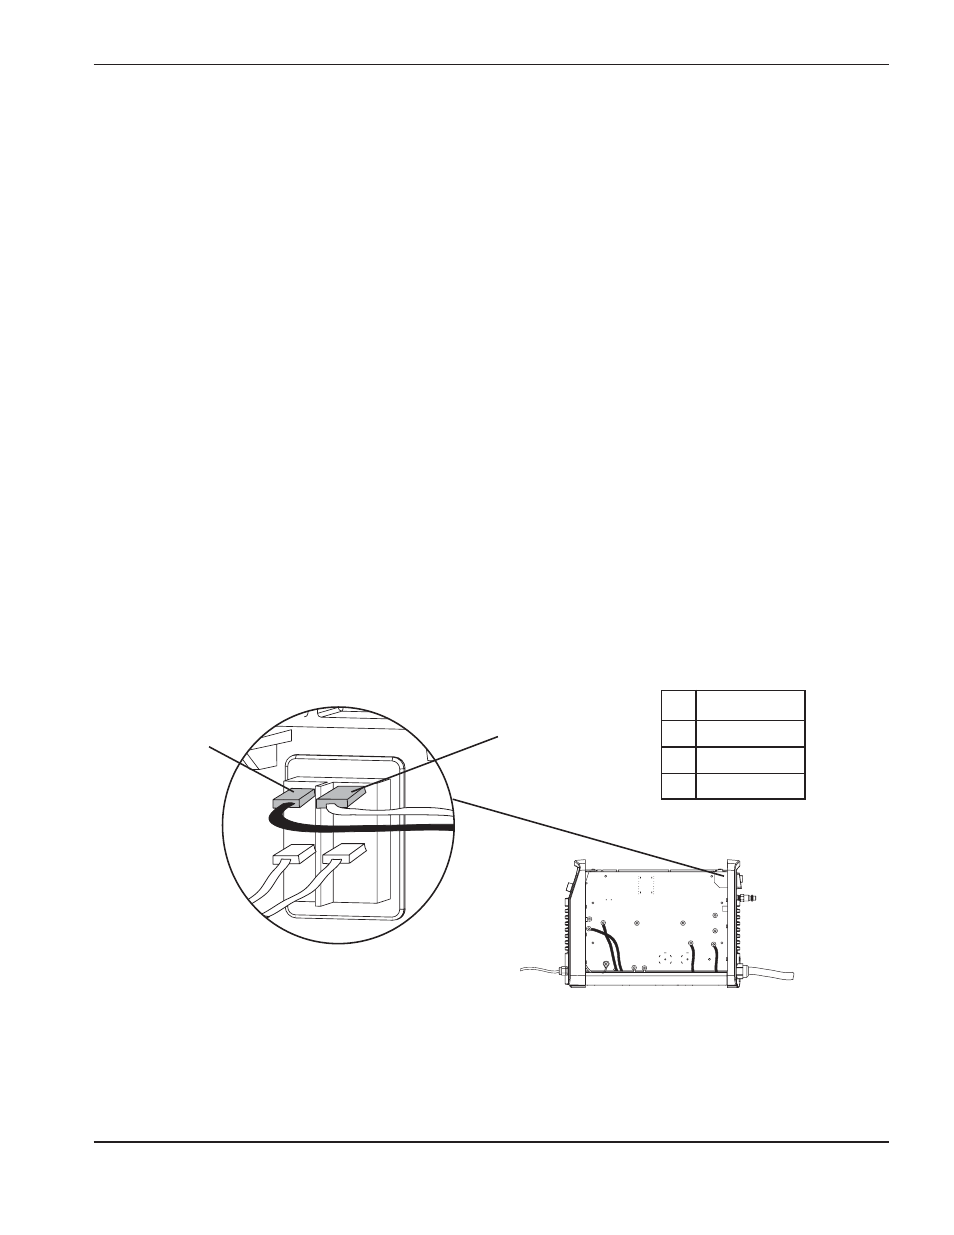
Single-phase
CSA unit
L
Black
N
White
PE
Green
L
Black wire
N
White wire
Replace the power cord (CSA)
1. Turn OFF the power, disconnect the power cord, and disconnect the gas supply.
2. Remove the 2 screws from the handle on the top of the power supply. Remove the handle and then lift the
cover off the power supply. Remove the Nomex barrier that protects the power board.
The power cord has a black wire and a white wire that connect to the power switch, and a green ground wire
that connects to the heatsink.
3. Remove the rear endcap or gently tilt it away from the power supply.
4. Carefully pull the connector for the white wire away from the power switch to disconnect it. You can use
needlenose pliers or a straight screwdriver to ease it off, if necessary.
5. Remove the black wire the same way.
6. Remove the screw that holds the green wire to the heatsink. A notch in the power board provides access to the
screw.
7. On the outside of the power supply, loosen the strain relief retention nut so that the wires move freely. If you
will replace the strain relief, use an adjustable wrench to unscrew the nut on the inside of the power supply as
well.