Go no go go no go – Infloor Crimp Fittings User Manual
Page 5
~ 4 ~
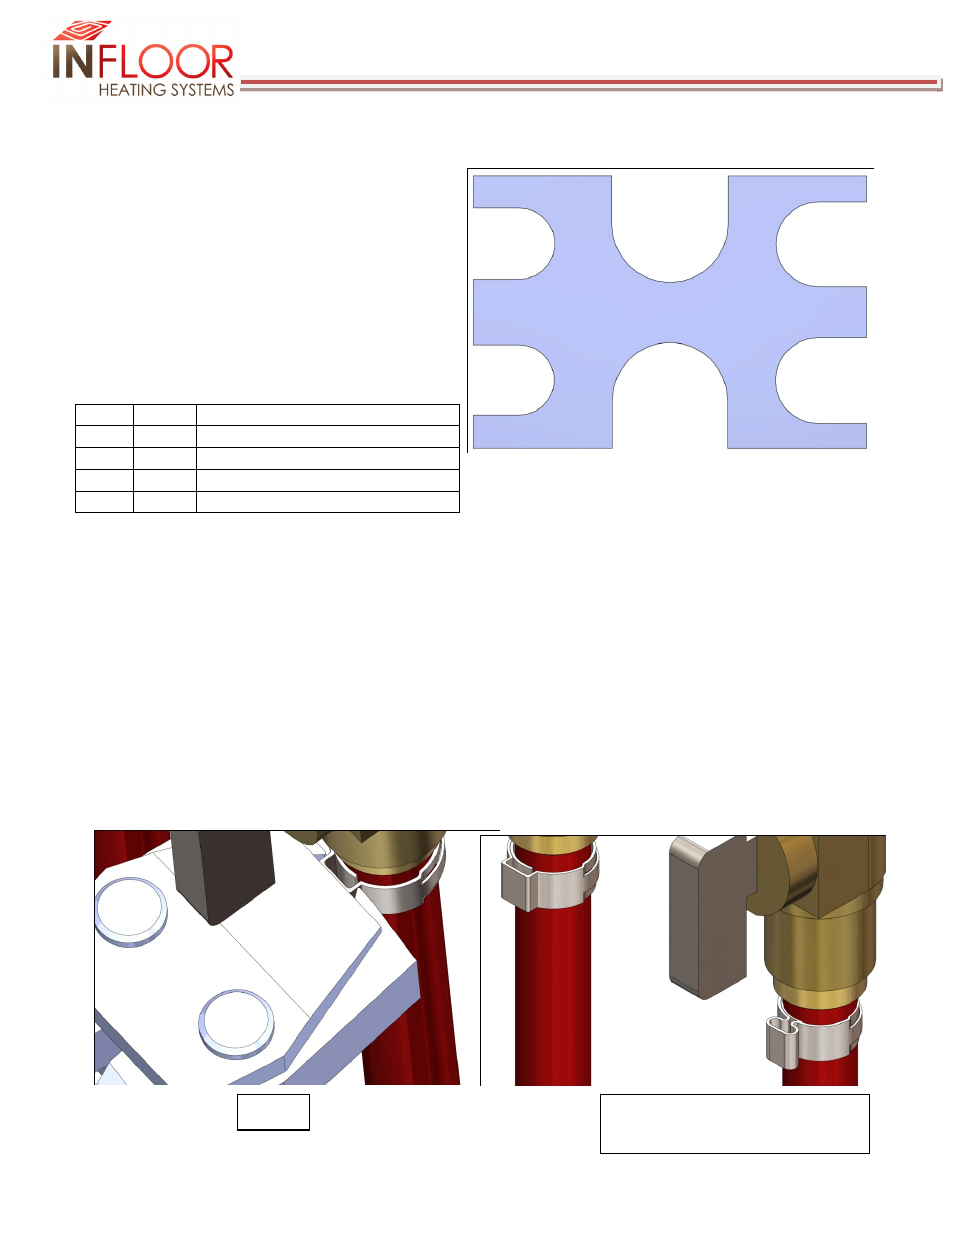
Checking the Crimp Joint
A tool called a ‘Go‐No‐Go Gage” is included with the
crimp tools. It has three different sizes of slots to
check if the crimp ring has been crushed enough, or
too much. To use the gage, slide it over the crimp
ring after it has been crimped in place. Be sure to
not measure the bump in the crimp created where
the jaws meet. Use the table below to determine
the status of the joint.
Go
No Go Status
Yes
No
Proper Crimp
No
No
Bad Crimp – Tool set too loose
Yes
Yes
Bad Crimp – Tool set too tight
No
Yes
Not possible ‐ remeasure
If the tool needs adjustment, follow the instructions that came with the tool for proper adjustment. It is normal
for tools to wear as they are used, so be sure to check all joints. Joints may not leak at first, but over time can
leak if the crimp was not done properly. If a crimp is too tight, the only solution is to cut the tubing and the
crimp ring out and redo it. For crimps that were not tight enough, the tool can be readjusted and aligned the
same way on the fitting as it was the first time and the crimp tightened.
Using Clamp Rings
Clamp rings have the distinct advantage that one crimp tool will work for all sizes of tubing. To use the clamp
rings, slide the ring over the PEX tubing and then push the PEX onto the barb fitting. Note that the PEX fits tight
over the barb fitting. Position the clamp ring so that is about 1/8” below the bottom of the fitting. Using the
crimp tool, squeeze the protrusion on the clamp ring until the tool stops and remove the tool. See the first two
steps above for the crimp ring for how the clamp ring is to be positioned.
Go
No Go
Go
No Go
Step 3
Step 4 – Note difference between
a new and crimped clamp ring