Ivoclar Vivadent CS User Manual
Page 26
26
7.3 Test programs
Press the the key ‘Settings’ and select the desired test program by
using the Cursor-keys.
Vacuum pump test program:
With this program, the vacuum performance of the furnace vacuum
system can be automatically tested. For that purpose, the achieved
(minimum) pressure in mbar is measured and indicated. If the
pressure value is below 80 mbar, the vacuum performance of the
system is adequate.
Heating muffle test program
With this heater test, the quality of the heating muffle can be auto-
matically tested (duration approximately 7 minutes). The heating
muffle test should only be conducted with the firing chamber empty,
since any additional item in the firing chamber (e.g. firing tray)
influences the result. Please run the heating muffle test program
immediately after switching on the furnace and before starting the
actual firing procedures. If the furnace is too hot, an incorrect
heating muffle quality will be indicated. If the quality of the heating
elements drops below 50%, changing the heating element is
strongly recommended.
Keypad test program
With every keystroke a short beep sounds. The keypad test is ended
by pressing the ESC key.
Cleaning program
The heating muffle is ‚cleaned‘ using the cleaning program (duration
approximately 17 minutes).
7.4 Stand-by
We recommend keeping the furnace head closed, especially if the
temperature drops below 150 °C (302 °F).
7.5 Dehumidification program
The condensation of water in the insulation of the firing chamber
and the vacuum pump will result in a lower vacuum and thus
impaired firing results. For that reason, the furnace head should be
kept closed when the furnace is switched off, in order to prevent the
absorption of humidity. Start the dehumidification program if
required (humidity in the insulation).
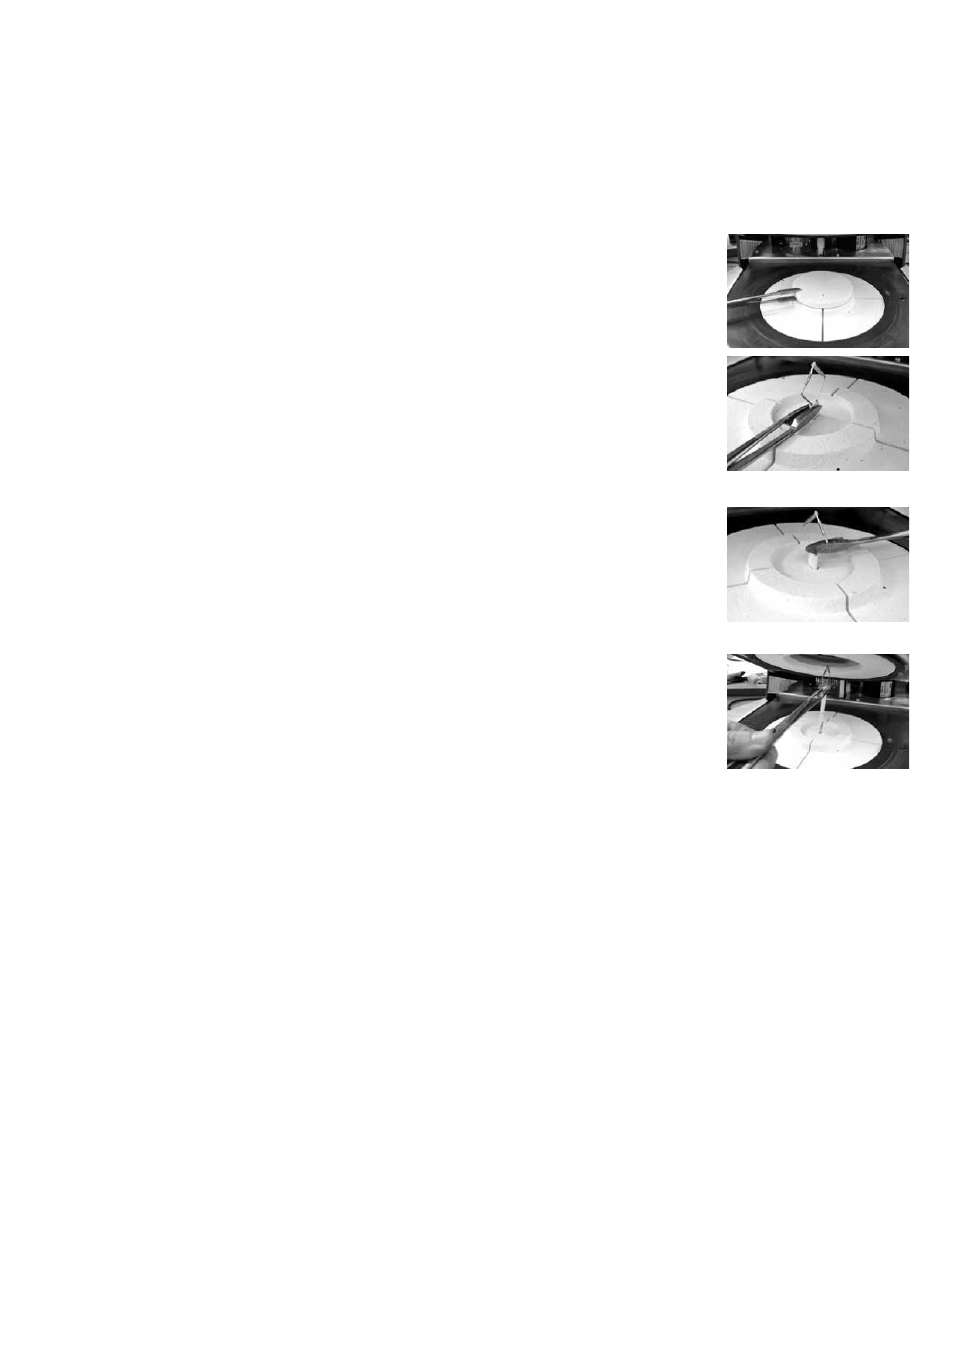
7.6 Temperature calibration
1. Select the calibration program.
2. Remove the firing plate from
the furnace using the furnace
tongues and place it on the
cooling tray.
3. Carefully grip the upper part
of the ATK 2 using the furnace
tongs (Caution: Fracture risk of
the ceramic) and insert it into
the holes designated for this
purpose until it snaps into
place. The orientation of the
calibration sample (left or right)
is not important.
4. If necessary, use the furnace
tongs to apply slight pressure
to the center of the calibration
base until the calibration
sample clicks into place.
Observe the corresponding
markings.
5. Start the calibration program
6. At the end of the program,
open the furnace head and
carefully remove the ATK 2
using the furnace tongs and
place it on the cooling tray to
allow it to cool.
7. Replace the firing plate using the furnace tongs.
8. Close the furnace head and select a firing program.
9. The ATK 2 can only be used once. Use a new calibration set for
the next calibration procedure.