Kemppi Protig 410 User Manual
Page 20
EN
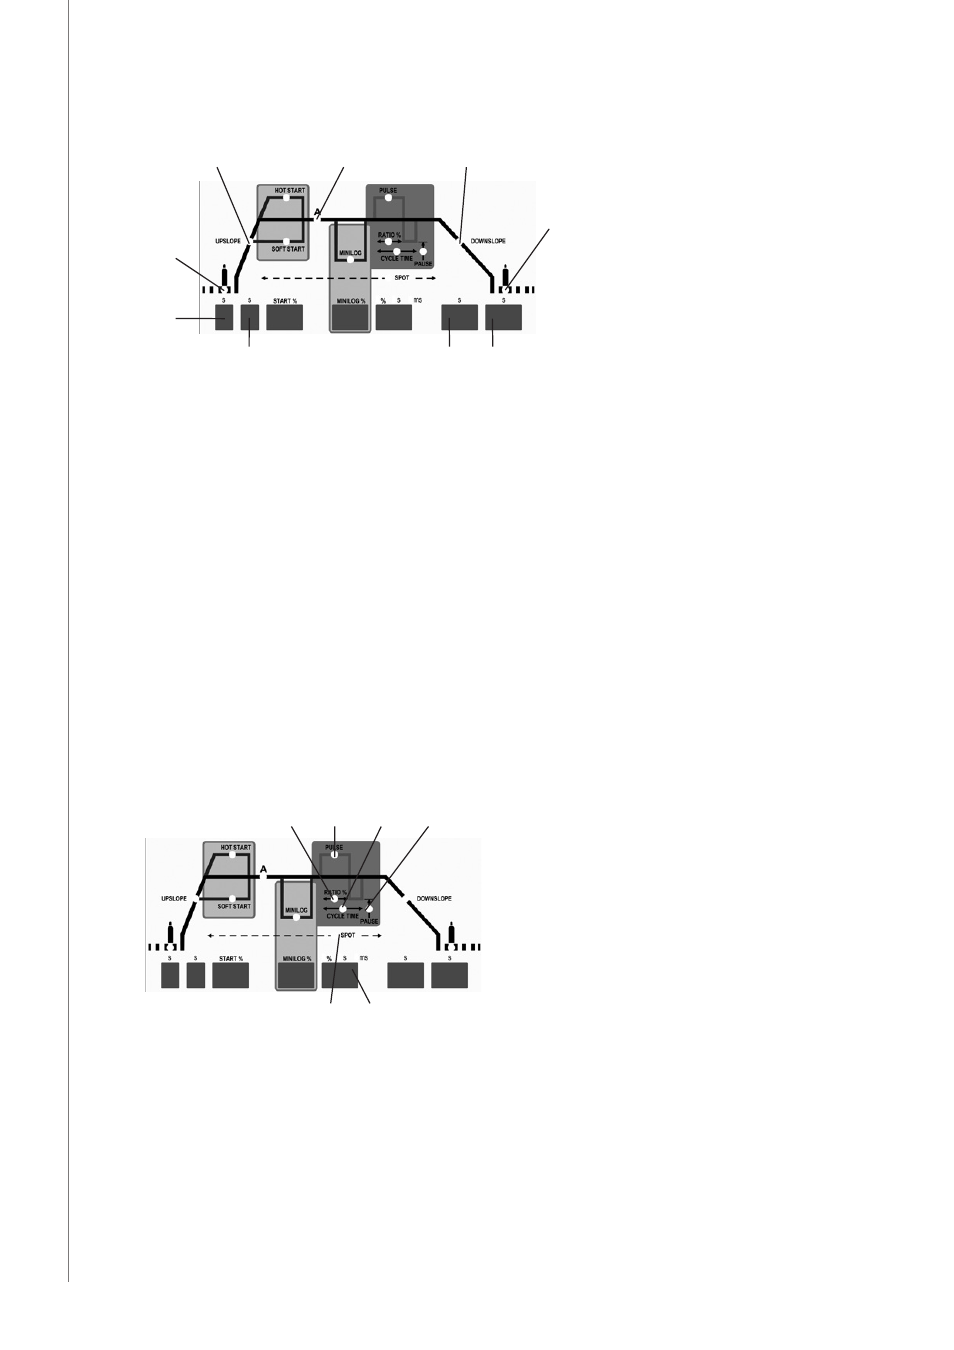
3.2.3 Controls for continuous welding
H22
H23
H24
H25
P25
P24
P22
H21
P21
1.
Select Demo, 2-function switch operation and continuous welding S24.
2.
Adjust welding current with parallel control S29, or go over to adjustment for welding
current with arrow keys S27 and adjust current with +/- keys S28. Reading will be visible
in display P23.
3.
Go with arrow keys S27 to pre-gas point H21. Adjust pre-gas time P21 with +/- keys S28.
4.
Go to up-slope point of current H24. Adjust up-slope time P22 with keys +/-.
5.
Go to down-slope point of current H24. Adjust down-slope time P24 with +/- keys.
6.
Go to post gas point H25. Adjust post gas time P25 with +/- keys.
By pressing the torch switch you can go through the whole operation cycle and after that go
to welding by selecting the ignition mode. You can use as operation models of torch switch
also the 4-function and Minilog operations.
Note the up- and down-slope times changing with current control and adjust when necessary.
If arc is not ignited within 4 sec from start, the unit will automatically go to stop without
timing.
Values of up- and down-slope times change automatically, when set values of welding current
are changing. Due to automatics you don`t need to change times in many welding cases,
when you change current.
3.2.4 Controls for pulsed TIG welding
H32 H31 H33
H34
P31
H35
1.
Select TIG welding, Demo, 2-function switch operation and pulsed welding S24.
2.
Adjust welding parameters as above in point: ”Controls for continuous welding”.
Automatics of unit set pulse parameters automatically according to start values in
storage. Automatics of unit calculate a new average value for current, when pulse values
are changed. Automatics make the operations in that way easier that you need not
always adjust again other parameters of pulse, when pulse or mean current value is
changed.
3.
Adjust pulse values in turns by going with arrow keys S27 to required adjustment point:
pulse current H31, pulse ratio H32, cycle time H33 and pause current H34. Control values
can be seen in display P31.
18
Pr
oT
ig 410 H
yundai / © Kemppi O
y / 1135