Kreg CT6066 Screw Gun & Hose Set for Framing Table User Manual
Screw gun kit, Assembly instructions
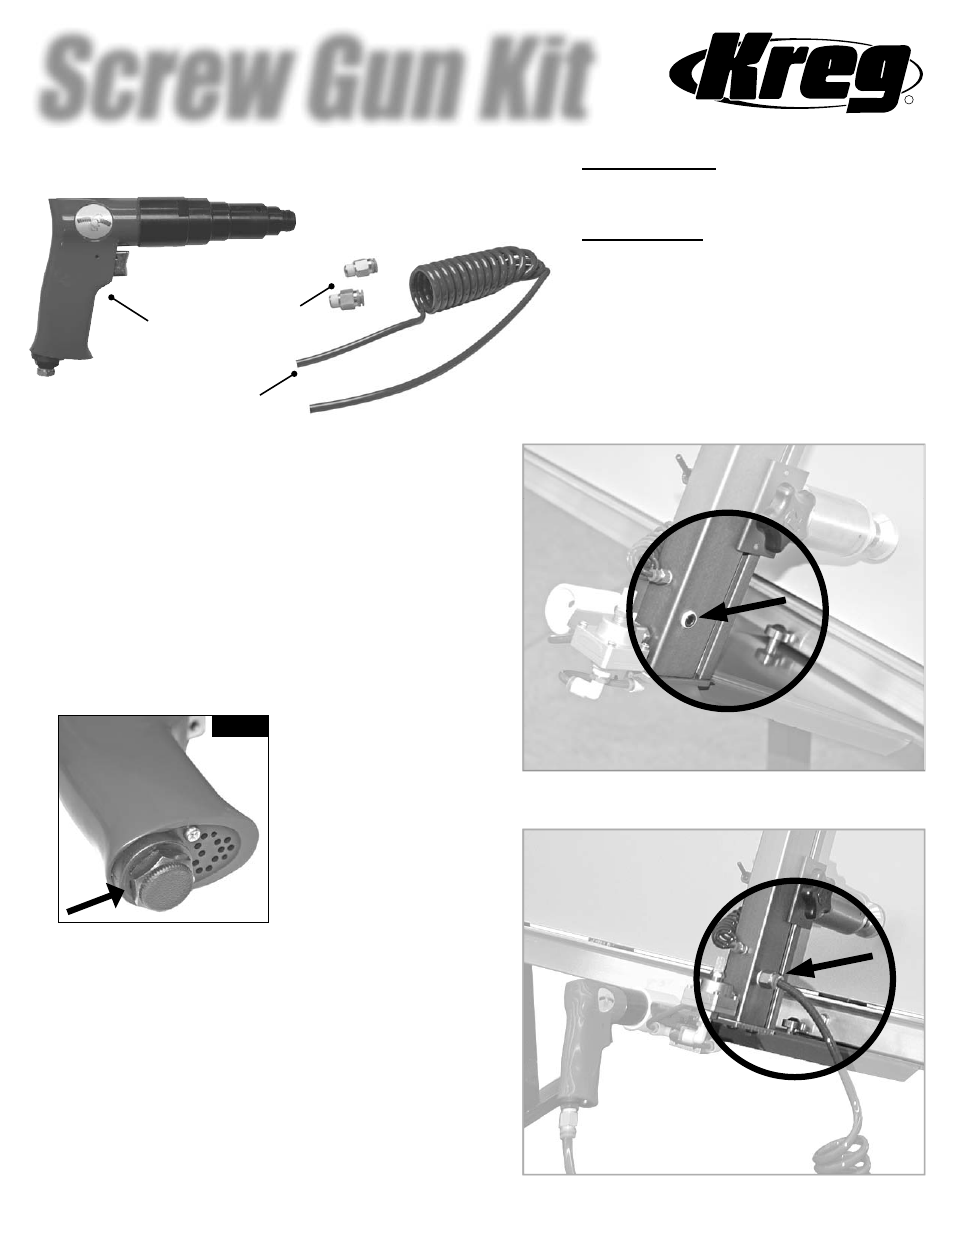
Screw Gun Kit
Assembly Instructions
R
Locate the 1/4” NPT pipe plug on the lower right
hand side of the main rail. Remove the pipe plug
using a 1/4” allen wrench. Once the pipe plug is
removed, thread one of the supplied fi ttings into the
hole. (Note: Thread sealer is already applied to the
fi tting, no other sealant should be needed. Tighten
the fi tting using a 11/16” socket or wrench. Do not
over tighten!)
Remove the screw gun from the box and locate the
black plastic (see Fig. 1)
cap on the bottom of the
handle of the screw gun.
Remove this cap and
install the second air fi tting
supplied with this kit into
the screw gun using a
11/16” socket or wrench.
Once both fi ttings are tight, install the blue
fl excoil hose to both the main rail and the gun.
This is done by simply pushing the hose into the
fi tting until you feel it seat in the fi tting. Now install
the 6” driver into the gun and you are ready to start
using your screw gun.
1.
3.
Pipe plug where the hose and gun will attach.
Hose and gun attached to the main rail.
Item# CT6066
Screw Gun
Hose fi ttings
Coil Hose
Tools Needed:
• 1/4” Allen Wrench
• 11/16” Socket or Wrench
Kit Contains:
• (1) Screw Gun
• (1) Coil Hose
• (2) Hose Fittings
• (1) 6”, #2 Square Driver
• (1) Screw Gun Operating Instructions
2.
Fig. 1
If you have any questions regarding these
instructions, please call 1.800.447.8638.
5/2010 CT6065
Rev B
WARNING: This product contains one or more
chemicals known to the State of California to cause
cancer and birth defects or other reproductive harm.
Wash hands after handling.