Trim group function addition, Zero trim function added, Hs-p82 – Teac HS-P82 Addendum V1.20 User Manual
Page 8: ª setting trim groups, ª clearing a trim group
HS-P82
8
TASCAM HS-P82
Trim group function addition
This new trim group function allows you to adjust input trim levels of
multiple channels at the same time with one input trim knob set as
the master
NOTE
Along with the addition of the trim group function, the
Function
Key Assign
item on the
RC-F82
page of the
REMOTE SETUP
screen has a new
MIXER (TRIM GROUP)
setting.
ª Setting trim groups
To use trim group operation, you must assign one channel as the
master of the group and other channels as slaves.
There are four groups, and multiple combinations are possible.
NOTE
• You cannot assign a channel to more than one group. The channel
is always assigned to the last group selected.
• Only the input trim knob of the designated master can be used to
adjust the input level. Turning the knobs of the slaves will have no
effect.
1 Press the MENU key to open the Menu Screen, and press the
MIXER SETUP
button to open the
MIXER SETUP
screen.
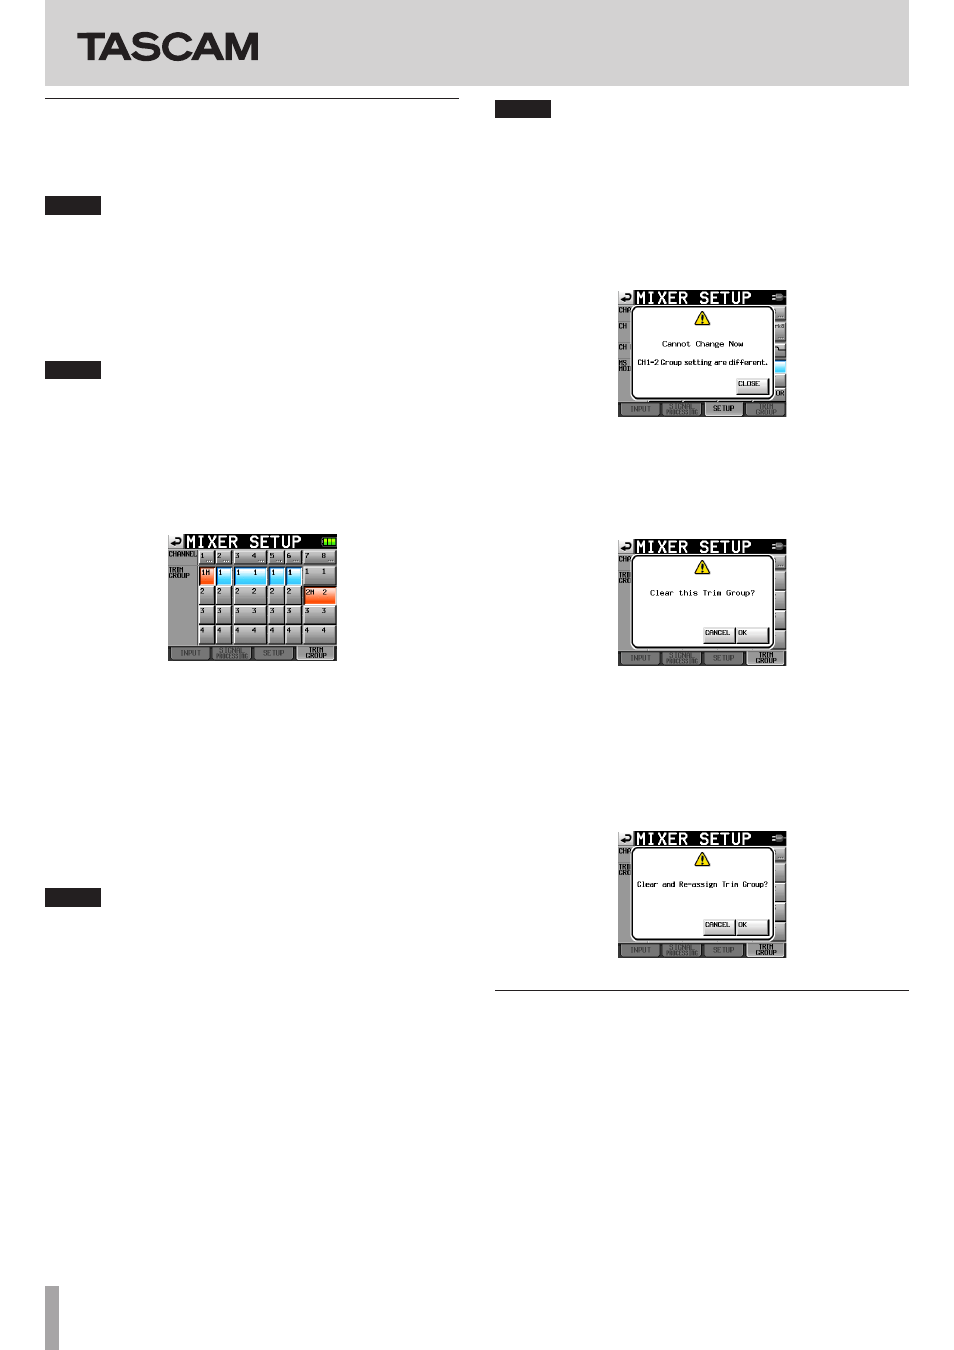
2 Touch the
TRIM GROUP
tab to open the
TRIM GROUP
page.
The
TRIM GROUP
item contains buttons numbered
1
–
4
for
each channel. Touch the corresponding buttons to assign
each channel to groups 1–4.
In this example, we will make channel
1
the master for group
1 and channels
2
,
3
-
4
(link),
5
and
6
into slaves.
3 Under the channel that you want to make the master, touch
the number button (
1
–
4
) for a group that does not have any
channels assigned to it yet.
The letter
M
appears to the right of the number and the
button becomes red.
In the example, touch the
1
button beneath channel
1
.
1M
appears and the button becomes red.
NOTE
The first channel assigned to a group becomes its master. The master
cannot be changed afterwards. If you want to change the master,
clear the grouping and start again, assigning the channel that you
want as the master to the group first.
4 Touch the group number button under the channel that you
want to make a slave. The button becomes blue.
Slaves can be channels of numbers lower than the master
and channels that are not consecutive.
For example, if you press the
1
button under channel
2
, that
button becomes blue. Likewise, you can press the
1
buttons
under channels
3
-
4
,
5
and
6
and they will also become blue,
indicating that they are slaves.
5 By turning the input trim knob for channel
1
, you can adjust
the trim values for channels
2
,
3
-
4
,
5
and
6
together.
NOTE
• If the trim setting for any of the grouped channels reaches its
maximum or minimum value, continuing to turn the input trim
knob of the master in the same direction will have no further
affect on any of the channels. (The differences in values between
channels are preserved.)
• Channels cannot be linked if they are in different groups
(including when one is not in a group). Touching the button for
those channels in the
CH LINK
item will cause the following
pop-up warning to appear.
ª Clearing a trim group
To clear a trim group, touch the master button for that group
(the button that appears red and has the letter
M
next to the
group number).
A pop-up appears to confirm that you want to clear the group.
Touch the
OK
button or press the
DATA
dial to clear the group.
Doing this clears the group setting from the slaves (channels with
blue buttons) at the same time.
If you try to assign a channel that is a group master to another group,
a pop-up appears to confirm that you want to clear its group and
assign it to a different group. Touch the
OK
button or press the
DATA
dial to clear the previous group and assign the channel that had
been its master to the other group.
Zero trim function added
Turning an input trim knob to its minimum setting now results in
that channel being muted.
Each trim knob functions the same as before, but when it reaches its
minimum setting, the channel is muted regardless of the reference
level setting.