4 set-up and installation – Thinklogical MX48 Router Manual User Manual
Page 19
®
M X 4 8 R o u t e r P r o d u c t M a n u a l , R e v . F , D e c . 2 0 1 4
Page 15
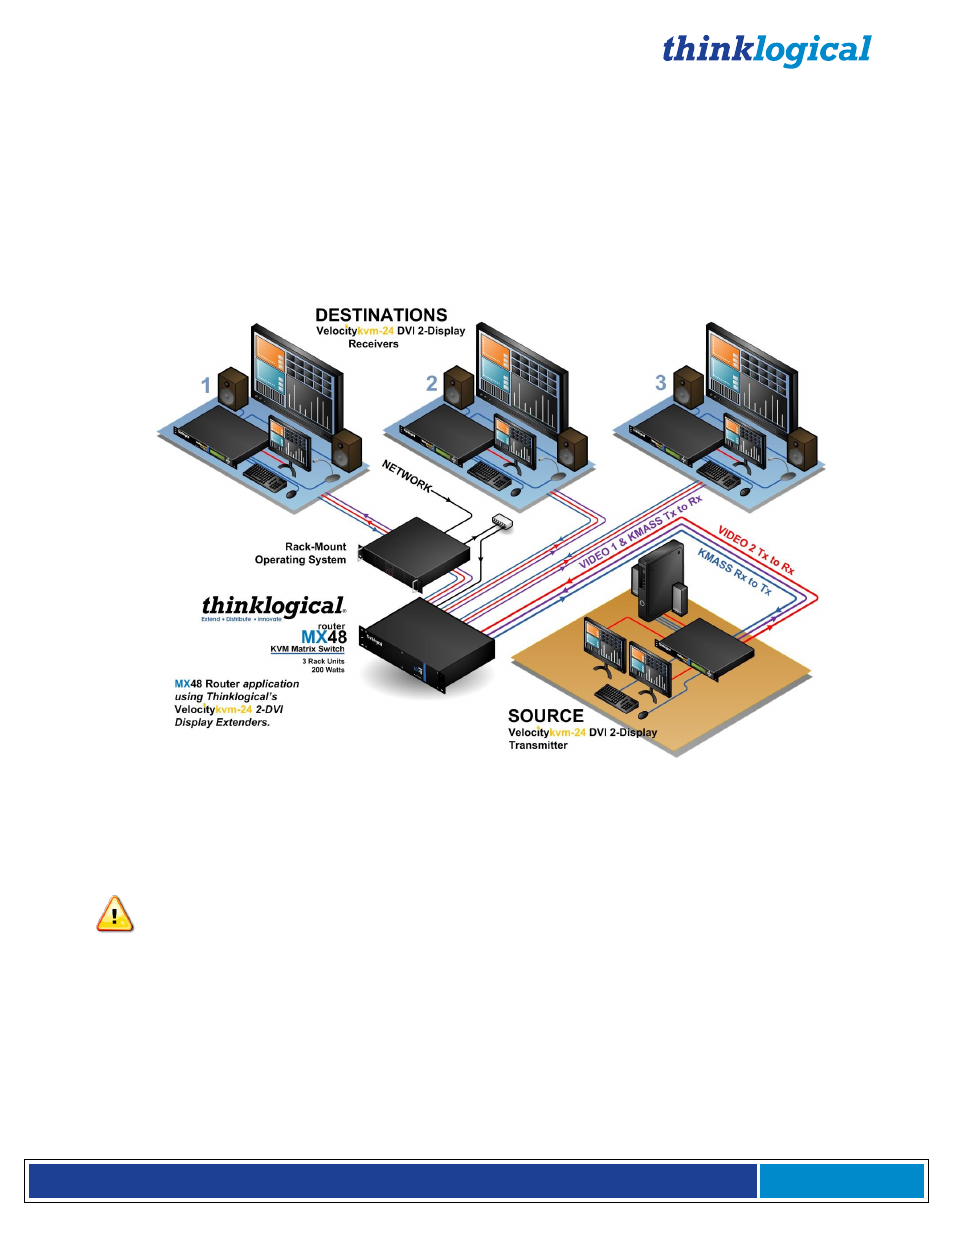
supplied to the unit. The Receiver then connects to the MX48 Receiver (Downstream) ports using fiber
(Multi-mode fiber for distances up to 1000m; Single-mode fiber for distances beyond 1000m).
Connecting to the Transmitter
The Transmitter serves as the Source (computer and video entities). Depending on your configuration,
your local KMASS devices (keyboard, mouse, etc) are first connected. The video sources (e.g.
computers) are then connected followed by any local video devices. Power can then be supplied to the
unit. The Transmitter connects to the MX48 Transmitter (Upstream) ports using fiber (Multi-mode fiber
for distances up to 1000m; Single-mode fiber for distances beyond 1000m).
Figure 13: Connecting Thinklogical VelocityKVM-24 Extenders to the MX48
4 Set-Up and Installation
Note: Insure that all thumb screws are finger tight so that all the modules are properly
held in the chassis.
1. Carefully remove the MX48 Router from its shipping container. Inspect the router to
make certain that no damage occurred during shipment.
2. All of the I/O cards are installed at the factory to meet the configuration. Insure that the
I/O cards are properly seated in the unit. All of the I/O cards have thumb screw retainers.
3. After checking the I/O cards, go to the bottom of the unit. There is a power supply located
in the bottom part of the chassis. Verify that the power supply is secure in the
chassis.
4. Located to the right of the power module is a fan tray. The fan tray has thumb screws
holding it into the chassis. Verify that the fan tray is secure. Cooling is accomplished by