JBL Synthesis SDP-25 User Manual
Page 14
-
14
-
JBL SYNTHESIS SDP-25
SPEAKER LEVEL
Before making any Speaker Level adjustments, first set the volume to a comfortable listening
level using a movie or musical selection you are familiar with, then use the Auto setting to make
certain that the speakers are properly connected. To do that, first navigate the highlight so
that the Test Signal Options appear. Then press the down Navigation button so that Auto is
highlighted and press Enter.
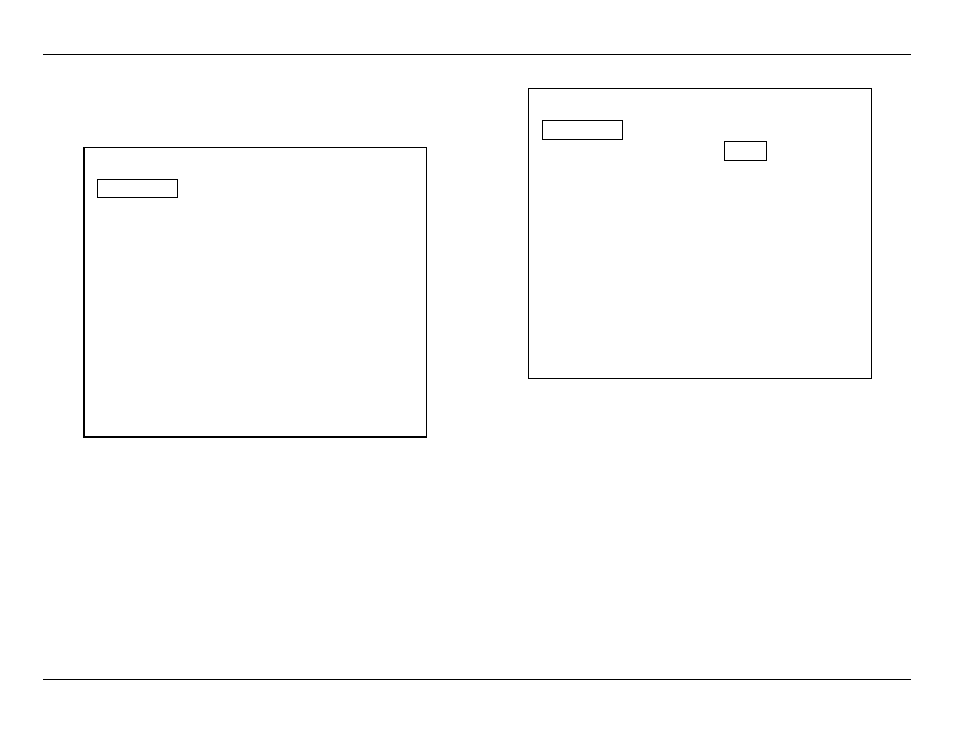
Speaker Level
Test Signal
Off
Front Left
0 dB
Center
0 dB
Front Right
0 dB
Side Left
0 dB
Side Right
0 dB
Rear Left
0 dB
Rear Right
0 dB
Height Left
None
Height Right
None
Subwoofer
0 dB
Back
Speaker Level
Test Signal
Test Signal
Front Left
Off
Center
Manual
Front Right
Auto
Side Left
Side Right
Rear Left
Rear Right
Height Left
Height Right
Subwoofer
Back
The on-screen menu will return to showing the output level settings and a test noise will circulate
around the room. As the highlight moves from one speaker location name to another verify that
the test noise is coming from the speaker name shown. If all speakers are properly connected,
proceed to adjust the levels. If the test tone for any highlighted speaker location does not
match the speaker the test noise is coming from, turn off your SDP and amplifiers and change
the wiring so that the speakers are connected properly. When this is done turn the SDP and
amplifiers back on and repeat the Auto test cycle to make confirm that the connections are
made correctly.
When all speaker positions have been verified the levels may then be adjusted.
It is essential that you adjust the level so that the output of each channel is identical as shown on
a sound pressure level meter or by using any of the “SPL Meter” apps available for smartphones or
tablets. When setting the levels make certain that the meter or app is set to display C-Weight/Slow.
Speaker Setup