LeMond RevMaster Pro User Manual
Page 23
Pg. 21
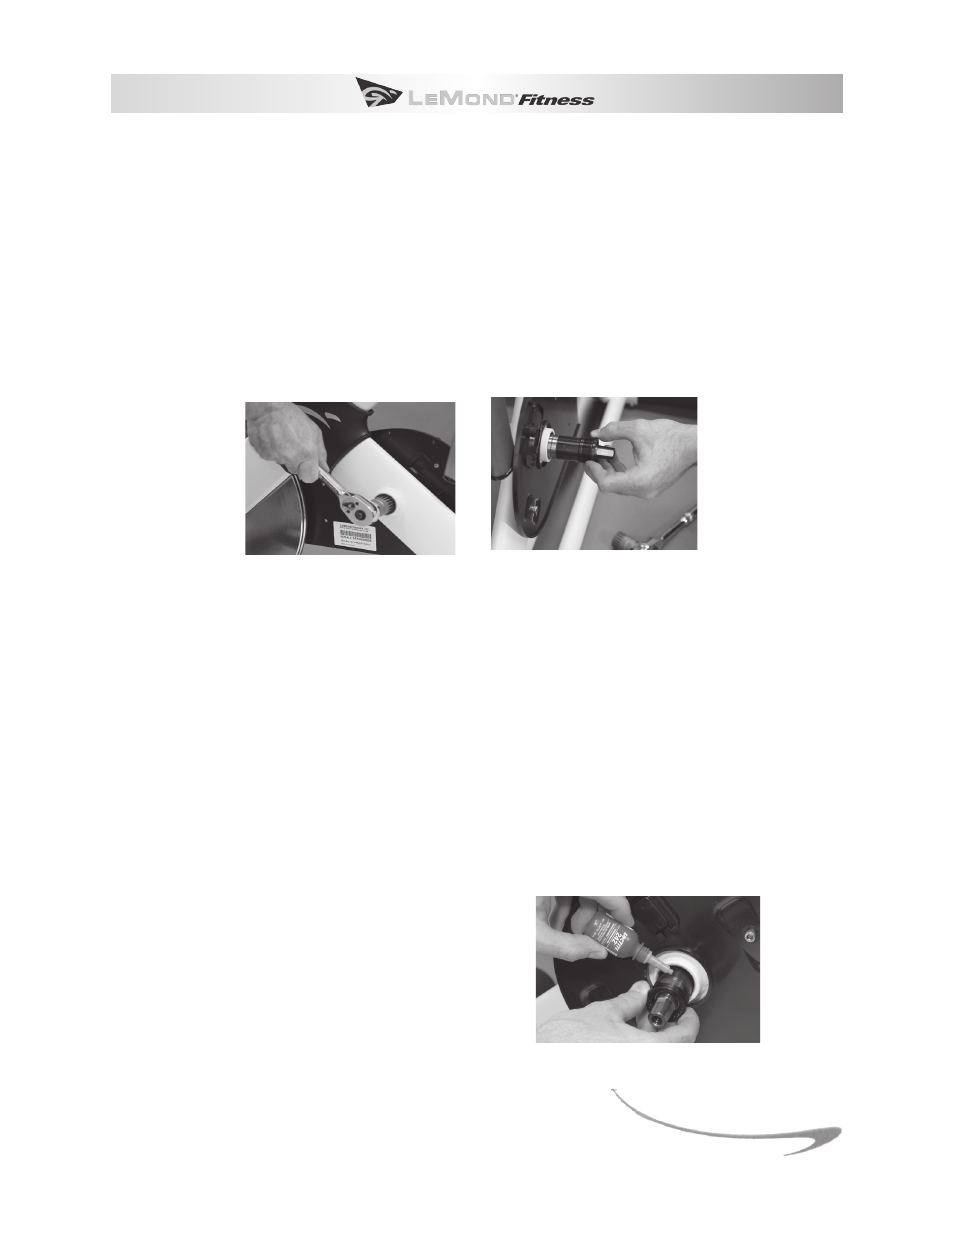
bottom brAcket beArinG Assembly
Use a Park BBT-22 or similar bottom bracket tool & blue medium 242 strength Loctite .
Removal
Remove the belt cover, drive belt and crank arms . Then remove the left bearing cup using the bottom
bracket tool by turning the cup counterclockwise . Loosen the right cup (reverse threaded) by turning
the cup clockwise until you are able to remove the right cup with the remainder of the cartridge assem-
bly from the frame .
Remove Leftside
Remove Rightside
Installation
Clean the bottom bracket threads in the frame . Set the left cup of the bearing assembly aside for now .
Apply a few drops of medium strength Loctite to the right bearing cup and insert the cartridge assem-
bly into the bottom bracket from the right side (drive side) . Carefully screw the right cup into the frame
with your hand by turning the cup counterclockwise (right cup is reverse threaded) while being cautious
not to cross the threads . Firmly tighten the right cup with the bottom bracket tool . Apply a few drops
of Loctite to the left bearing cup . Carefully screw the left cup into the frame with your hand by turning
clockwise while again being cautious not to cross the threads, and torque to 175 inch/lbs . If you do not
have a torque wrench, tighten the cup, but stop and twist the spindle with your hand periodically as you
go to assure that the cup is fully threaded into the frame but loose enough to allow the spindle to rotate
freely . If the rotation of the spindle feels rough or clunky loosen the cup and test again . Reinstall the
crank arms, drive belt and belt cover . Allow loctite to dry for 24 Hours before using the unit .
Use Loctite 242