350101-p2, Universal light fixture kit, Installing the light kit – Kichler 350101 User Manual
Page 3
2
Universal Light Fixture Kit
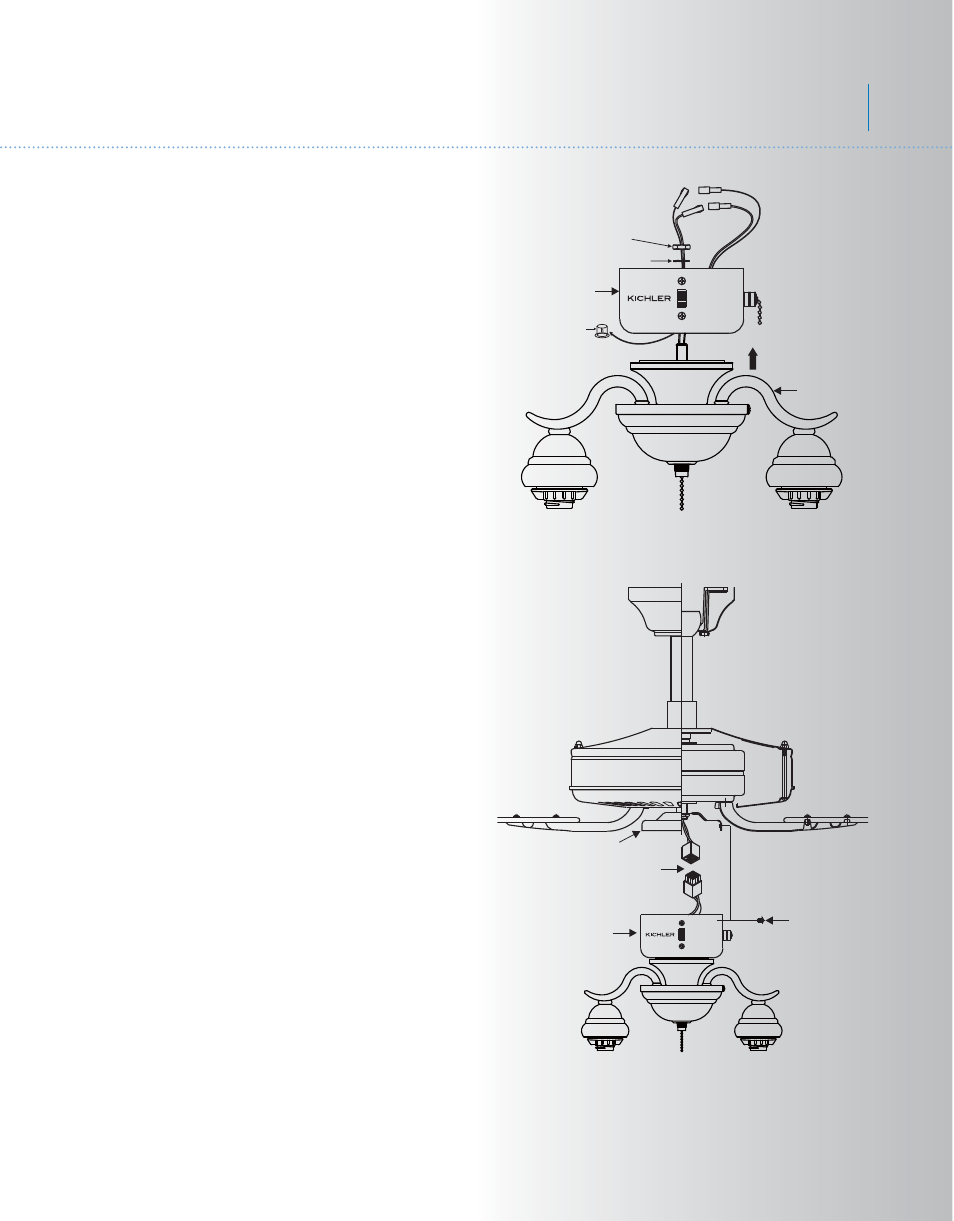
Fig. 2
Light kit
assembly
Square connectors
Screws
Mounting plate
o-o
-o-o
-o-o
-o-o
-o
Fig. 1
Light kit
Nut
Lock washer
Center
plug
Switch
housing
3. INSTALLING THE LIGHT KIT
1. Remove and discard the center plug from
the switch housing. Attach the light kit to the
switch housing by feeding the light kit wires
(black and white) through the hole in the
center of the switch housing, then screw the
light kit onto the switch housing.
Attach the nut & lock washer on the inside of
the switch housing making sure the light kit is
secure to prevent movement after installation.
(Fig. 1)
2. Locate the white and blue wires inside the
switch housing labeled FOR LIGHT.
3. Attach the wires from the light kit to the
wires inside the switch housing by pushing the
polarized connections together.
- White wire to White wire
- Black wire to Black wire
4. Raise and hold the light kit assembly close
to the mounting plate of the ceiling fan. Push
the square wire connectors together. (Fig. 2)
NOTE:
The square connectors are color
coded. Match the color coded sides of each
plug and push. They will attach
ONLY
when
matched correctly.
5. Carefully push all wires back into the switch
housing, then install the light kit assembly onto
the mounting plate with 3 screws provided. Be
sure to tighten all screws. (Fig. 2)