Sealey AK9635D User Manual
Electronic digital micrometer, Instructions for, Model no
AK9635D.V2 - 1 - 170108
INSTRUCTIONS FOR
ELECTRONIC DIGITAL MICROMETER
MODEL NO:
AK9635D.V2
Thank you for purchasing a Sealey product. Manufactured to a high standard this product will, if used according to these instructions and properly main-
tained, give you years of trouble free performance.
IMPORTANT
PLEASE READ THESE INSTRUCTIONS CAREFULLY. NOTE THE SAFE OPERATIONAL REQUIREMENTS, WARNINGS, AND
CAUTIONS. USE THIS PRODUCT CORRECTLY AND WITH CARE, FOR THE PURPOSE FOR WHICH IT IS INTENDED. FAILURE TO DO
SO MAY CAUSE DAMAGE AND/OR PERSONAL INJURY AND WILL INVALIDATE THE WARRANTY.
p
WARNING! Ensure Health and Safety, local authority and general workshop practice regulations are adhered to when
using tools and equipment.
7
DO NOT use the micrometer if damaged.
3
Maintain the micrometer in good and clean condition for best and safest performance.
3
Keep the work area clean, uncluttered and ensure there is adequate lighting.
3
Maintain correct balance and footing. Ensure the floor is not slippery and wear non-slip shoes.
3
Remove ill fitting clothing. Remove ties, watches, rings and other loose jewellery. Contain or tie back long hair.
7
DO NOT use the micrometer for any purpose other than for which it is designed.
7
DO NOT get micrometer wet or use in damp or wet locations, or areas where there is condensation. Keep micrometer clean
using a dry cotton cloth only.
7
DO NOT dip or submerge the micrometer in any type of liquid.
7
DO NOT expose micrometer to bright sunlight or dust.
7
DO NOT dis-assemble micrometer. The device must be checked by qualified service personnel only.
7
DO NOT apply any voltage to the micrometer i.e. with an electric marker pen.
3
The micrometer is a precision instrument, treat with care, avoid using force and do not subject to knocks or shocks.
3
Take particular care not to damage or scratch the scale surface.
3
Use micrometer in reasonably constant temperature conditions of approximately 20°C
3
When not in use, store micrometer in a safe, dry, childproof location.
3
Keep children and unauthorised persons away from the work area.
1.
SAFETY INSTRUCTIONS
2. INTRODUCTION & SPECIFICATION
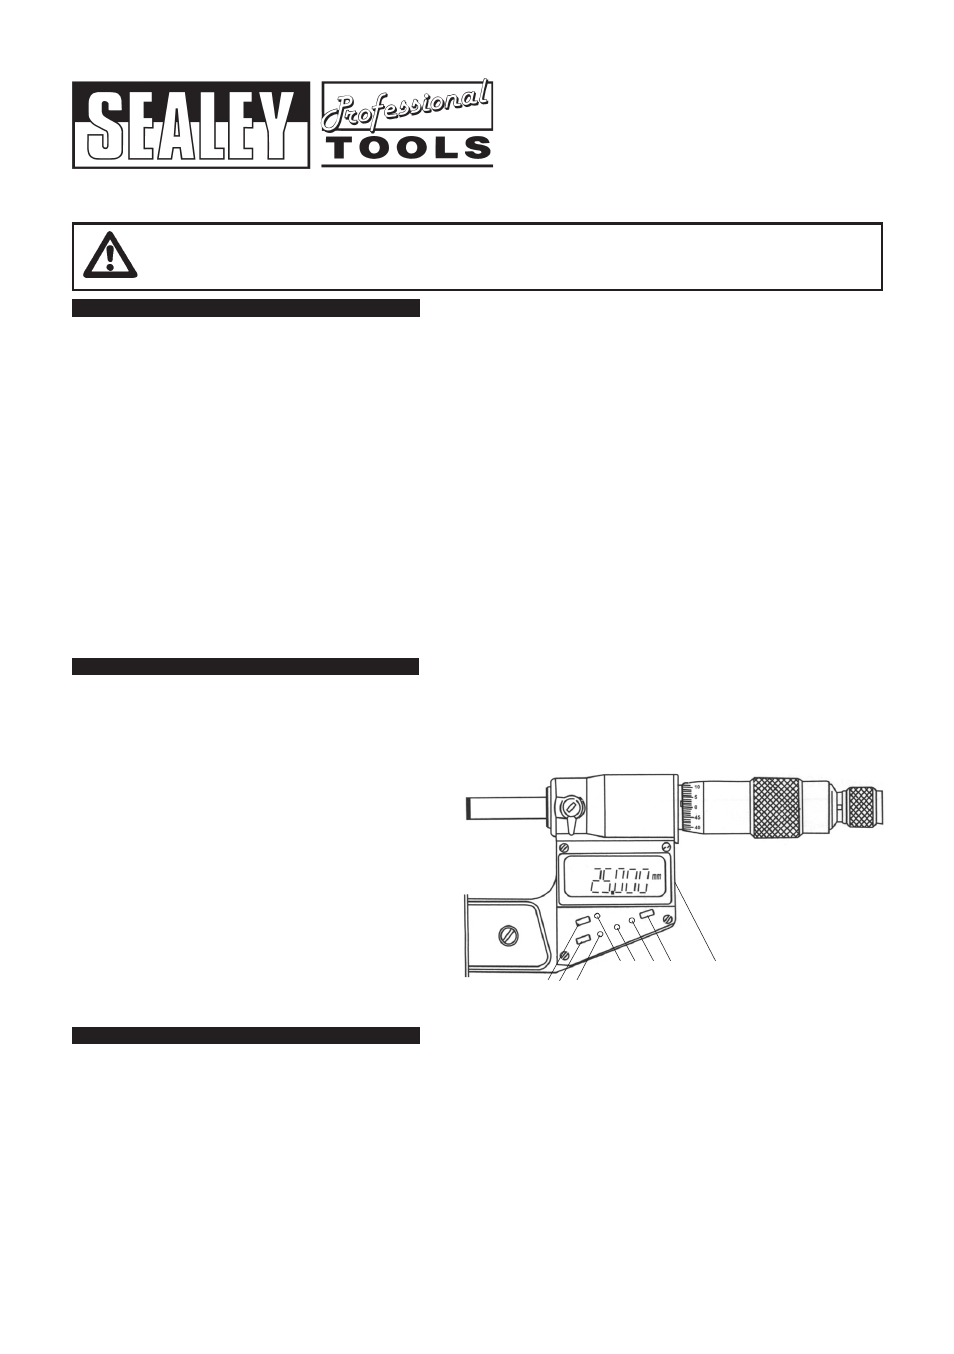
7 Button digital micrometer with satin chrome thimble and sleeve. Large, easy to read 9mm high LCD read-out. Display switches
automatically between Metric and Imperial units. Zero display in any position plus take relative readings and tolerance readings.
Auto power off switch. Includes serial port connection for computer interface. Supplied with adjustment wrench and storage case.
1................Metric/Imperial conversion
2................Data hold
3................Relative/absolute measuring
4................Tolerance setting
5................Positive setting
6................Negative setting
7................Reset
8................Data output (Serial port)
SPECIFICATION:
Range:
0 - 25mm
Graduation:
0.001mm/0.00005
Battery:
LR44 (1.5V)
Operating temp: 0 -- +40ºC
Storage temp:
-20ºC -- +70ºC
Power supply:
1 x silver-oxide button battery (LR44 1.55V)
p
WARNING! Ensure that you have read and understood Section 1 safety instructions before commencing.
3.1. Ensure all measuring surfaces are clean.
3.2.
Origin setting. Use this function to preset the origin value. (Value can be anything from 0-25mm and can be used for
calibration purposes).
3.2.1. Press (RESET) and (-) buttons together and hold until “SET” begins to flash on the LCD.
3.2.2. Press the (+) or (-) button to preset the origin value as required. Now press (RESET) to confirm the setting.
3.3.
Origin resetting. Use this function to calibrate the device using the preset origin value entered in step 3.2.
3.3.1. Ensure the measuring faces of the micrometer are in contact with the object being used to calibrate it and that the
measurement is precisely the distance required (i.e. identical to the preset origin value) and press (RESET).
3.4. To measure an object: open the micrometer by revolving the large barrel, place the object between the measuring surfaces
and close the micrometer using the smaller ratchet barrel (the ratchet is used to prevent over tightening which could other
wise result in inaccurate measurement, damage to the micrometer and damage to the object being measured). The reading
is taken from the LCD display.
3. OPERATION
1 2 3
6 7
8
FIG 1
4 5