Sealey VS600 User Manual
Vs600, Air conditioning leak detection kit, Fig. 1
1. INTRODUCTION
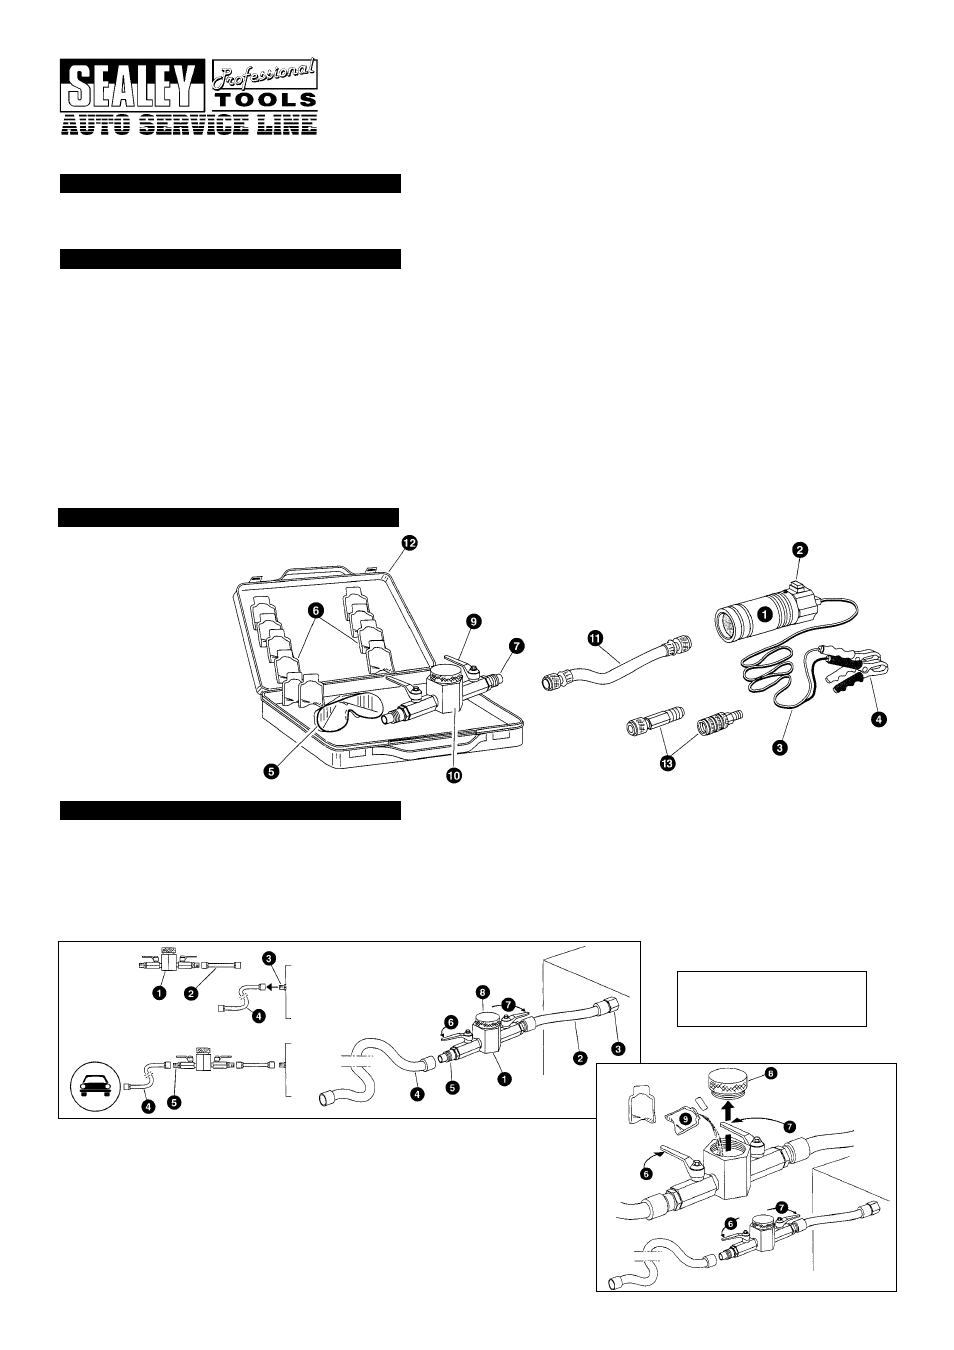
1. UV Lamp, 12V
2. Lamp Switch
3. Lamp Cable
4. Battery Clips
5. UV
Goggles
6. UV Dye, 10 Bottles
7. Injector
9. Valve
10. Reservoir
11. Hose
12. Case
13. Connectors
The kit consists of ten bottles of ultraviolet dye, fittings to enable the dye to be introduced into the air conditioning system, an ultraviolet lamp
to show up any leaks and UV protective goggles.
4.1.
Installation
The dye injector (fig. 1.1) is designed to be used with air conditioning coolant recovery/recycling equipment. Connectors provided allow
for permanent connection, see fig.1.
4.1.1. Evacuate the pipes on the recovery/recycling equipment and disconnect the low pressure hose (4).
4.1.2. Connect the kit hose supplied (2) to the low pressure connector (3).
4.1.3. Connect the injector (1) to the kit hose (2) and the low pressure hose (4) to the other injector valve (5).
4.1.4. Check that the injector valves (6 & 7) are open and the injector cover (8) is tightly closed.
p WARNING! Ensure that Health and Safety, local authority and general workshop practice regulations are adhered to when using tools.
7 DO NOT use tools if damaged.
3 Maintain tools in good and clean condition for best and safest performance.
3 Ensure that a vehicle which has been jacked up is adequately supported with axle stands.
3 Wear supplied eye protection. A full range of personal safety equipment is available from your Sealey dealer.
p WARNING! DO NOT look into the UV lamp, even if wearing the UV goggles, and DO NOT point the lamp at other people or animals.
3 Wear suitable clothing to avoid snagging. Do not wear jewellery and tie back long hair.
3 Account for all tools and parts being used and do not leave them on or near the engine.
3 On completion of work, place the equipment back in the carry-case and store in a cool, dry, childproof area.
3 Wear suitable protective clothing, gloves and eye protection when handling the dye (Leak Detection Fluid) which can cause irritation on contact
with skin and eyes. A safety data sheet covering the Leak Detection Fluid VS60012 & VS60033 is obtainable via your local Sealey dealer.
IMPORTANT: These instructions are provided as a guide only. Always refer to the vehicle manufacturers service instructions, or a proprietary manual,
to establish the current procedure and data.
2. SAFETY INSTRUCTIONS
3. CONTENTS
4. INSTRUCTIONS
fig. 1
VS600 - 2 - 110304
VS600
AIR CONDITIONING LEAK DETECTION KIT
4.2.
Dye Injection - A/C system under vacuum or low pressure (fig. 2)
4.2.1. Recover the remaining coolant and set the system under vacuum.
4.2.2. Close the two injector valves (6 & 7) and unscrew the cover (8).
4.2.3. Pour one bottle of dye (9) into the tank and then screw the cover back on, firmly.
4.2.4. Open the injector valve that is between the equipment and the car (6).
4.2.5. Start the recovery/recycling equipment loading function and immediately open the
second injector valve (7). The air conditioning system will be charged with
coolant and dye.
4.2.6. When the required system loading level is reached stop the recovery/recycling
equipment. Leave both injector valves open.
fig. 2
Ambient Range
Temperature . . . . . 10 to 45
O
C
Humidity . . . . . . . . . 20 to 90%