Installation, Installation (single unit) – Rose Electronics UltraMatrix AV VGA 8 User Manual
Page 7
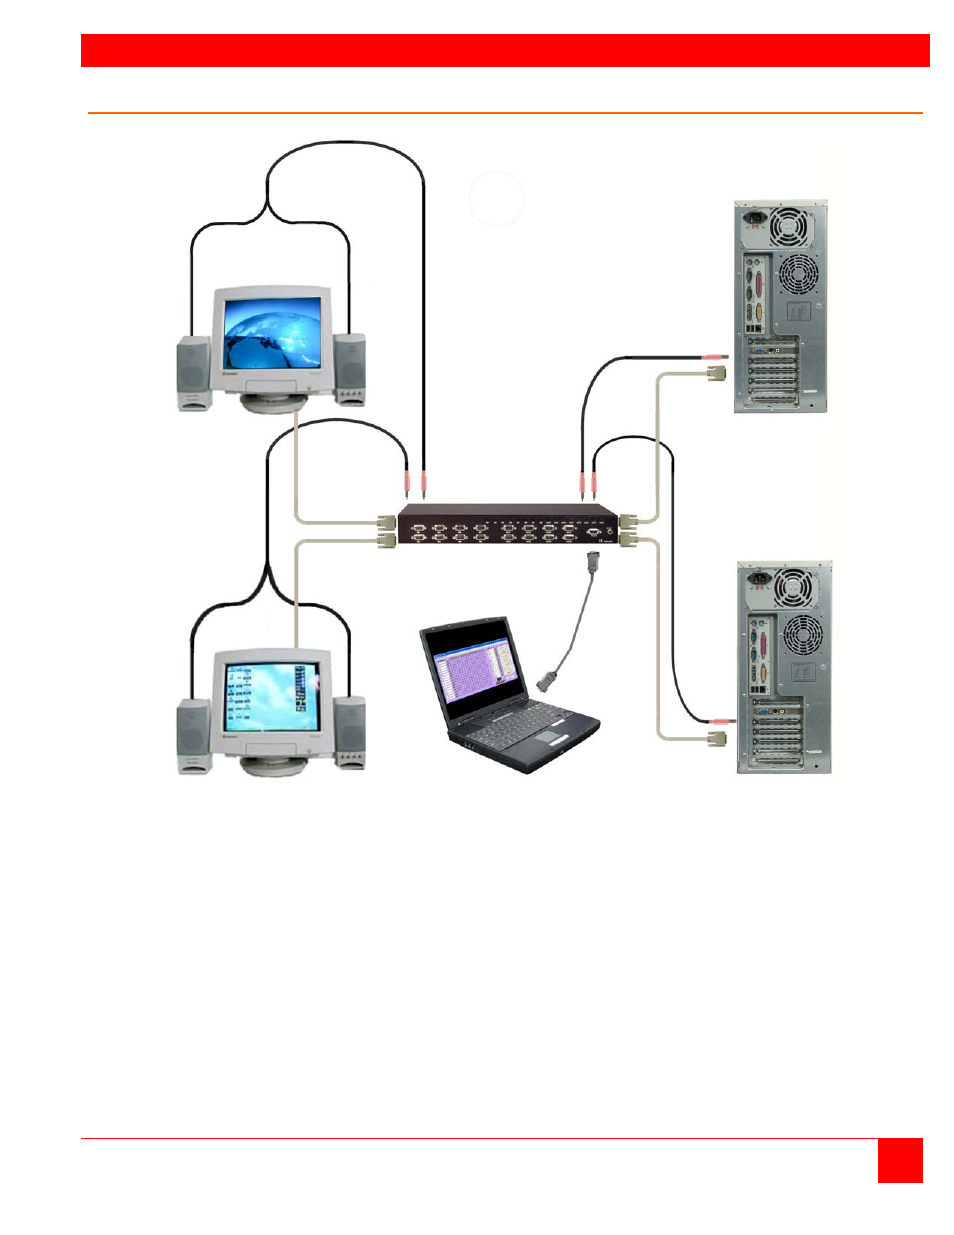
INSTALLATION
UltraMatrix AV Installation and Operations Manual
3
Installation (single unit)
Figure 1. Typical Installation
It is a good idea to pre-plan the installation of the UltraMatrix AV and the connected equipment. It is recommended that
each video input be labeled to keep track of the video source. Each video and audio input can be assigned a name for
ease of identification. The name assignment is performed during the RoseControl software installation.
Installation of the UltraMatrix AV consists of connecting each of the video and audio output sources to the video and
audio input ports on the UltraMatrix AV. All video and audio inputs are located on the right half of the rear panel and are
labeled video 1 – 8 and audio 1 – 8. Connect the video from the HD15F video output connector on computer #1 to the
HD15F video input connector #1 using an HD15M to HD15M cable. Connect the audio from the audio output connector
on computer #1 to the audio input connector #1 using a standard 3.5mm male to male stereo audio cable. Connect the
remaining video and audio sources to the corresponding video and audio inputs. Keep the video and audio together,
meaning computer #1’s video and audio should be connected to the UltraMatrix AV video #1 and audio #1 inputs.
When all connections have been made, power up the system. It is recommended that you first power on all monitors,
then the UltraMatrix AV unit, then boot each computer.
CPU #1
.
.
.
.
.
CPU #8
Monitor/
Speakers #1
.
.
.
.
.
Monitor/
Speakers #8
Control Computer
Serial
Cable to
RS-232 port