Subaru Robin EX13 User Manual
Page 32
- 29 -
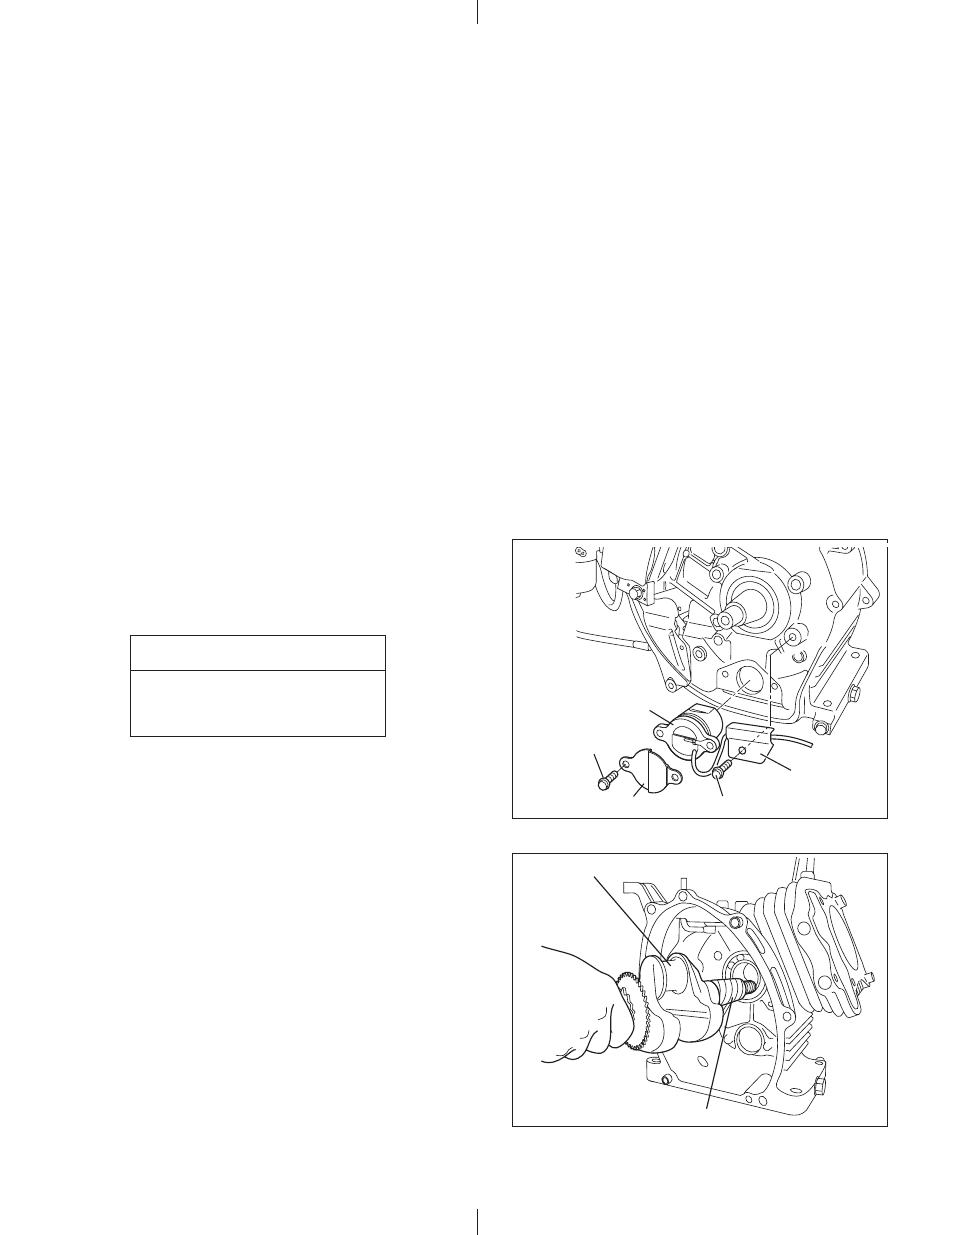
OIL SENSOR
SHIELD PLATE(OS)
M6 x 12 BOLT : 1pc.
M6 x 16
BOLT : 2pcs.
CLAMP
(1) OIL SENSOR
(a) Mount the oil sensor and fix the wire with the clamp.
(b) Mount the shield plate only for charge coil type.
(c) Mount the control unit. Fix the earth wire of the
control unit at the same time.
(See Fig. 5-49a on page 38).
Fig.5-29
Fig.5-30
5-4 REASSEMBLY PROCEDURE
5-4-1 NOTES ON REASSEMBLY
(1) Clean the each parts carefully, taking special care with the piston, cylinder, crankshaft, connecting rod and
bearings.
(2) Scrape off any carbon deposits on the cylinder head and the piston head. Be particularly careful when
removing carbon from the piston ring grooves.
(3) Inspect the oil seals for any damage to the lip. Replace them if damaged. Apply oil to the lip before reassembly.
(4) Replace all the gaskets with new ones.
(5) Replace the keys, pins, bolts and nuts with new ones, if necessary.
(6) Tighten nuts and bolts to the specified torque settings.
(7) When reassembling the engine, apply oil to all moving parts.
(8) Check clearances and end plays and adjust, if necessary.
(9) When mounting any major part during reassembly of the engine, rotate it with your hand to check for any
jamming or abnormal noise.
CRANKSHAFT
POLYVINYL TAPE
(2) CRANKSHAFT
(a) Wrap the key-way portion of the crankshaft with
polyvinyl tape and insert the crankshaft into the
crankcase, taking care not to damage the oil seal lip.
(b) Insert the woodruff key (for the flywheel magneto).
NOTE: Do not insert the woodruff key before inserting
the crankshaft into the crankcase.
5-4-2 ASSEMBLY STEPS AND PRECAUTIONS
Tightening torque
10.0 N m
(
100 kgf cm)
(7.2 ft lb.)