Whelen DBKT5 User Manual
Automotive: lightbars, Engineering company inc
Page 1
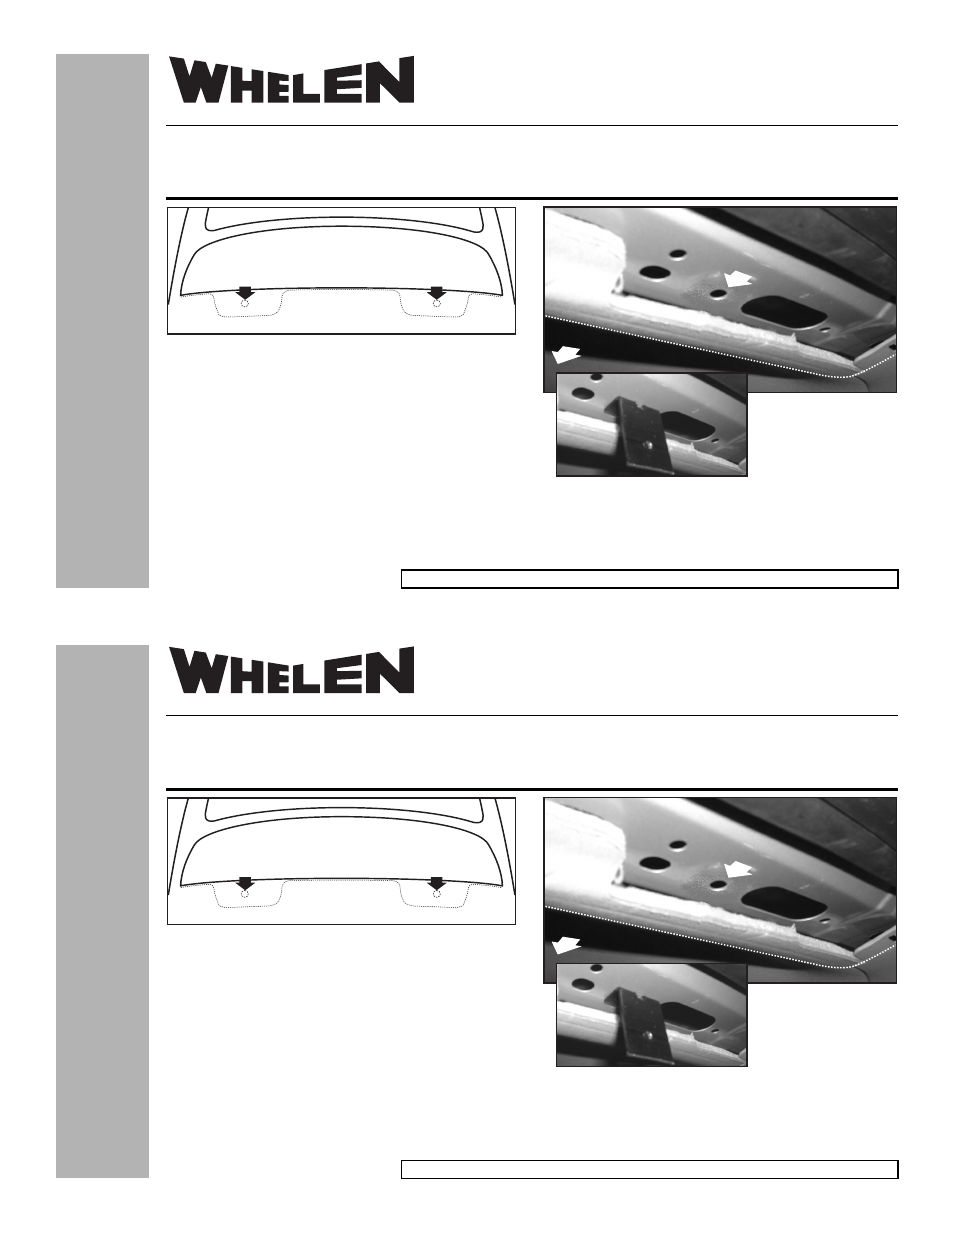
Fig. 2
Mount
h e r
e
REAR
WINDOW
Headliner
covers
this area
©2008 Whelen Engineering Company Inc.
Form No.14247 (120208)
Automotive:
Lightbars
Installation Guide:
Dominator™ Rear Window Bracket DBKT5
2008 Tahoe
®
ENGINEERING COMPANY INC.
Internet: www.whelen.com
Sales e-mail: [email protected]
Canadian Sales e-mail: [email protected]
Customer Service e-mail: [email protected]
For warranty information regarding this product, visit www.whelen.com/warranty
51 Winthrop Road,
Chester, Connecticut 06412-0684
Phone: (860) 526-9504
Fax: (860) 526-4078
Caution: Permanent mounting of this product will require drilling. It
is absolutely necessary to make sure that no other vehicle
components could be damaged by this process. Check both sides of
the mounting surface before starting.
1. Lower the rear section of the headliner and locate the 2 existing holes
in the vehicle roof shown in Figs. 1 & 2.
2. Enlarge these holes to a diameter of .391” using an appropriately
sized drill bit.
IMPORTANT NOTE! This installation uses Rivnuts™ to secure the
brackets to the vehicle. This type of hardware requires the use of a
specialized installation tool. Refer to the owners manual included
with this tool for proper installation techniques. Be sure to follow the
mounting hole specifications precisely!
3. Secure tighten the two brackets to the two Rivnuts using the supplied
metal screws and lock washers.
4. Replace the headliner
and make two small slits
in the headliner for the
brackets to go through.
5. Secure the lightbar to the
two brackets.
6. Extend the lightbar wires to your power source and connect the wires
as shown in the lightbar manual.
IMPORTANT! Before returning the vehicle to active service, visually
confirm the proper operation of this product, as well as all vehicle
components/equipment.
Fig. 1
TRUNK
Top view of vehicle shows approximate
of mounting holes
location
REAR DECK
ROOF
REAR
WINDOW