Whelen PROGRAM1 User Manual
Automotive
Page 1
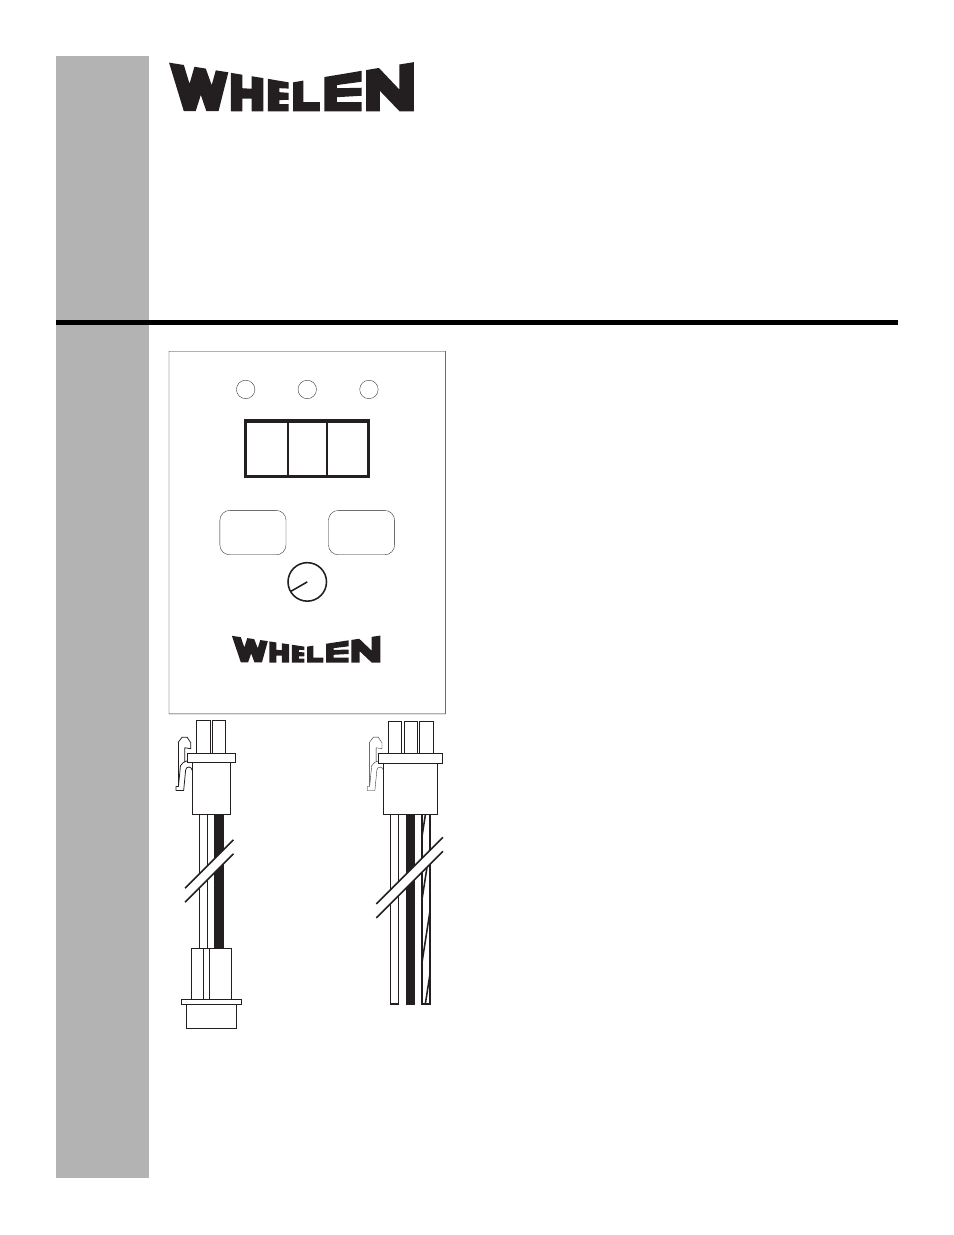
POWER
TEST
START
S/L
READY
®
888
RED.........
BLACK....
To +12VDC
To Ground
RED...........
BLACK......
WHT/VIO...
To (+) Lighthead Input
To (-) Lighthead Input
To ScanLock™ Input
®
ENGINEERING COMPANY INC.
51 Winthrop Road
Chester, Connecticut 06412-0684
Phone: (860) 526-9504
Fax: (860) 526-4078
Internet: www.whelen.com
Sales e-mail: [email protected]
Canadian Sales e-mail: [email protected]
Customer Service e-mail: [email protected]
Automotive:
Operational Guide:
LED Lighthead Pattern Programmer
©2010 Whelen Engineering Company Inc.
Form No.14373 (031810)
1. Connect the programmer to the lighthead using the
information in the wiring diagram shown. The ‘READY”
LED indicator will be lit when the programmer has been
properly connected to a +12VDC power source.
2. Rotate the knob until the number of the desired pattern
(found in the installation guide included with your
lighthead) is shown on the display.
3. Press the “START” button to begin programming the
lighthead to the selected pattern. During the
programming process the following will occur:
• The ready LED will go off.
• The programmer resets the lighthead to pattern #1
• The “POWER” LED will be lit to indicate that power is
being provided to the lighthead.
• The S/L (ScanLock) LED will flash to indicate that the
programmer is scanning through the patterns
• The display will count down the number of patterns
remaining until the selected pattern has been reached.
4. When programming process is complete, the lighthead
will display the new pattern for approx. 5 seconds. The
lighthead will then turn off, the POWER and S/L
indicators will turn off and the READY LED will be lit.
5. Press the “TEST” button to momentarily turn on the
lighthead and display its current pattern.