Main applications - breakers (energized), Breakers – Amprobe AT-7000 User Manual
Page 23
19
Step 1 -
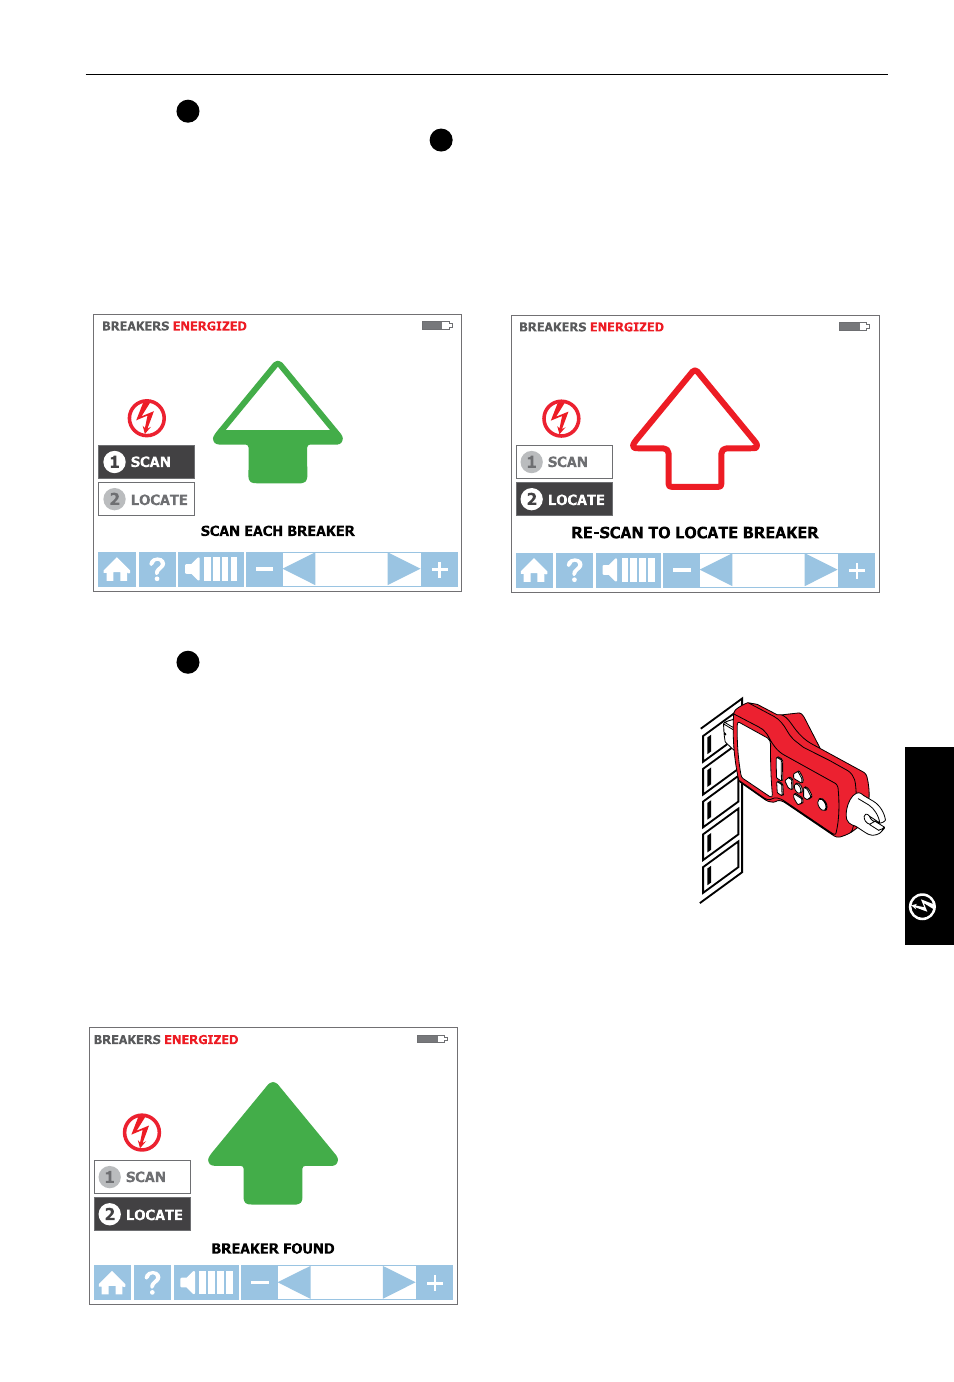
1
SCAN:
1. The unit will automatically start in
1
SCAN mode as shown in Figure 3.3b.
2. Scan each breaker for a half second by touching it with the Tip Sensor. Make sure the
groove on the Tip Sensor is parallel to the breaker lengthwise (See Figure 3.3d)
3. To assure sufficient time between the scans, wait for active green arrow and audible
alert (2-beeps) before moving to the next breaker.
4. Scan all breakers – the order of scanning does not matter. You can scan breakers
multiple times. The receiver is recording the highest detected signal.
Figure 3.3b
SCAN mode – receiver scanning breakers
Figure 3.3c
LOCATE mode – receiver checking breakers
Step 2 -
2
LOCATE
1. Select LOCATE mode by using the directional arrows to
highlight this operating mode and pressing the yellow
“ENTER” button. (See figure 3.3c)
2. Rescan each breaker by touching each with the Tip Sensor
for a half second. Active red arrow indicates scanning process
(see Figure 3.3c). Make sure the groove on the Tip Sensor is
parallel to the breaker lengthwise.(See Figure 3.3d)
3. Rescan all breakers until solid green arrow and audible alert
(continuous beep) indicates that the correct breaker was
found. (See figure 3.3e)
4. Press ENTER when complete to return to Home screen.
Usage Tip: The accuracy of breaker identification results can be verified by switching the
receiver to Energized TIP SENSOR mode and checking that that the signal level of the
breaker identified by the receiver is the highest among all breakers.
Figure 3.3e
LOCATE mode – receiver identified breaker
3. main aPPLications - breaKers (energized)
Figure 3.3d
BREAKERS